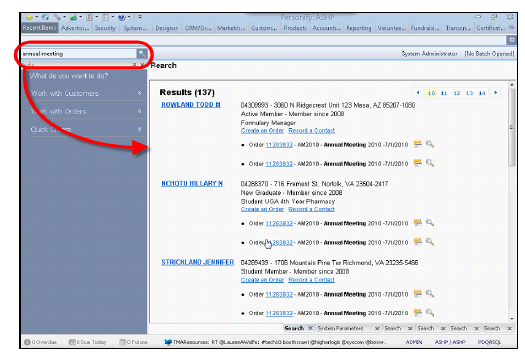
With the Personify 7.3.1 release, the Personify application includes a Unified Search capability that allows users to perform a free-text search across all customer and order records entered in the database. Users can enter any information desired, such as a customer’s first name or a specific order number, and the Unified Search retrieves all customer records or order entry records within the logged-in user’s Org Unit that contain the entered text. This text can appear as part of the customer name, customer address, order lines, purchased products, etc.
When a user enters text into the Unified Search field, the application uses a Google™ Search appliance connected to the Application Server to retrieve the search results and then displays the results on an ASPX page that opens in Personify.
If your organization is not hosted by TMA Resources, then in order to set up the Unified Search functionality, you need to complete the following:
· Installing the Google Search Applicance or Google Mini
· Configuring the Google applicance to Personify
· Defining the Crawl process your Application Server Settings
· Applying the Unified Search ASPX page’s URL to your Application Parameters
· Installing Windows Imaging Service (optional)
· Modifying the Unified Search Results Page
· Enabling Unified Search for a Security Group
 FOR HOSTED
CLIENTS: Please note that hosted clients do not need to install the Google
Search Appliance, define the Crawl process, or set up the Unified Search
webpage, as your Unified Search page is hosted with TMA Resources.
FOR HOSTED
CLIENTS: Please note that hosted clients do not need to install the Google
Search Appliance, define the Crawl process, or set up the Unified Search
webpage, as your Unified Search page is hosted with TMA Resources.
To set up Personify Unified
Search, perform the following:
1. Contact your Account Specialist and request the Personify Unified Search URL.
2. Enter the URL in the UNIFIED_SEARCH_URL Application System Parameter on APP008.
3. Enable
Unified Search for a Security Group.
(as discussed in Enabling
Unified Search)