Adding a Contact Tracking Record to a Constituent's Record in CRM360®
 If
you start adding a new contact tracking record, but navigate away before
saving it, when you try to again select any of CRM360’s tasks/links for
contact tracking, that record will come up and a warning message will
display on the bottom, right of the screen. This record will display no
matter how you try to access contact tracking – either a detail record
or the list. You must do something with this record before you will be
allowed to proceed. Either you can save the record, or if you wish to
remove it, you can select the refresh button and select "No"
when asked if you wish to save their changes. Please note that if you
have made other changes since you initiated the contact tracking, then
go ahead and save, then delete the contact tracking record if it is not
desired.
If
you start adding a new contact tracking record, but navigate away before
saving it, when you try to again select any of CRM360’s tasks/links for
contact tracking, that record will come up and a warning message will
display on the bottom, right of the screen. This record will display no
matter how you try to access contact tracking – either a detail record
or the list. You must do something with this record before you will be
allowed to proceed. Either you can save the record, or if you wish to
remove it, you can select the refresh button and select "No"
when asked if you wish to save their changes. Please note that if you
have made other changes since you initiated the contact tracking, then
go ahead and save, then delete the contact tracking record if it is not
desired.
To add a new contact tracking record in CRM360:
1. From
the Background Information task category in CRM360,
click Activity and Contact Tracking.
The list of activities and contact tracking records display below the header
in CRM360.
2. Click
New.
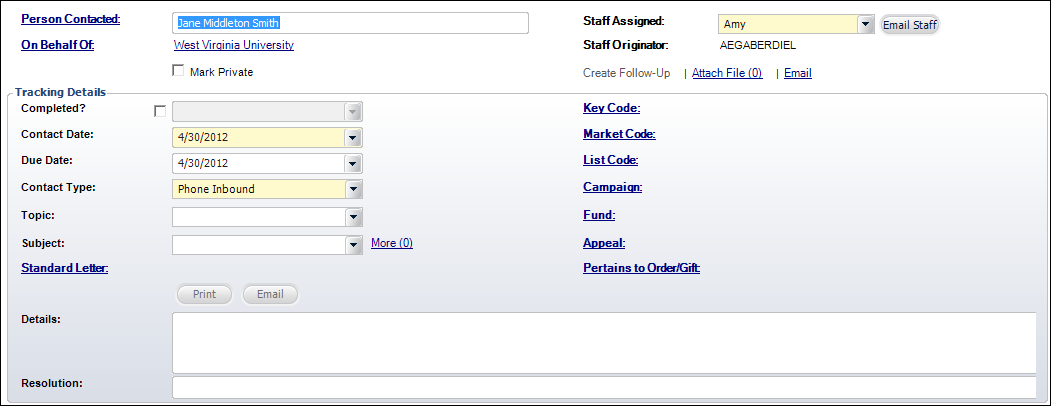
3. Please
note that the Contact Tracking for
field does NOT display in CRM360 detail page because the header already
identifies the "owner" of the record. This field will only display
when a contact tracking record is created from the Contact Tracking stand-alone
screen. For more information, please see Viewing
a Constituent's Contact Tracking Records in Contact Tracking. For
example, if you open CRM360 for Sam Jones, you may find a record where
he is the Person Contacted but the record actually belongs to a company
he has been working with. When you double-click to open it, the stand-alone
Contact Tracking screen opens because Sam does not “own” the record. Sam’s
information will be in the header, but the “Contact Tracking For” field
will indicate that the company was the reason for the record.
4. For
company records, the Person Contacted defaults to the "Main Contact",
if that relationship has been defined. Click this link to open the constituent
in a new CRM360 tab. You can select a different constituent, if necessary,
by clicking the Person Contacted
link. You can also right-click the linked constituent and select Clear to display a text box for
manual entry of a constituent that does not already exist in Personify.
If a main contact relationship does NOT exist for the company, either
click the Person Contacted link
to search for the appropriate constituent in Personify or manually enter
the person contacted if they do not already exist in Personify.
For example, if Sam Jones has a "Main Contact" relationship defined
with XYZ Company, his name will default as the Person Contacted on all
contact tracking records for XYZ Company. If a different employee of XYZ
Company was contacted, click the Person Contacted link to select a different
constituent.
For individual records, the Person Contacted defaults to the constituent
open in CRM360. If the Person Contacted is NOT the selected constituent,
either click the Person Contacted
link to search for the appropriate constituent in Personify or manually
enter the person contacted if they do not already exist in Personify.
For example, if the contact tracking record is for Sam Jones but his wife
called, enter the wife's name in the text box or click the Person Contacted
link to search for her record in Personify.
5. For
individual records only, the "On Behalf Of" field displays.
By default, this field will automatically populate with the constituent's
primary employer, if defined. If necessary, you can change this by clicking
the On Behalf Of link to search
for an existing constituent in Personify. To remove the On Behalf Of constituent,
right-click the link and select Clear.
6. By
default, the Staff Assigned automatically populates with the logged in
user. If necessary, select a different Staff
Assigned from the drop-down.
Only active users that are defined on the User
Maintenance screen will display in this drop-down.
If
a staff person has been assigned to a topic/subject combination, the Staff
Assigned will automatically change when that topic/subject is selected
on the contact tracking record. For more information, please see Assigning
Staff a Call Topic.
7. If
necessary, click Email Staff to
open a blank email to the selected Staff Assigned.
As a courtesy, we recommend that you click the "Email Staff"
button to give that person a heads up. Note that emails sent to staff
are not captured within the contact tracking record for future reference.
Depending on the parameter value for the ENABLE_OUTLOOK
parameter, the email will open in Outlook, the Personify Send
E-Mail (APP140) screen, or the Outlook Plug-In.
8. By
default, the Staff Originator automatically populates with the logged
in user and cannot be changed.
9. If
necessary, select the Mark Private checkbox.
If selected, this record will only display for the user who created the
record and admin users.
10. From
the Tracking Details section, select the following information when appropriate:
· Completed?: if this contact tracking record is complete
at the same time as creation, check this checkbox. The date field to the
right enables and today's date is selected by default. If necessary, change
the completion date. Contact tracking fields can be marked
as completed at a later time if necessary. If you select this checkbox
during record creation, the Due Date is removed.
· Contact Date: by default, this date is set to today.
Change this if necessary.
· Due Date: by
default, this date is set to today. Change this if necessary. This is
the date in which the contact tracking record should be complete. If this
date is set to a date in the future, the "Future" button will
enable in the bottom, left corner of the Personify application for the
Staff Assigned, as shown below.

If this date is set to today, the "Due Today" button will enable
in the bottom, left corner of the Personify application for the Staff
Assigned, as shown below.

If this is set to a date in the past, the "Overdue" button will
enable in the bottom, left corner of the Personify application for the
Staff Assigned, as shown below.

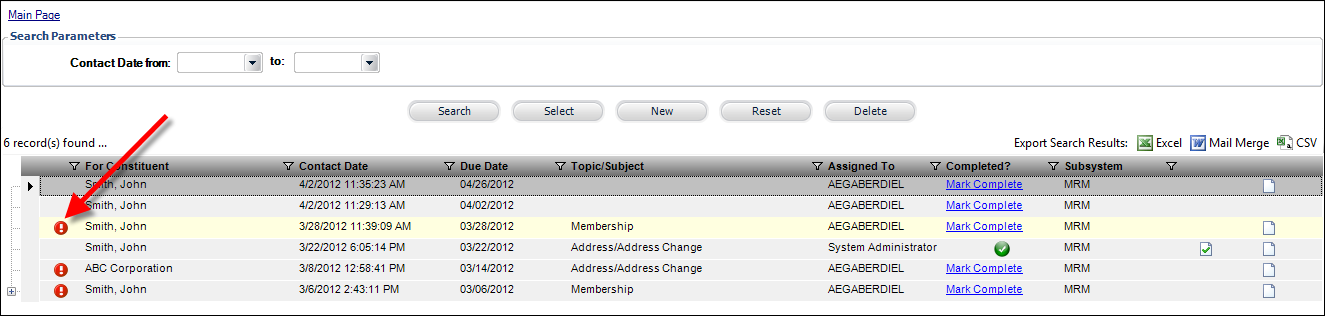
Additionally, the red overdue icon will
display to the left of the record in the list of all
activities and contact tracking records for the constituent in CRM360,
as shown below.
· Contact
Type: for example, "Phone Inbound"
or "Fax Outbound". Values are populated based on the non-fixed
MRM "CALL_TYPE"
system type. Please note that
the Contact Type selected here will display as the second column in the
Latest Interactions grid on the main page of CRM360.
· Topic: for
example, "Address" or "Order Status". Values are populated
based on the non-fixed MRM "CALL_TOPIC"
system type.
· Subject: for
example, if "Address" is selected as the Topic, the Subject
could be "Address Change" or "Address Validation".
Values are populated based on the subcodes defined for the non-fixed MRM
"CALL_TOPIC"
system type.
If you want to add more than one topic/subject to the contact tracking
record, click the More link
to open the More Topics and Subjects window, as shown below.
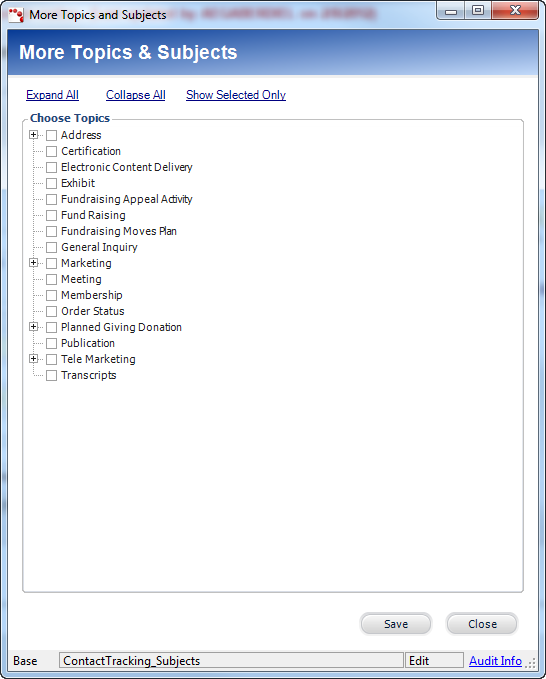
Check the checkbox next to the desired
subject(s) and click Save. When
a user accesses this contact tracking record in the future, the More link
displays the number topic/subject(s) selected on this screen. Additionally,
you can click the Show Selected Only link
to display only the topic/subjects that have been checked. This is beneficial
for users at organizations with an extensive list of topics/subjects so
they can see only selected topics/subjects.
If
a topic/subject is checked that has been assigned to a staff person on
the Staff Assignments (MRM000C)
screen, when you click Save,
the system will automatically create a follow-up record and assign it
to the appropriate assigned staff person. Also, keep in mind that the
Completed? checkbox will be disabled on the parent contact tracking record
until the record is saved. This is a precaution so a staff person does
not automatically mark child follow-up records as complete.
Additionally, because more than one staff member can be set up to auto-assign
for Topic and/or Subject, the system will look at the number of calls
assigned (displayed on MRM000C) and choose the user with the least number
of calls – to balance the load.
· Standard Letter: click this link
to open the Choose Standard Letter screen and search for a standard
letter to attach to the contact tracking record. The standard
letters displayed in the Choose Standard Letters screen search results
are specific to the organization/organization unit of the logged in
user.
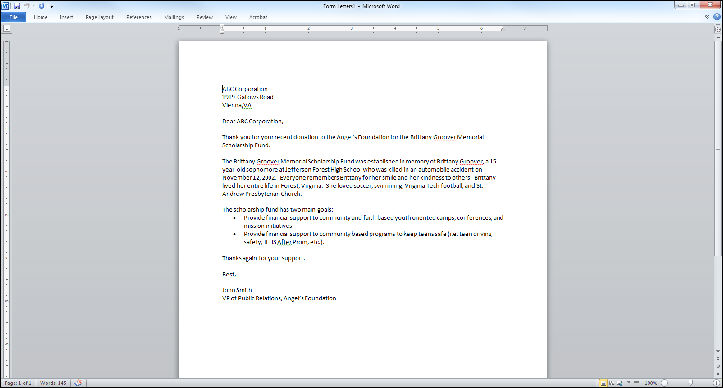
· Click Print to open the standard letter
in Microsoft Word, as shown below. If the standard letter contains
merged fields, those fields will automatically populate with the constituent's
information.
· Click Email to open the standard letter
in an email, as shown below. Depending on the parameter value for
the ENABLE_OUTLOOK parameter,
the email will open in Outlook or in the Personify Send
E-Mail (APP140) screen. For
individual records, the constituent's primary email address will populate
the To
field. For company records, the Contacted Person’s email address will
populate the To
field. If no person contacted is selected, the company's primary email
address will populate the To field.
Be
careful when generating a standard letter for an anonymous constituent
because it may contain merged fields that cannot be inserted unless a
constituent record exists. Use the Print button to preview the contents
before sending.
· Details:
enter the details of the correspondence
in this field.
· Resolution:
if the contact tracking record
is marked as complete, enter details about the resolution in this
field.
For example, if a constituent calls
to complain about slow shipping, the user can look up and see what
others did about the problem.
· Key Code: if a key
code is associated with the correspondence, select it here. This
code identifies the combination of the marketing piece (e.g., brochure,
mailing, etc.) and list code used to solicit the customer. If the
key code selected is associated with a market and/or list code, the
market code and/or list code will automatically populate. Right-click
the market code and/or key code and select Clear to
remove these if necessary.
· Market Code: if a market
code is associated with the correspondence, select it here.
This code identifies the source
of an order if it is based on a promotion created for a marketing
campaign.
· List Code: if a list
code is associated with the correspondence, select it here. This
code identifies the mailing list from which the customer was solicited.
· Campaign: if this correspondence is associated
with a particular campaign,
select it here.
· Fund: if
this correspondence is associated with a particular fund,
select it here.
· Appeal: if this correspondence is associated
with a particular appeal,
select it here.
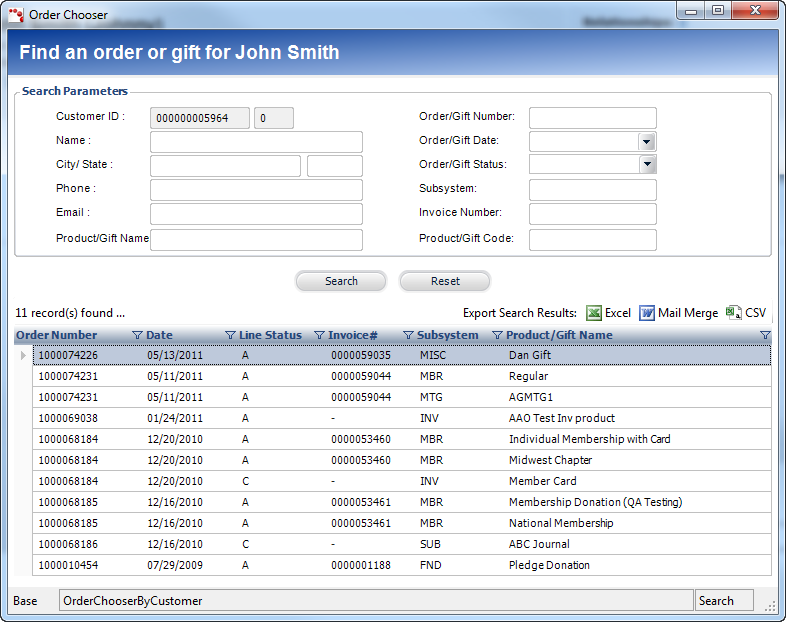
· Pertains to Order/Gift: if this correspondence is regarding a particular
order or gift, click this link to open the Order Chooser, as shown
below. The Order Chooser only displays orders and gifts in which the
selected constituent is the bill-to customer or line-level ship-to
customer. Please note that the Order/Gift Status in the search parameters
searches against the Order Master status. The Line Status in the search
results is the Order Detail status and may not match the Order master
status.
11. Click
the Create Follow-Up link to create
a follow-up record for this contact tracking record.
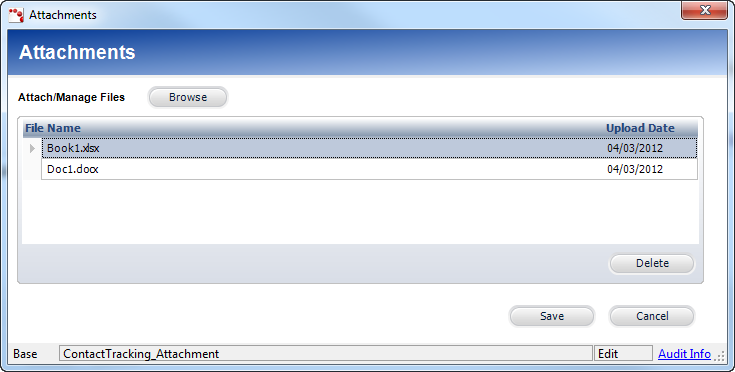
12. Click the Attach
File link to attach and view files to this contact tracking record.
The Attachment window displays, as shown below. Click Browse
to add a new attachment to this contact tracking record. The Attach File
link will display the number of attachments in parentheses. For example,
if a contact tracking record has two attachments, the link will display:
Attach File (2).
13. Click
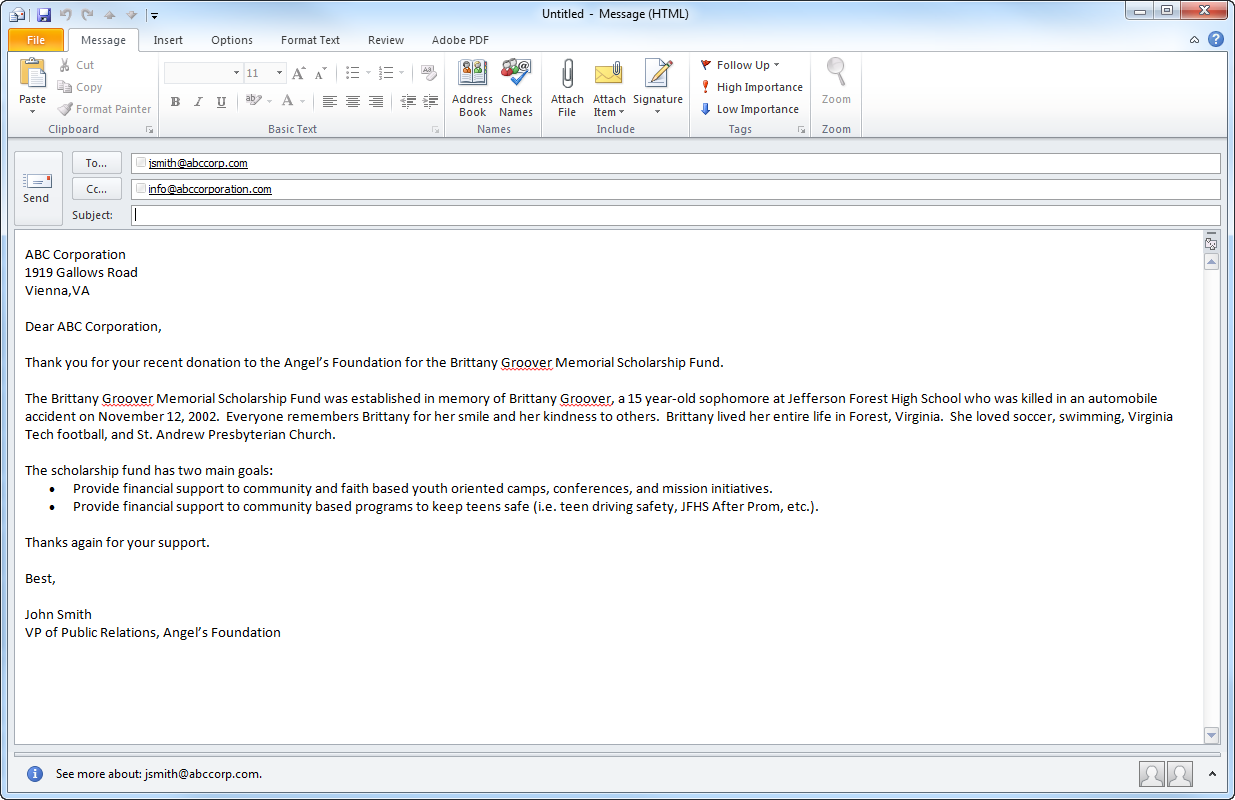
the Email link to open a blank email to this constituent.
The Person Contacted email address will default in the To field on the
email. If a Person Contacted constituent does not exist, the Contact Tracking
for email address will default into the To field on the email. The On
Behalf Of email address will default to the CC field. If the Staff Assigned
selected is different than the staff user creating the email, that Staff
Assigned email will default to the BCC field on the email.
Please note that if a standard letter has been attached to the contact
tracking record, the body of the standard letter will display in the email.
Depending on the parameter value for the ENABLE_OUTLOOK
parameter, the email will open in Outlook or in the Personify Send
E-Mail (APP140) screen.
If an email has already been sent from this contact tracking record, this
link will display "View Email" instead. Click this link to open
the saved email in your default email window. Personify only captures
one email per Contact Tracking item. If you want to reply or forward an
existing email or send a new email, it is recommended that you do so from
a follow-up
record.
14. Click
Save.
As of 7.4.0SP1, if the customer for which you created the contact tracking
record has a primary employer relationship, the Employer Master Customer
ID and Sub Customer ID is saved Cus_Activity table. Please note that there
is no process in which to keep this information current. The purpose of
this functionality is to capture the primary employer information at the
time of record creation.