Defining Organization Unit New GL Accounts
The GL definition applies to all financial companies within the organization,
and therefore, to all organization units as well. This screen changes
if account segments need to be defined.
 You
must have permissions to view the organization in order to view the GL
accounts on this screen. If you cannot view this screen, you can either
change the organization you are logged in to, log in as another user,
or contact your system administrator to change your permissions.
You
must have permissions to view the organization in order to view the GL
accounts on this screen. If you cannot view this screen, you can either
change the organization you are logged in to, log in as another user,
or contact your system administrator to change your permissions.
Please
refer to Uploading
GL Accounts within the Financial Company for more information
on uploading the GL accounts.
To add GL accounts:
1. Select
System Admin > Organization Structure
> Organization Unit Definition from the toolbar.
2. Search
for an organization unit and double-click it or highlight it and click
Select Org Unit.
The Organizational Unit Maintenance General Parameters screen displays.
3. From
the Default GL Accounts task category, click Define
New GL Accounts.
4. Search
for an organization or organization unit and select it.
The GL Accounts Maintenance screen displays, as shown below.
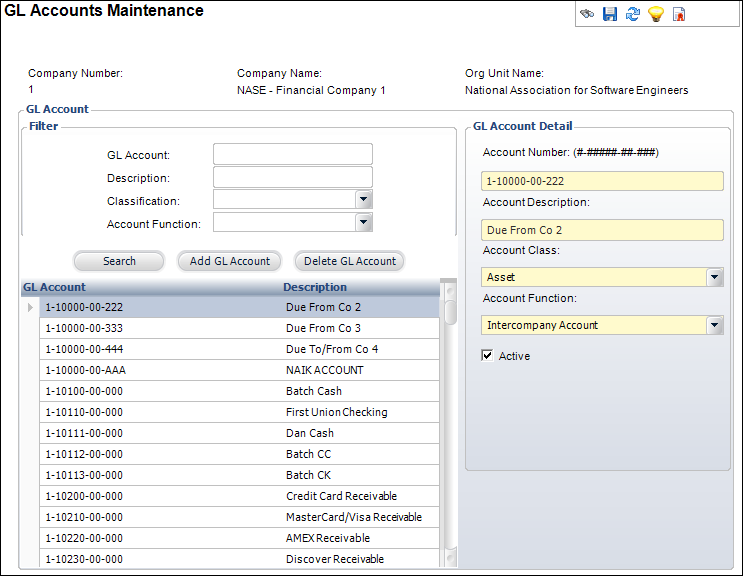
5. Click
Add GL Account.
The GL Account Detail fields are enabled.
6. In
the GL Account Detail section, enter the Account
Number.
The Account Number can only be entered in the following format: #-#####-##-###.
Personify does not support account numbers containing plus signs or dashes.
7. Enter
the Account Description.
8. Select
the Account Class from the drop-down.
9. Select
the Account Function from the
drop-down.
10. If
necessary, select the Active checkbox.
11. Click
Save.
Screen Element |
Description |
Filter |
GL
Account |
Text box. The
account number of the GL account for which you want to search. |
Description |
Text box. The
description of the GL account for which you want to search. |
Classification |
Drop-down.
The class of the GL account you want to search for. For example,
Asset or Liability. |
Account
Function |
Drop-down.
The function of the GL account. Used to identify the kind of account
referenced when setting up products and other account search functions.
This is set so users do not inadvertently use the incorrect account.
For example, Credit Balance or Accounts Receivable. |
Search |
Button. Click
this button to search for GL accounts based on the filter information
added. |
Add
GL Account |
Button. When
clicked, a row is added to the table and the corresponding fields
are enabled to add a GL account. |
GL Account
Detail |
Account
Number |
Text box. The
account number of the GL account. This must be unique within the
organization unit. It also must be the specified segment length
and use the segment separator. All accounts that are used throughout
the system are defined here. Account lookups use the accounts
defined here. |
Account
Description |
Text box. The
description of the GL account. |
Account
Class |
Drop-down.
This is used as a filter for account selection to enforce appropriate
use of accounts as per the functionality. For example, the lookup
for a Revenue account should use “Revenue” as a filter so that
no other type of accounts are made available for revenue account
selection. |
Account
Function |
Drop-down.
The function of the GL account. Used to identify the kind of account
referenced when setting up products and other account search functions.
For example, Credit Balance or Accounts Receivable. |
Active |
Checkbox. When
selected, indicates the account is active. Only active accounts
display in the lookup and can be used for product setup or in
transactions. |
Delete
GL Account |
Button. When
clicked, the highlighted row from the table is deleted.
You cannot delete an account
if it has transactions associated with it. |