 For more information on the INV610 batch process, see INV610
– Shipping Import Process.
For more information on the INV610 batch process, see INV610
– Shipping Import Process.
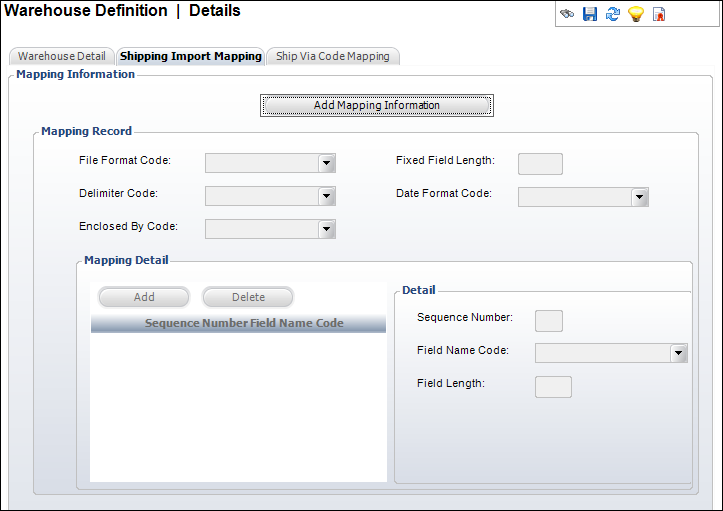
The Shipping Import Mapping tab provides you with the ability to define an input file structure for a given shipping vendor for the selected warehouse. If shipping files are imported from more than one vendor then each shipping import mapping must be created for each warehouse.
The Shipping Import Mapping information works in correlation with the INV610 Shipping Import batch process, which allows you to take a file from a shipping vendor and from that file, update order shipping information in Personify.
For more information on the INV610 batch process, see INV610
– Shipping Import Process.
To set up shipping import mapping:
1. On
the Warehouse Definition
screen, click the Shipping Import Mapping tab.
The Mapping Information screen displays, as shown below.
2. Click
Add Mapping Information.
The fields in the Mapping Record section become enabled.
3. Select
a File Format Code from the drop-down.
Values are populated based on the fixed APP
FILE_FORMAT system type code.
a. If you select Fixed, perform the following:
i. Enter the character length of the Fixed Field Length.
ii. If
necessary, select the Date Format Code
from the drop-down.
Values are populated based on the fixed INV
Date_Format system type.
b. If you select Delimited, perform the following:
i. Select
a Delimiter Code from the drop-down.
This is the punctuation type to be the delimiter in the mapping file. For
example, comma, pipe, tab, or tilda. Values are populated based on the
fixed
INV DELIMITER system type.
ii. Select
an Enclosed By Code from the drop-down.
This is the punctuation type by which to enclose the mapping records. For
example, comma or double-quotes. Values are populated based on the fixed
INV
ENCLOSED_BY system type.
iii. If
necessary, select the Date Format Code
from the drop-down.
Values are populated based on the fixed INV
Date_Format system type.
4. To add Mapping Detail information, perform the following:
a. From
the Mapping Detail section, click Add.
A new record is added to the grid below and the fields in the Detail section
become enabled.
b. b.
Enter a Sequence Number.
This indicates the order of the fields in the input file.
c. Select
the Field Name Code from the drop-down.
The values are populated based on the fixed INV
INV610 system type.
One record should exist in the Mapping Detail section for each Field Name
Code.
d. If you selected Fixed as the File Format Code above, then enter the Field Length.
e. Repeat
for each Field Name Code.
One record should exist for each Field Name Code. Tracking Number is the
only optional Field Name Code.
5. Click Save.