Configuring the Web Settings for the Membership Login Control
This control needs to be dropped on the same page where you dropped
the Membership Join Registration control.
The section below details how to set up the control on your website.
The instructions are intended for a user with web admin/host privileges.
To configure the web settings for the Membership Login
control:
1. Navigate
to the page where you dropped the Membership
Join Registration control. Copy the URL of that page.
 When
you log into the site as a host, the listing page will no longer display
products. Therefore, you will not be able to navigate to a detail page
from there. Copying the URL ensures that you can get to the detail page
while logged in as a host.
When
you log into the site as a host, the listing page will no longer display
products. Therefore, you will not be able to navigate to a detail page
from there. Copying the URL ensures that you can get to the detail page
while logged in as a host.
2. Log
into your e-Business site as host.
3. Paste
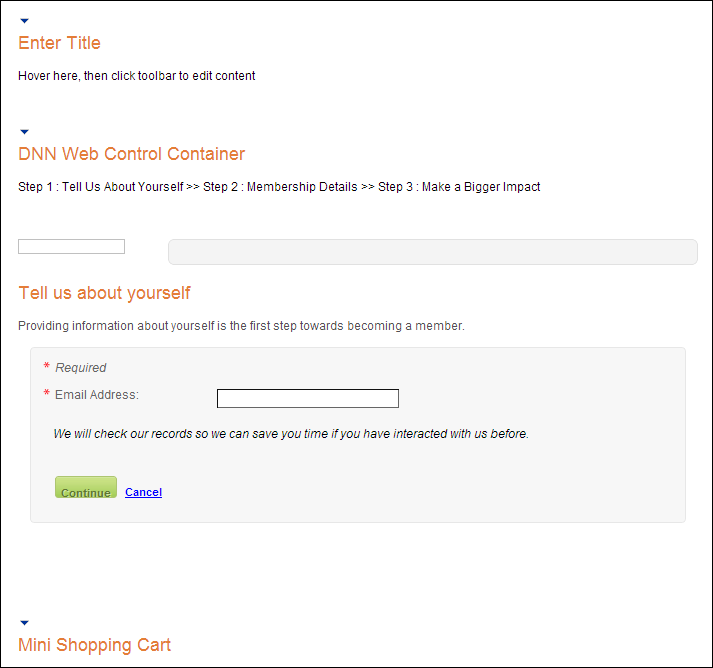
the URL to open the page in host mode. The page opens as shown below.
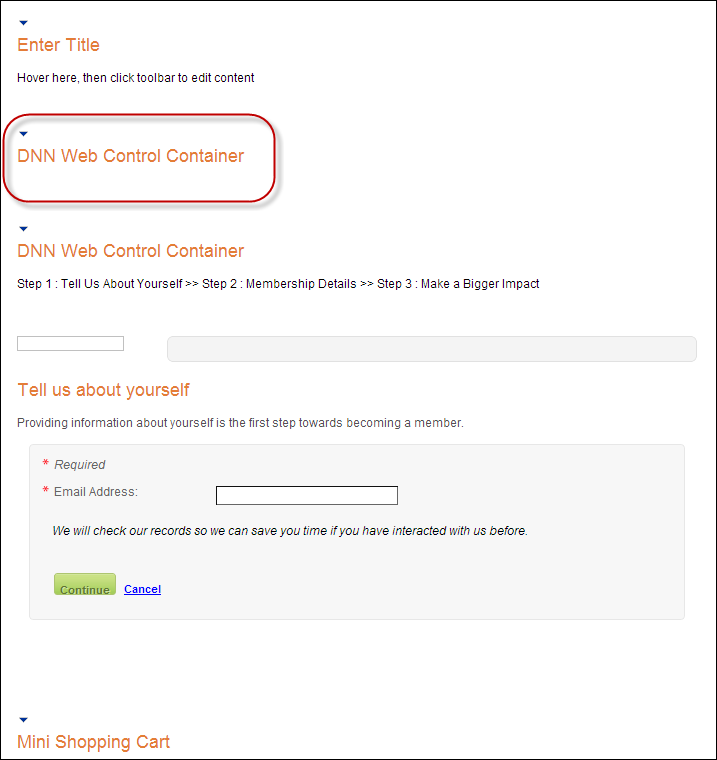
4. Add
the Personify- DNN Web Control Container module to the page, as
highlighted below.
See Installing .NET Controls for
more information.
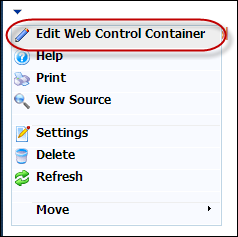
5. Select
the Edit Web Control Container option from the downward arrow icon,
as highlighted below.
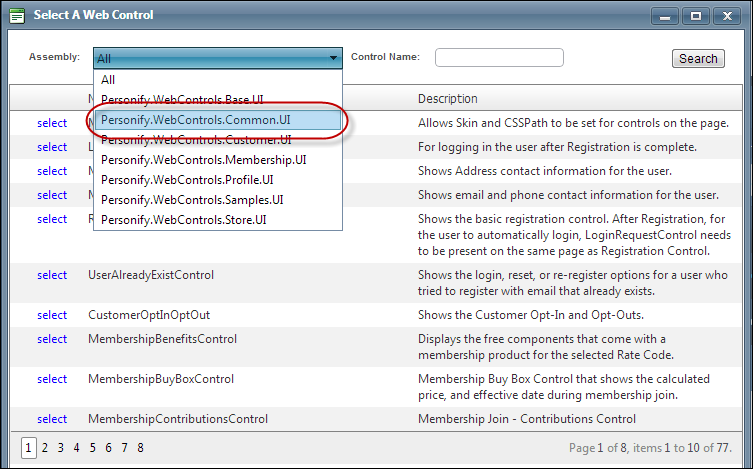
The Select A Web Control window displays.
6. From
the Assembly drop-down, select
"Personify.WebControls.Common.UI",
as highlighted below.
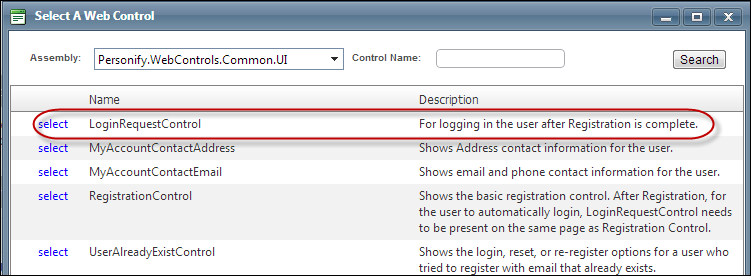
7. In
the Control Name field, enter "LoginRequestControl" and
click Search.
8. Click
the select next to the "LoginRequestControl", as highlighted
below.
The Control Settings for this control display, as highlighted below.
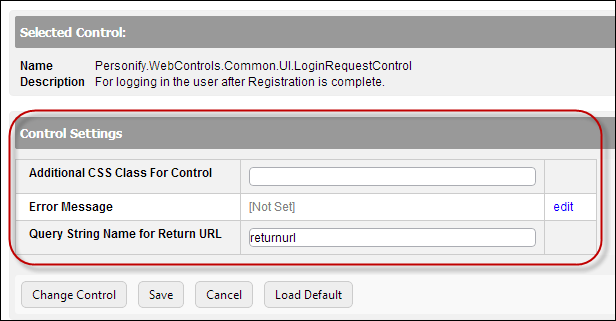
Text
fields have a 250 character limit.
9. Optional:
in the Additional CSS Class for Control
field, enter the CSS class.
This option allows you to add additional layout to the skin by developing
a new DOTNETNUKE style, which requires an advanced understanding of HTML
and CSS. See Using Skins for more information.
10. Optional:
if necessary, select or create a new Error Message.
The error message will display on the control for the action that was being
performed at the time of the error.
a. If
left blank and the default "PersonifyErrorMessage" does not
return a result, the default error message, "An error occurred while
performing [Insert Action]. If the problem persists, please contact the
site administrator", will display.
b. If
you wish to change the default error message, customize it with a PWF
parameter. See Setting up
PWF Parameters for more information.
11. In
the Query String Name for Return URL textbox, enter "returnURL".
This is the default name of the parameter. However, if the environment's
redirection logic uses a different direct Query String name, enter it
here.
12. Click Save.