You must create a new page before you can configure the Affiliate Segment
List page. You can give the title page a unique name. For example, we
titled our homepage “Affiliate Management Home”.
You must create a new page before you can configure the Affiliate Segment
List page. You can give the title page a unique name. For example, we
titled our homepage “Affiliate Management Home”.
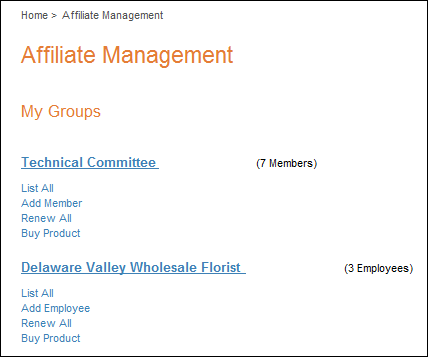
The Personify Affiliate Segment List Web Module, offered in Personify 7.2.1 and above, provides you with the ability to create a page that displays only the affiliate segments a user controls when the associated user is logged into the site.
This page also serves as the Affiliate Management homepage from which point the user can purchase products on behalf of Affiliate Members or manage the segment group depending on the rights assigned to the user through the Organization Segmentation (ORG002) screen in the Personify back-office.
To create the configure the affiliate segment list page:
You must create a new page before you can configure the Affiliate Segment
List page. You can give the title page a unique name. For example, we
titled our homepage “Affiliate Management Home”.
1. After creating your Affiliate Management Homepage, install the Personify – Affiliate Segment List Web Module to the Content Pane of the page.
2. Select
the Edit Affiliate Segment List Settings option from the downward
icon, as shown below.
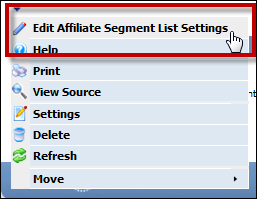
This displays the Personify – Affiliate Segment List settings, as shown
below.
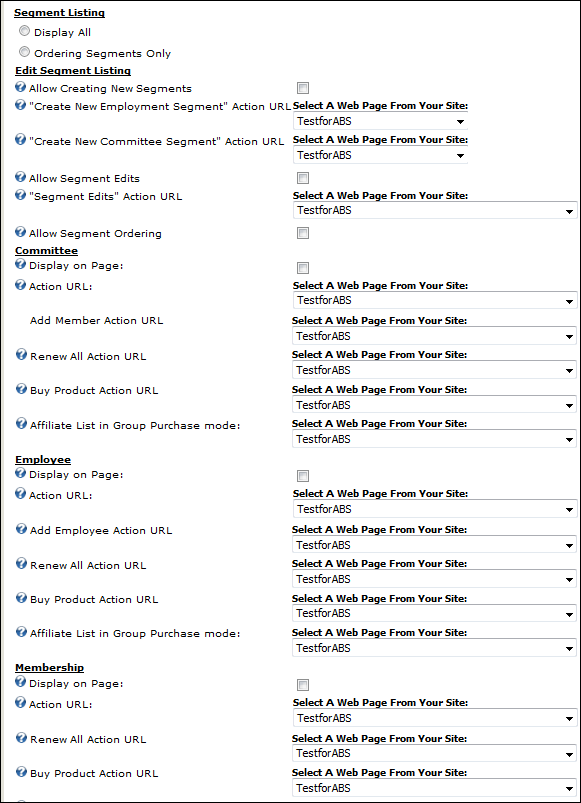
The sections below lists the various settings for the Affiliate Segment List Web Module and the impact each setting has on the customer experience. The Segment Listing section of the settings page displays two radio buttons that determine which segments the customer can see on this page.
Customers
will never be able to view any segments they are not granted rights to
control from the Organization Segmentation (ORG002) screen in Personify.
To create the page display setting:
1. Select the radio button that you want to be displayed on the screen:
a. Display All– all segments the customer
has rights to control display on the page, as shown below.
b. Ordering Segments Only – only
segments the customer has right to control AND are available for the customer
to purchase products for display on the page, as shown below.
2. Click Save.
1. From the homepage, select Edit Segment Listing.
2. Choose which actions you want your customer to perform based on the configurations described below.
· Allow Creating New Segments – checkbox. When checked, this allows the user to create a new segment (employment or committee) if a system administrator has already provided the user rights to this action by way of ORG002 in Personify. An “Add Segments” button displays on the screen when you activate this feature. Please refer to “Affiliate Management Workflows” for more information on enabling this button.
· “Create New Employment Segment” Action
URL – drop-down. Only needed if you enabled the Allow Creating
New Segments checkbox. The page you select determines what page the user
is directed to. For example, if they click the Create New Employment Segment
button after clicking the Add Segment button.
Please refer to Affiliate
Management Workflows for more information on enabling this button.
· “Create New Committee Segment” Action URL –
drop-down. Only needed if you enabled the Allow Creating New Segments
checkbox. The page you select determines what page the user is directed
to. For example, if they click the Create New Committee Segment button
after clicking the Add Segment button.
Please refer to Affiliate
Management Workflows for more information on enabling this button.
· checkbox.
When checked, the segment name displays as a hyperlink, and, when checked
by the user, allows the user to edit the segment's contact information
if a system administrator has already provided the user rights to this
action in the back office.
Please refer to Defining Customer
Segmentation for more information.
· “Segment Edits” Action URL – drop-down. Only needed if you enabled the Allow Segment Edits checkbox. The page you select determines what page the user is directed to. For example, if they click the segment name in order to edit the segment’s contact or demographic information. You should direct them to a page that has the Customer Address, Customer Communication, and Alter Customer modules installed.
· Allow Segment Ordering – checkbox. When checked, a Buy Product link displays under each segment which allows the user to purchase products specifically for the segment. For the link to work, you must configure the Affiliate Management Buy Product workflow as discussed in Configure the Buy Product Workflow.
The sections for Committee, Employee, Membership, Miscellaneous, and Geographic list the same settings (with exception to Committee and Employee, as discussed below). These settings deal with displaying each type of segment and the action that occurs when a user clicks on any of the links under each segment.
· Display on Page – checkbox. When checked, this ensures that any segments of that specific type (committee, employee, etc.) in which the user has control over will display on the screen when the user is logged in.
This
option is provided so that associations may create multiple segment list
pages if they want a separate page for each type of segment type.
· Action URL – drop-down. Only available when you set the Segment Listing Mode to Display All. The page you select determines which page the user is directed to when he/she clicks the List All link next to the segment. Make sure to select the page that includes the Personify – Affiliate List module for that specific segment type. For example, you may have created a page entitled Employee Affiliate List which uses the Affiliate List module.
· Add Member/Employee Action URL –
drop-down. Only available when you set the Segment Listing Mode to Display
All. This setting refers to the page to which the user is redirected when
the user clicks the Add Member button for the associated segment.
Please refer to Configure
the New Committee Member Workflow for more information.
· Renew All Action URL – drop-down.
This setting refers to the page to which the user is redirected when he/she
clicks the Renew All button. This setting should point to the page where
you installed the Personify – Renewable Products module.
Please refer to “Configure the Renewable Products Workflow” for more
information.
· Buy Product Action URL – drop-down.
This setting refers to the tab to which the user is redirected when the
“Buy Product” button is clicked.
Please refer to Configure
the Buy Product Workflow for more information.
· Affiliate List in Group Purchase Mode – drop-down. This setting refers to the Committee Affiliate list tab (set in “Group Purchase” mode). User will be redirected in the Buy Product workflow. .
Please
refer to Configure
the Buy Product Workflow for more information.
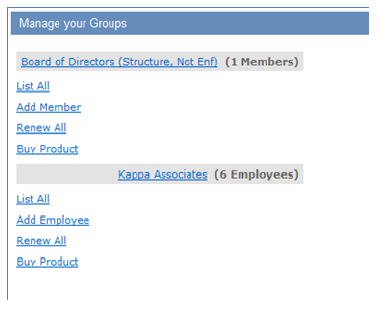
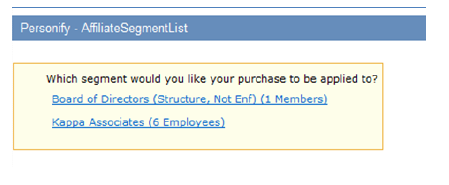
After setting up the Segment List Web Module, your customers will see
the module as displayed below.