Displays all system activities in which the MASTER_CUSTOMER_ID of the CUS_Activity record matches that of the customer you are viewing.
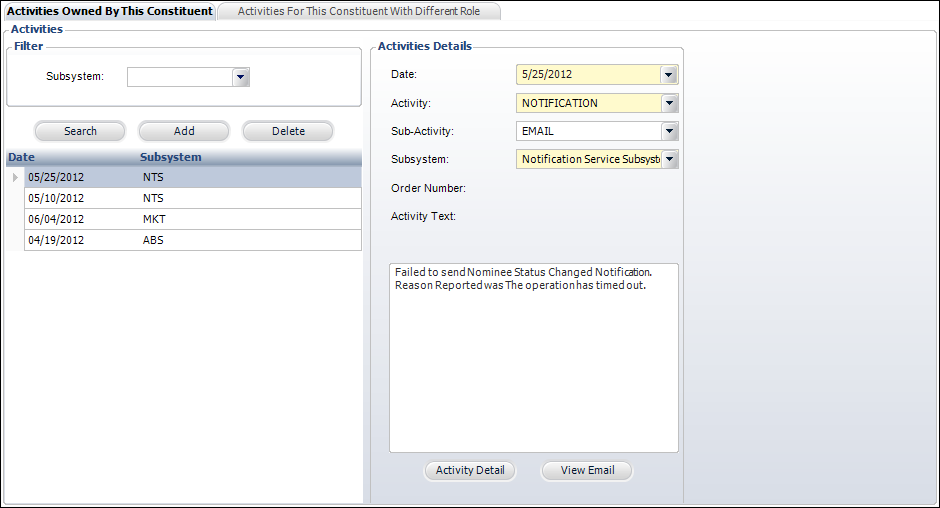
The Activities screen enables you to manage and record activities. Customer activities include system-generated entries (such as sending an email, purchasing a product, and renewing a membership) and user-defined entries (such as making a phone call, writing a letter, and sending a thank you note).
As of 7.4.1SP1, the checkbox filters on this screen have been replaced by two tabs:
· Activities Owned By This Constituent
Displays all system activities in which the MASTER_CUSTOMER_ID of the CUS_Activity
record matches that of the customer you are viewing.
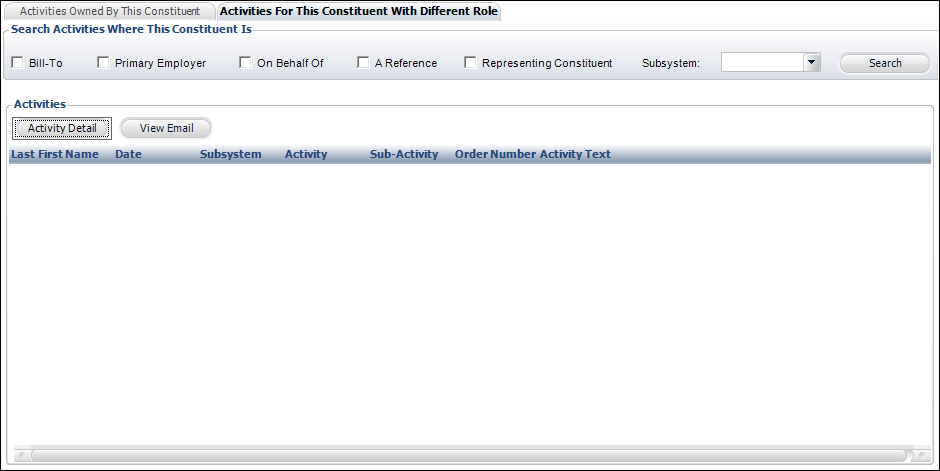
· Activities For This Constituent With Different
Role.
Displays a list of system activities in which the BILL_MASTER_CUSTOMER_ID,
EMPLOYER_MAST_CUST, ON_BEHALF_MAST_CUST, REFERENCE_MAST_CUST, REPRESENTING_MAST_CUST,
or SUBSYSTEM of the CUS_ACTIVITY record matches that of the MASTER_CUSTOMER_ID
of the customer you are viewing.
To add an activity:
1. From
the Demographics task category on the Customer Central screen or the Subgroups
as Customers task category on the Subgroup Central screen, click Activities.
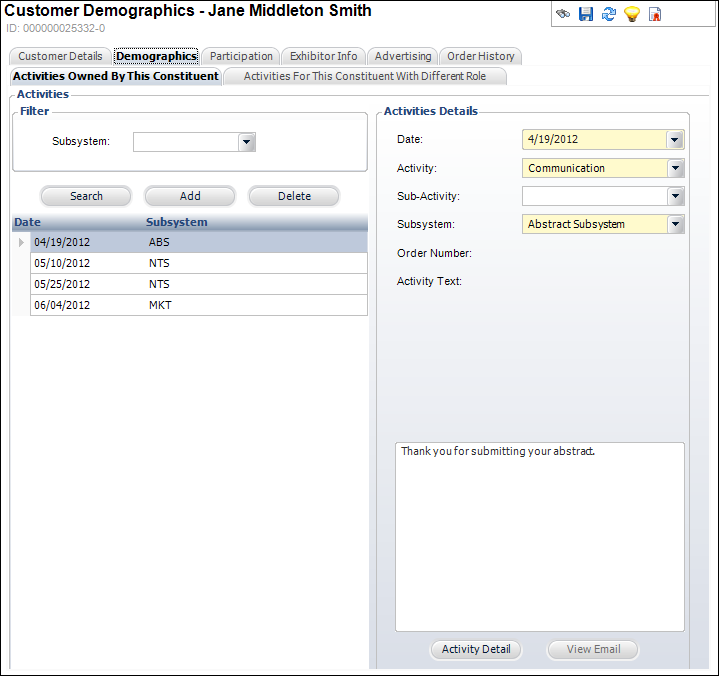
The Activities screen displays, as shown below.
2. Click Add.
3. Select the Date the activity occurred from the drop-down.
4. Select the Activity from the drop-down.
5. If necessary, select the Sub-Activity from the drop-down, which is a user-definable subcode that further defines the activity.
6. Select the Subsystem from which the activity was generated from the drop-down.
7. Enter information in the Activities Text section.
8. Click Save.
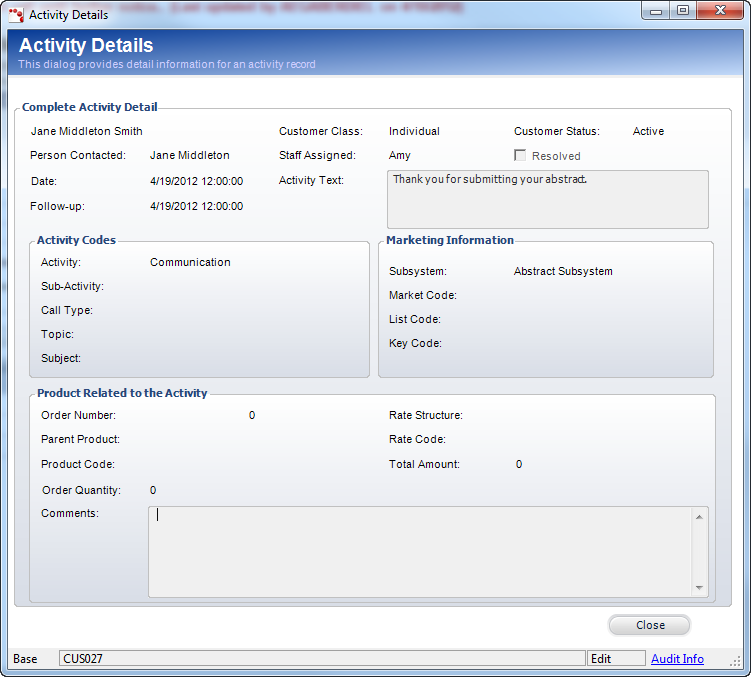
9. Click
Activity Detail to view more information on the activity, such
as activity codes, marketing information, and products related to the
activity, as shown below.
10. If the activity created was an email communication, click View Email to open the associated email. If you have integrated Personify with Outlook, the email will open in Outlook. If not, the email will open the Send E-Mail (APP140) screen.
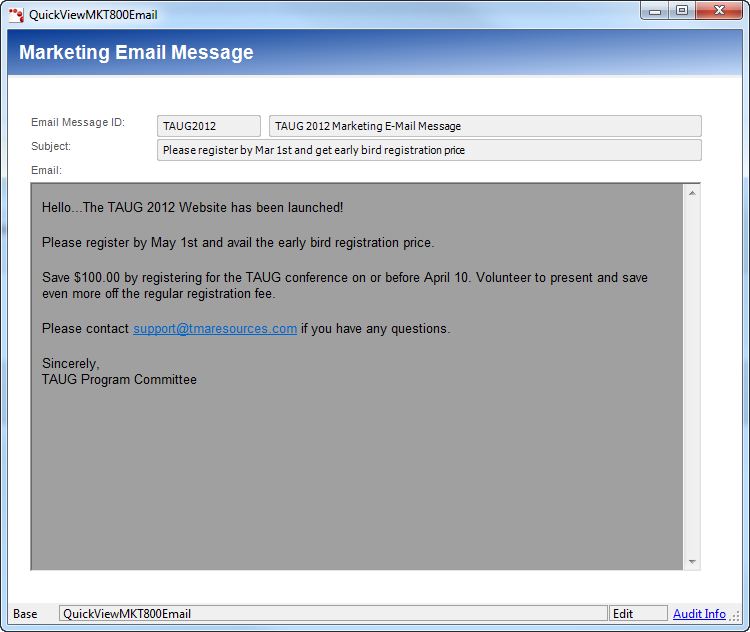
 As
of 7.4.1SP1, if the system activity is an email sent via MKT800,
the Marketing Email Message window displays, as shown below. This window
displays the email template used when the blast email was sent. Please
note that if any columns were used in the email template, the customer
data will NOT display in this window, as only the template is being displayed,
not the actual email sent to the customer. Keep in mind that this window
will always display the latest version of the email message template.
Therefore, it is recommended that you do not update email message templates;
instead, create a new email message template. For more information, please
see Defining
Email Marketing Messages.
As
of 7.4.1SP1, if the system activity is an email sent via MKT800,
the Marketing Email Message window displays, as shown below. This window
displays the email template used when the blast email was sent. Please
note that if any columns were used in the email template, the customer
data will NOT display in this window, as only the template is being displayed,
not the actual email sent to the customer. Keep in mind that this window
will always display the latest version of the email message template.
Therefore, it is recommended that you do not update email message templates;
instead, create a new email message template. For more information, please
see Defining
Email Marketing Messages.