After you have created a call for participation/papers, the first step in creating a submission type is defining the submission type details.
To define submission type details:
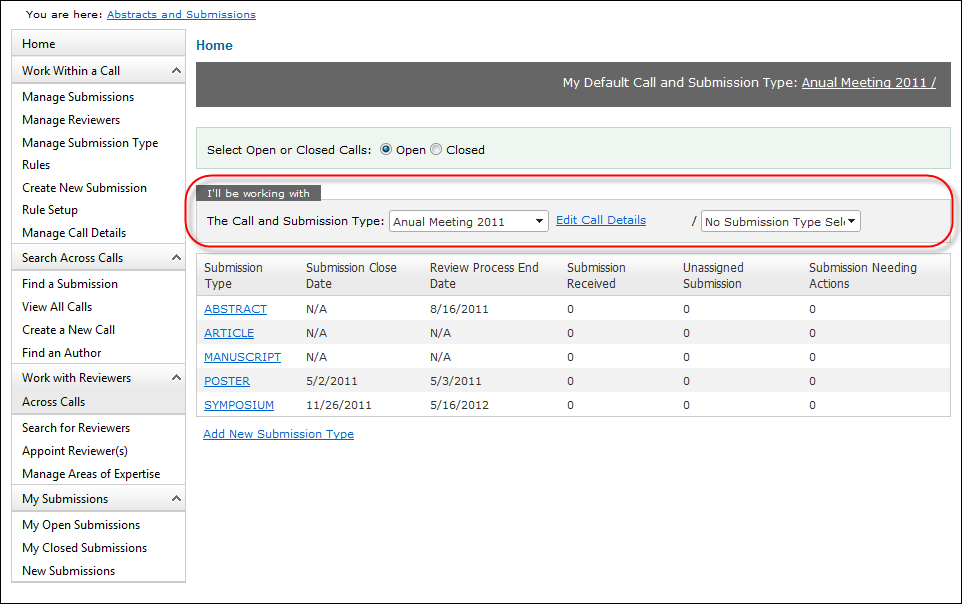
1. From
the ABS Home page, create
a new call for participation/papers or select the appropriate call
from the "I'll be working with" section, as highlighted below.
2. Click
Add New Submission Type.
Alternatively, click Create New Submission
Rule Setup from the Work Within a Call task category.
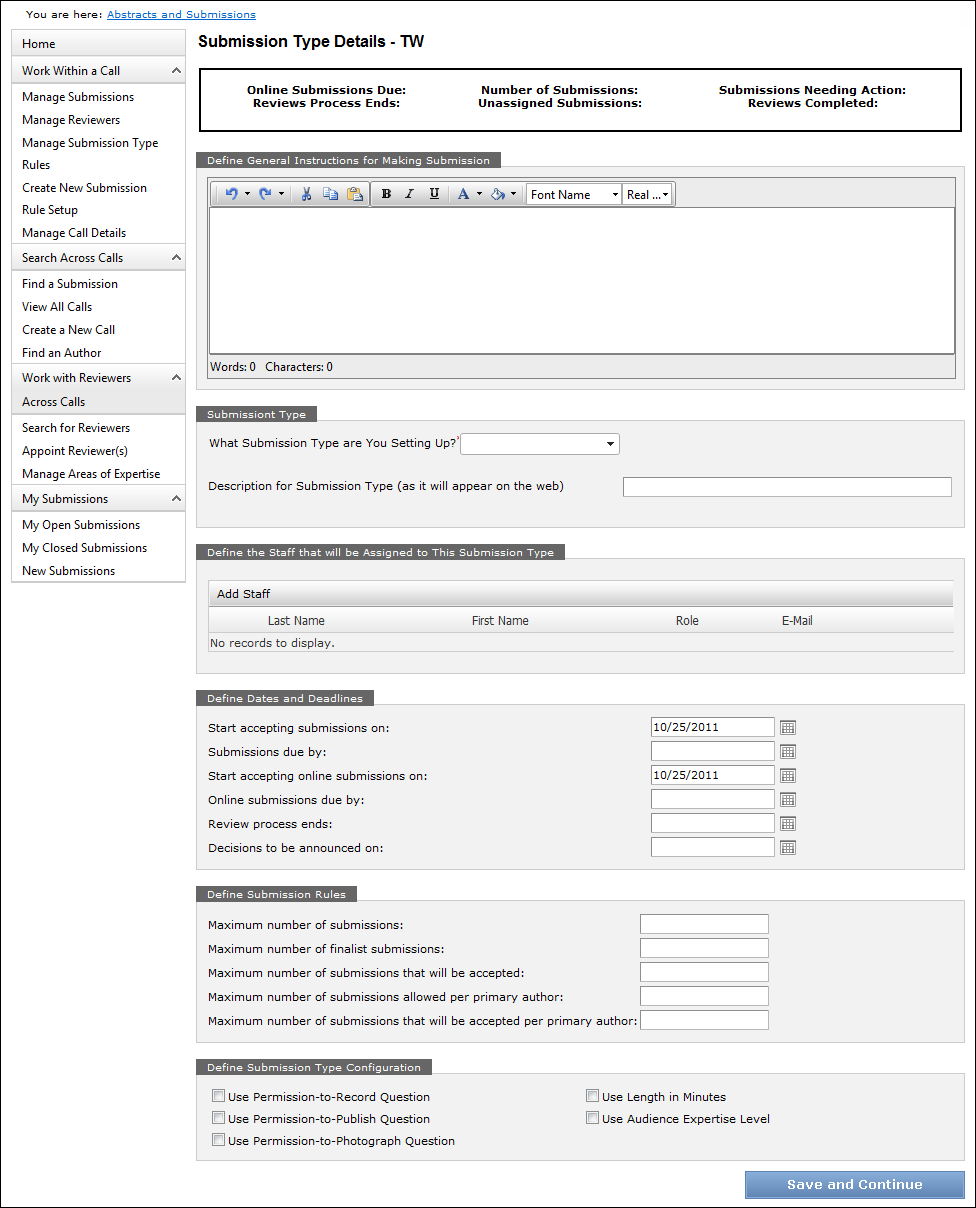
The Submission Type Details screen displays, as shown below.
3. Define General Instructions for Making
Submission in the section highlighted below.
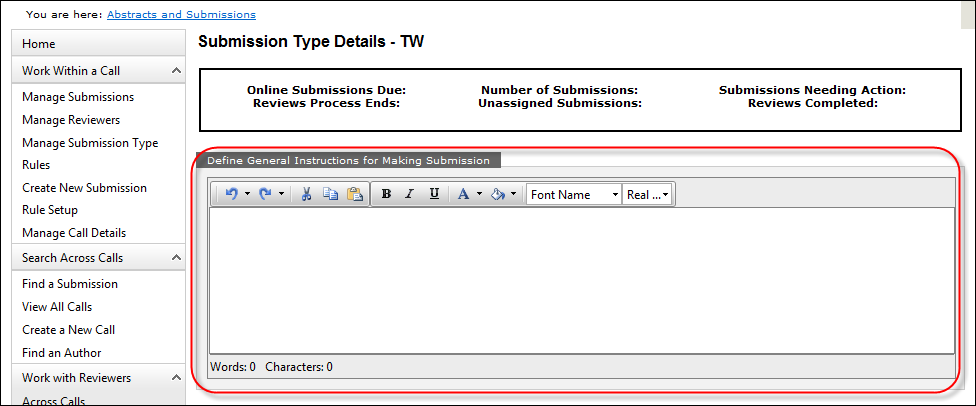
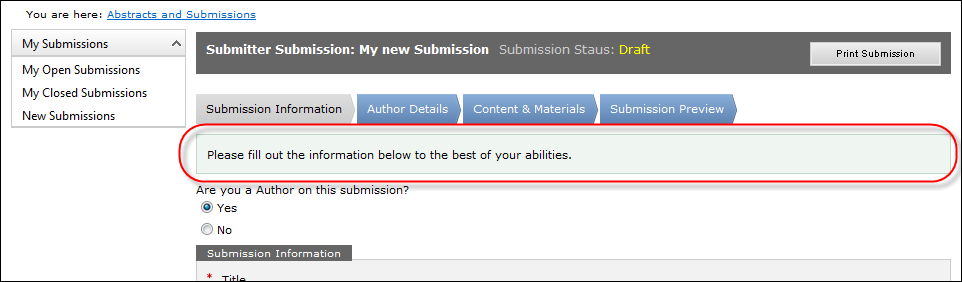
The information displays at the top of the page when the submitter begins
creating their submission, as highlighted below.
4. Select
What Submission Type are You Setting
Up? from the drop-down.
The available values are populated based on the non-fixed SUBMISSION_TYPE
system code.
 Once
you have selected the type of submission and saved the submission type
setup, this value cannot be changed. The organization needs to understand
that papers submitted to this submission type cannot have their submission
type changed. Therefore, if the organization wants to evaluate the submissions
first, before deciding what type of presentation the submission could
best be used for, the submission type code should be generic, such as
"Abstracts". Then, the organization can use the category code
on each submission to further classify the submission based on the type
of presentation for which the submission is best suited.
Once
you have selected the type of submission and saved the submission type
setup, this value cannot be changed. The organization needs to understand
that papers submitted to this submission type cannot have their submission
type changed. Therefore, if the organization wants to evaluate the submissions
first, before deciding what type of presentation the submission could
best be used for, the submission type code should be generic, such as
"Abstracts". Then, the organization can use the category code
on each submission to further classify the submission based on the type
of presentation for which the submission is best suited.
5. Enter
the Description for Submission Type (as
it will appear on the web).
This information displays in the Submission Type Description column on
the Start Submission screen where the submitter will select the call and
submission type for which to submit their submission, as shown below.

6. The
intention of the next section was for administrators to add non-administrator
staff to submission types, because non-administrator staff are only allowed
to access submissions in call submission types to which they have been
assigned. However, as of 7.4.0, there is a known defect, in which only
staff designated as "administrators" can access the necessary
ABS screens to manage submissions. Until this defect is resolved, all
staff (who have to be defined as administrators) will be able to access
all calls and submission types.
For a staff person to be able to access the ABS system, they must be an
individual in the customer table, have a Customer Class code of "Staff",
and have a record in the Cus_Abs_Staff_Role table.
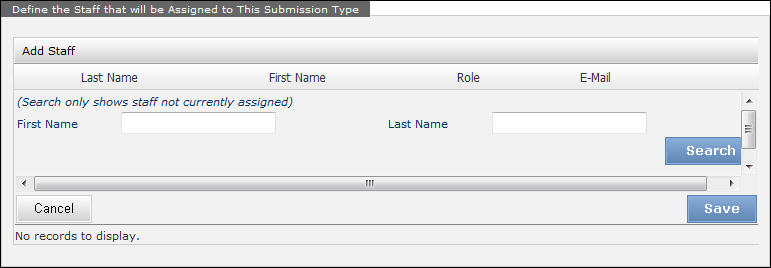
7. To add administrator staff that will be assigned to this submission type, perform the following:
a. From
the "Define the Staff that will be Assigned to This Submission Type"
section, click Add Staff.
The First Name and Last Name search fields display, as shown below.
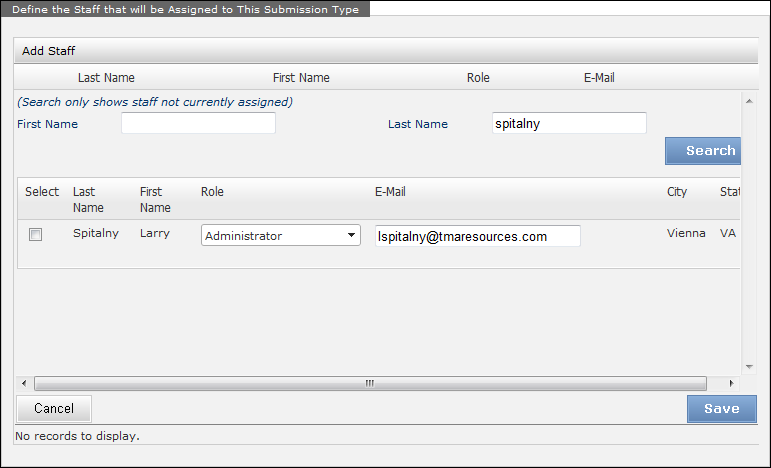
b. Enter the First Name and/or Last Name of the desired staff person.
c. Click
Search.
The search results display, as shown below. The search results only display
staff that have not already been assigned to this submission type.
d. Select the checkbox in the Select column next to the staff you want to assign to this submission type.
e. Select
the Role for the selected staff
from the drop-down.
This designation is for informational purposes only. In the future, this
Role code will be used for notification events. The available values are
populated based on the non-fixed STAFF_ROLE system code.
f. If
necessary, enter the staff person's E-Mail
address.
This designation is for informational purposes only. In the future, this
Role code will be used for notification events.
g. Click
Save.
The selected staff person is added to the grid, as shown below. If necessary,
you can click the Edit link to
update their Role and/or E-Mail address at any time. Additionally, click
the X icon to the right of any
assigned staff person to remove them for this submission type.

8. From
the "Define Dates and Deadlines" section (shown below), define
the following dates and deadlines, as necessary:
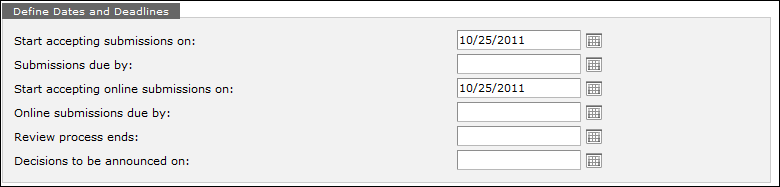
a. Start accepting submissions on: (required) This is the first date that submitters can submit submissions (not online) for this submission type. By default, this date is set to the "From" date defined for the call, but can be changed if necessary. In the future, this field will be used to allow back-office submissions for dates that fall outside of the online submission dates. Currently, this should be set to the same date as the Start accepting online submissions on date below.
b. Submission due by: (optional) This is the last date submissions will be accepted for this submission type. Enter the appropriate date or click the calendar icon to select it. In the future, this field will be used to allow back-office submissions for dates that fall outside of the online submission dates. Currently, this should be set to the same date as the Online submissions due by date below.
c. Start accepting online submissions on: (required) This is the first date that submitters can submit submissions online for this submission type. By default, this date is set to the "From" date defined for the call, but can be changed if necessary. Currently, this should be set to the same date defined for Start accepting submission on above.
d. Online Submission due by: (optional) This is the last date that submitters can submit their submissions online for this submission type. Enter the appropriate date or click the calendar icon to select it. Currently, this should be set to the same date as the Submissions due by date below.
e. Review process ends: (optional) This is the last date that reviewers can submit their review of submissions for this submission type. This date is for informational purposes for the submitters. The system does not enforce this date. Enter the appropriate date or click the calendar icon to select it.
f. Decisions to be announced on: (optional) This is the date that the decision will be announced. The type of decision is up to the organization. This date is for informational purposes only. The system does not enforce this date. For example, a winner may be announced or the organization may announce how many and which submissions will be presented at the meeting. Enter the appropriate date or click the calendar icon to select it.
9. From
the "Define Submission Rules" section (shown below), define
the following submission rules for this submission type, as necessary:
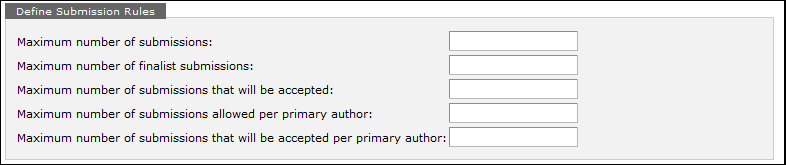
a. Maximum number of submissions: (optional) This is the maximum number of submissions that can be submitted for this submission type. When this maximum is reached, the system will prevent submitters from submitting their submission for this submission type.
b. Maximum number of finalist submissions: (optional) If your organization are using "finalists" (determined in step 24d), this is the maximum number of finalist submissions that can be approved as finalists by an administrator for this submission type.
c. Maximum number of submissions that will be accepted: (optional) This is the maximum number of submissions that accepted from the amount of submissions submitted.
d. Maximum number of submissions allowed per primary author: (optional) This is the maximum number of submissions a primary author can submit. For example, if this number is set to five, John Smith can only submit five submissions as a primary author for this submission type. However, John Smith can be a contributing author on any amount of submissions for this submission type.
e. Maximum number of submission that will be accepted per primary author: (optional) This is the maximum number of submissions by a primary author that will be accepted from the entire amount of submissions submitted for this submission type. For example, if this number is set to two and John Smith submits five submissions for this submission type, only two of his submissions can be accepted.
10. From
the "Define Submission Type Configuration" section (shown below),
select the appropriate checkbox, as necessary, from the following:

a. Use Permission-to-Record Question: If this checkbox is selected, while entering their submission, the submitter of a submission to this submission type will be asked whether or not their submission can be recorded.
b. Use Permission-to-Publish Question: If this checkbox is selected, while entering their submission, the submitter of a submission to this submission type will be asked whether or not their submission can be published.
c. Use Permission-to-Photograph Question: If this checkbox is selected, while entering their submission, the submitter of a submission to this submission type will be asked whether or not their submission can be photographed.
d. Use Length in Minutes: If this checkbox is selected, while entering their submission, the submitter will be asked to enter the length in minutes of their submission. This is typically used for presentations for a meeting.
e. Use Audience Expertise Level: If this checkbox is selected, while entering their submission, the submitter will be asked to select the audience level of expertise for their submission, which is validated against the non-fixed EXPERTISE_LEVEL code.
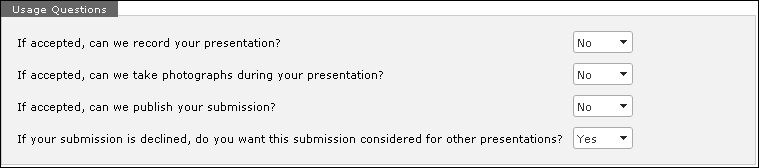
11. If you select all the checkboxes above,
the Usage Questions section will display to the submitter on the Content
& Materials page, as shown below:
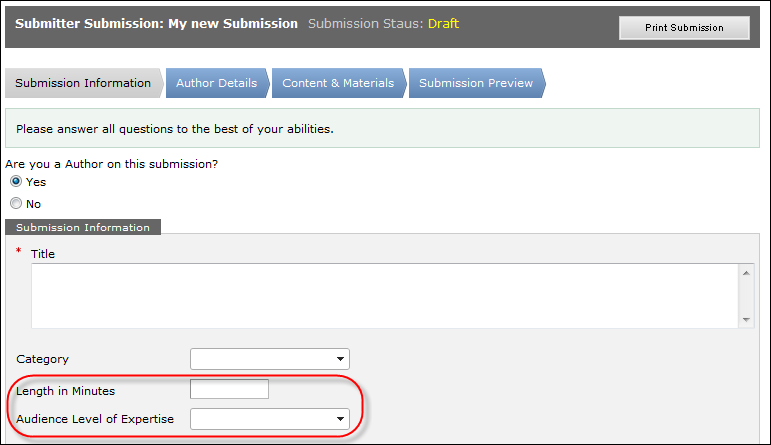
If you select the Use Length
in Minutes and the Use Audience
Expertise Level, the following fields
display to the submitter on the Submission Information page:
12. Click
Save and Continue.
The Submitter Requirements screen displays, as shown below.
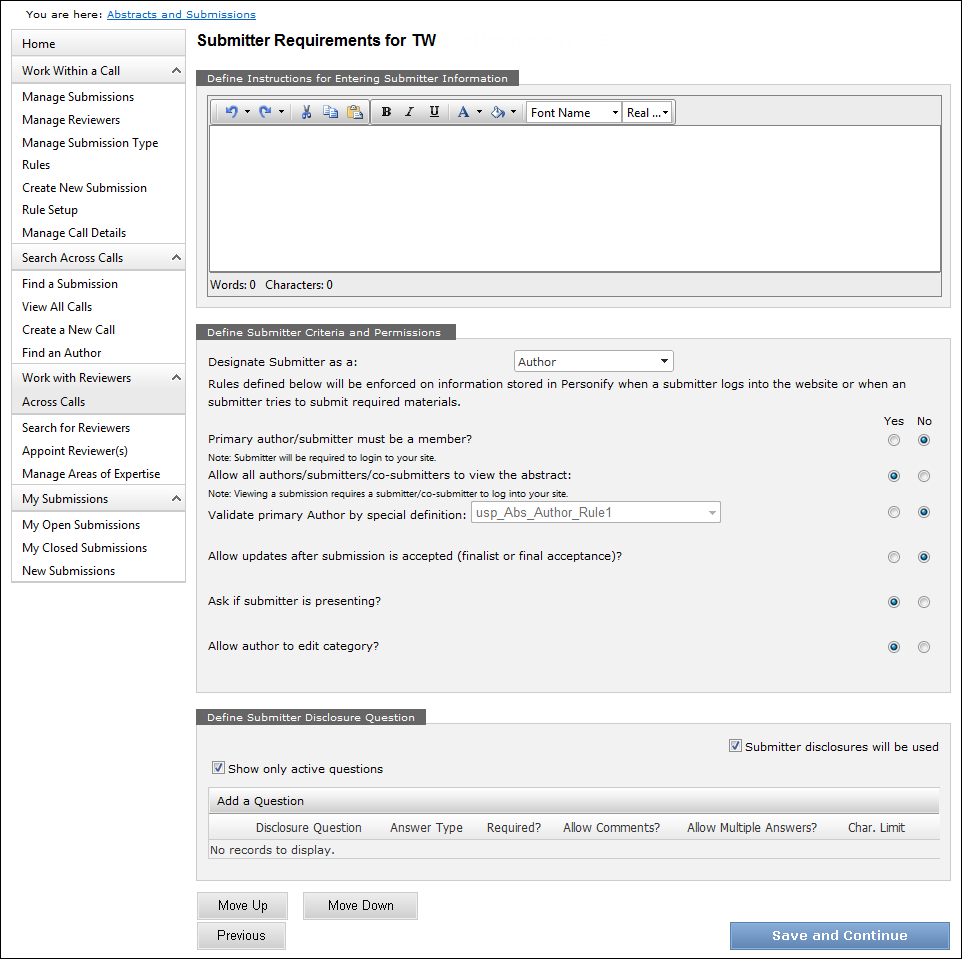
13. Proceed to define submitter requirements.