The Select A Web Control window displays.
To configure the web settings for the Breadcrumb control:
1. Log into your e-Business site as host.
2. Create
a new page on your site to add the control.
See Adding and Managing Pages for
information on how to add a page to your website.
3. Add
the Personify- DNN Web Control Container
module to the page.
See Installing .NET Controls
for more information.
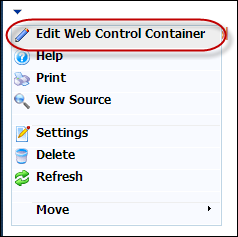
4. Select
the Edit Web Control Container option from the downward arrow icon,
as highlighted below.
The Select A Web Control window displays.
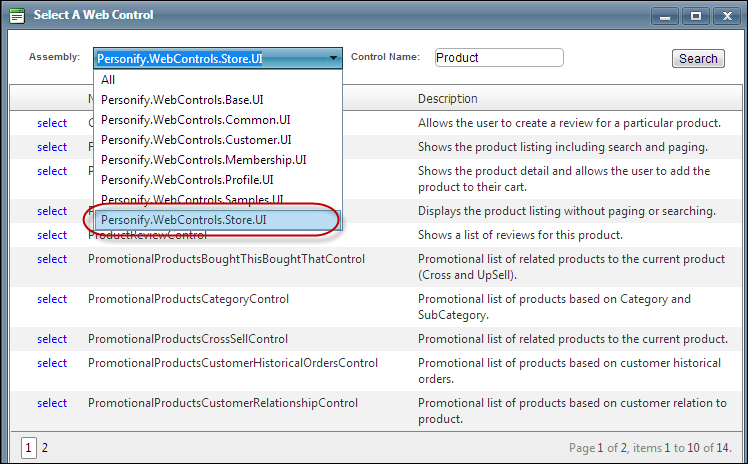
5. From
the Assembly drop-down, select
"Personify.WebControls.Store.UI",
as highlighted below.
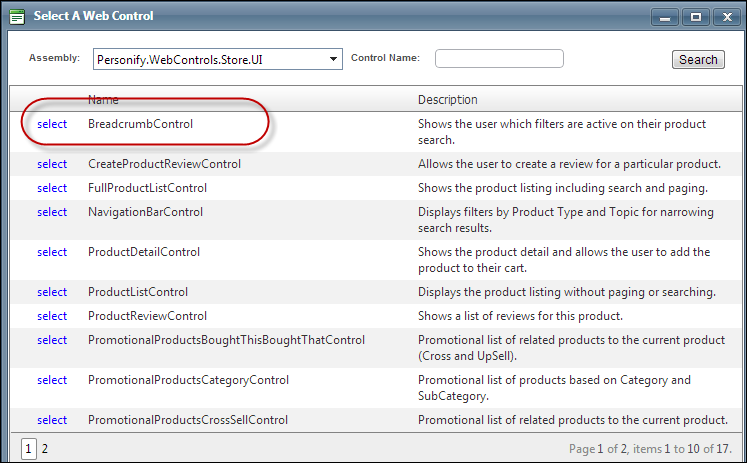
6. In the Control Name field, enter "BreadCrumbControl" and click Search.
7. Click
select next to the "BreadCrumbControl", as highlighted
below.
The Control Settings for this control display, as highlighted below.
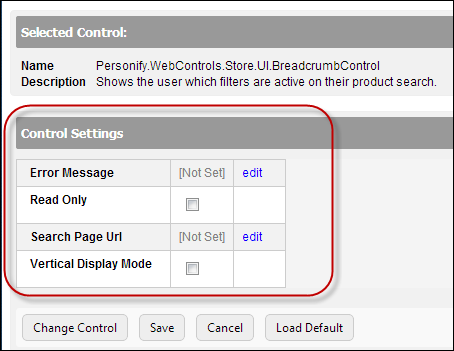
8. Optional:
select or create a new Error Message.
The error message will display on the control for the action that was being
performed at the time of the error.
a. If left blank, the default error message, "An error occurred while performing [Insert Action]. If the problem persists, please contact the site administrator", will display. [Insert Action] will be substituted with the action the control was performing at the time of the error.
b. If you wish to change the default error message, customize it with a PWF Parameter. See Setting up PWF Parameters for more information.
9. Check the Read Only checkbox.
a. When this check box is checked, the breadcrumb to is a read-only field. When it is in read-only mode, the words act as links that take you back to the Search Page URL.
b. When this check box is not checked, the breadcrumb will display with x’s in the left navigation next to the elements. This allows parts of the filter to be changed without sending the user to another page.
10. From
the Search Page Url line, click
edit.
The Select/Edit Personify Web Parameter screen displays, as shown below.
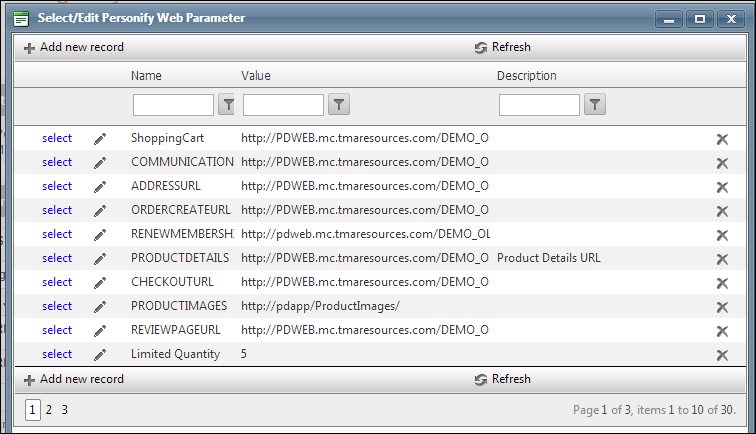
a. Click
the select link next to the appropriate
PWF parameter.
You should set the PWF parameter to a value that will redirect the user
to the product listings when crumbs are clicked. The
option is used in read-only mode.
If this PWF parameter does not exist or you would like to create a new
one, see Setting up PWF Parameters for
more information.
 The
Search Page Url does not have to be defined if product listings are on
the same page and the Read Only checkbox is not checked.
The
Search Page Url does not have to be defined if product listings are on
the same page and the Read Only checkbox is not checked.
11. Check
the Vertical Display Mode checkbox.
Select this check box if you would like the breadcrumb to display vertically.
It will default to a horizontal display if this box is not checked.
12. Click Save.