The Photo control displays your user's mobile, home, work, etc. phone number(s). See Configuring the Web Settings for the Phone Control for more information on how to drop this control onto a page on your e-Business website.
Before configuring web settings for the Phone control, it is important
that your back office configurations are accurate. If not, these configurations
will not display properly on your e-Business website. See Configuring
the Back Office Settings for the Contact Informations Control for
more information on the system types and codes that need to be web enabled
before setting up this control.
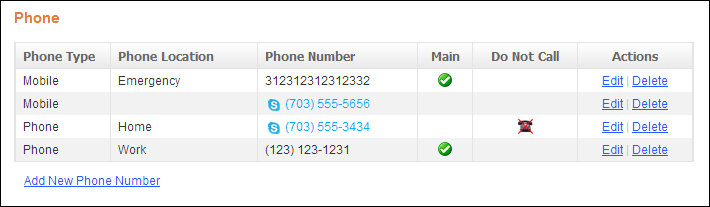
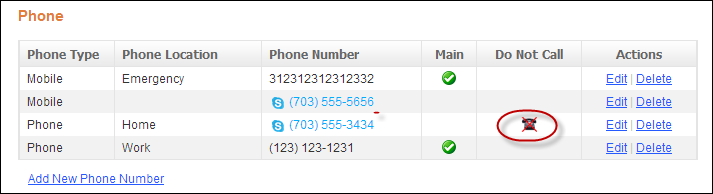
After setting up the Phone control, your user will see the control similar
to the one displayed below.
When the constituent clicks the Add New Phone Number link, the
screen displays as shown below. Depending on the existing phone numbers,
the options in the Phone Location drop-down may be disabled since only
one combination of Phone Type and Phone Location can exist. For example,
if a Mobile/Emergency phone number already exists, the “Emergency” option
will be disabled in the Phone Location drop-down.
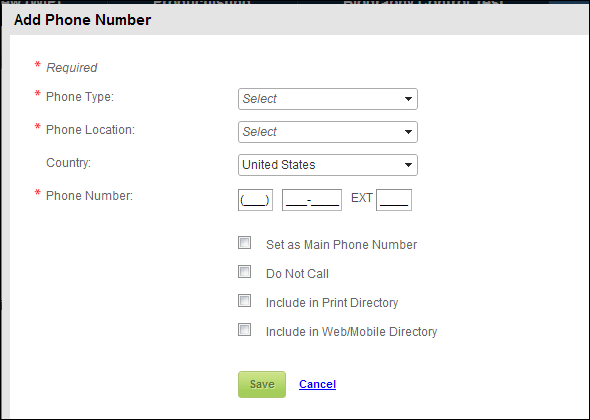
Here the constituent can add a phone number and check the following checkbox(s)as appropriate:
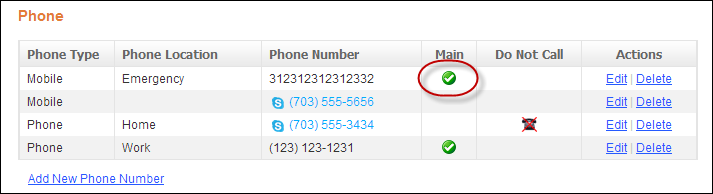
· Set as Main Phone Number
When checked, a checkmark displays in the Main column of the Phone control,
as highlighted below.
 Users
are able to have more than one main number selected if there are two COMM_TYPE
options defined in the back office. The reason for this is that each COMM_TYPE
has one primary flag associated with it. For example, if there is a Comm_TYPE
of Mobile and a COMM_TYPE of Phone defined in the back office, the user
can select to list his/her mobile number and phone number on the web and
mark both as primary, as shown above. See Configuring
the Back Office Settings for the Contact Information Control for more
information.
Users
are able to have more than one main number selected if there are two COMM_TYPE
options defined in the back office. The reason for this is that each COMM_TYPE
has one primary flag associated with it. For example, if there is a Comm_TYPE
of Mobile and a COMM_TYPE of Phone defined in the back office, the user
can select to list his/her mobile number and phone number on the web and
mark both as primary, as shown above. See Configuring
the Back Office Settings for the Contact Information Control for more
information.
· In
the back office, on the CRM360®
screen, this communication record will be marked as "Primary",
as shown below. For more information on this screen, please see Viewing
a Constituent's Contact Information in CRM360.
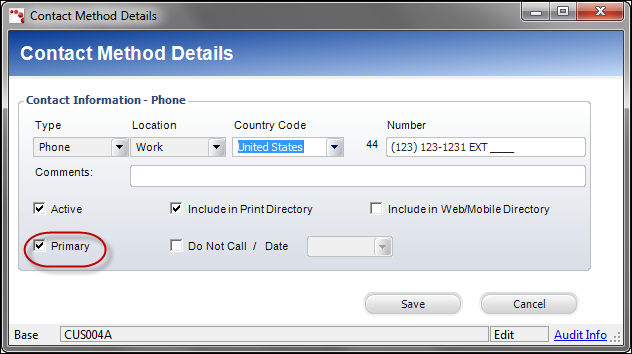
Only
one phone number can be set as “Main”.
· Do Not Call
When checked, the do not call icon displays in the Do No Call column of
the Phone control, as shown below.
In the back office, on the CRM360 screen, this communication record will
be marked as "Primary", as shown below. For more information
on this screen, please see Viewing a Constituent's Contact Information
in CRM360.

· Include in Print Directory
When checked, the constituent's phone number will be included in the external
directory reports for print. In the back office, on the CRM360 screen,
the “Include in Directory” checkbox is checked, as shown below For more
information on this screen, please see Viewing
a Constituent's Contact Information in CRM360.
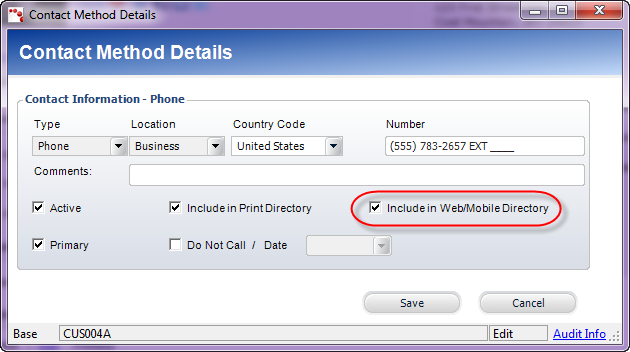
· Include in Web/Mobile Directory
When checked, the constituent's phone number will be included in the external
directory for the web/mobile. In the back office, on the CRM360 screen,
the “Include in Web/Mobile Directory” box is checked, as shown below.
For more information, please see. Viewing a Constituent's Contact Information
in CRM360.