 User-group
security can be defined for some codes by setting the PUBLIC_CODE_FLAG
= 'N'. Currently user-group security can be placed on Call Center “Topic”
codes.
User-group
security can be defined for some codes by setting the PUBLIC_CODE_FLAG
= 'N'. Currently user-group security can be placed on Call Center “Topic”
codes.
After the Type code is defined or selected, Code values can be created for the Type code. The Code definition can impose rules on subcodes that can be defined for the code associated with the Type code.
User-group
security can be defined for some codes by setting the PUBLIC_CODE_FLAG
= 'N'. Currently user-group security can be placed on Call Center “Topic”
codes.
To define the codes:
1. Select System Admin > System Codes > System Types and Codes from the toolbar.
2. Search
for and select an existing system type code or create
a new system type code.
The Types and Codes Maintenance screen displays.
3. Click
Edit Codes from the Code
Types task category or click Edit Codes
for this Type.
The Codes Maintenance screen displays, as shown below.
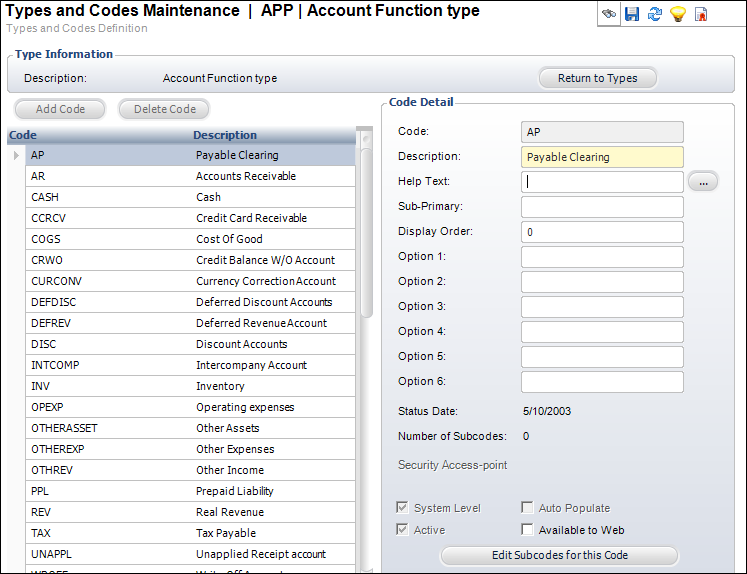
4. Click Add Code.
5. Enter the Code.
6. Enter the code Description.
7. If necessary, click the ... button to add Help Text.
8. If necessary, enter the default subcode in the Sub-Primary field.
9. If necessary, enter the Display Order.
10. If necessary, enter Options 1-6.
11. By default, the Active checkbox is selected. If necessary, uncheck this.
12. By default, the Auto Populate checkbox is selected. If necessary, uncheck this.
13. If necessary, select the Available to Web checkbox.
14. Click Save.
Screen Element |
Description |
|---|---|
Add Code |
Button. When clicked, a new row is added to the table and the Code Detail fields are enabled. |
Delete Code |
Button. When clicked, the highlighted code from the table is deleted. If the code is being used elsewhere in the system, you cannot delete it. |
Code Detail |
|
Code |
Text box. A unique code. Maximum length is 24. |
Description |
Text box. The description of the code. |
Sub-Primary |
Text box. Enter the default Subcode to be used on the screen that uses this Code for populating drop-downs. If you enter a Sub-Primary code, it must exist in the App_Subcode table and it must be active. |
Display Order |
Text box. This determines the order of the Codes in the drop-down for the Type code. |
Option 1, 2, 3, 4, 5, 6 |
Text boxes. Enter options to perform special functions that vary from applying formatting to a field to automatically populating fields to reduce data entry. There are certain screens where Option fields can be used in conjunction with types and codes as shown in the System Types and Codes table. |
Status Date |
Read-only. The date the active status was last updated. |
Number of Subcodes |
Read-only. The number of subcodes added to the code. |
Security Access-point |
Link. When clicked, the Generic Chooser displays and you can search for the appropriate access-point to associate with the code. A code with an access-point associated with it will be available only to the users who have permissions to the access-point. A code without an access-point associated with it will be considered “public” and will be available to everyone.
|
System Level |
Checkbox. When checked, indicates users cannot change the Code, except for the Description field. All Codes will be auto-populated if this is checked. |
Auto Populate |
Checkbox. This functionality has not been implemented, with the exception of use with the "CONSTITUENT_ROLES" system type. |
Active |
Checkbox. When checked, indicates the code is active. When unchecked, indicates the code is inactive and will not display as an option on its related screen. If the code has already been used but it will not be used in the future, you can deactivate it by unchecking this checkbox, rather than deleting it. |
Available to Web |
Checkbox. When checked, indicates the code is available on the Web. |
Edit Subcodes for this Code |
Button. When clicked, the Subcodes Maintenance screen displays. Refer to the “Subcodes” section below for more information. |