 A Direct
Posting or Deferred Posting batch must be opened or created to enter receipts.
A Direct
Posting or Deferred Posting batch must be opened or created to enter receipts.
There are several ways to enter cash receipts, and one way is through the Receipt Entry screen. The advantage of using this screen (rather than reviewing an order and then paying it from that screen) is it facilitates more complex receipts. Receipts can be applied to individual lines, orders, or multiple orders. Before you begin entering receipts, a batch for the receipts must already exist.
A Direct
Posting or Deferred Posting batch must be opened or created to enter receipts.
The sequence of orders in the grid is based on Order Number, Pay Priority, and Order Line Number.
To enter a receipt:
1. From the Accounting
Central screen, click Enter Receipts.
The Receipt Entry search screen is displayed.
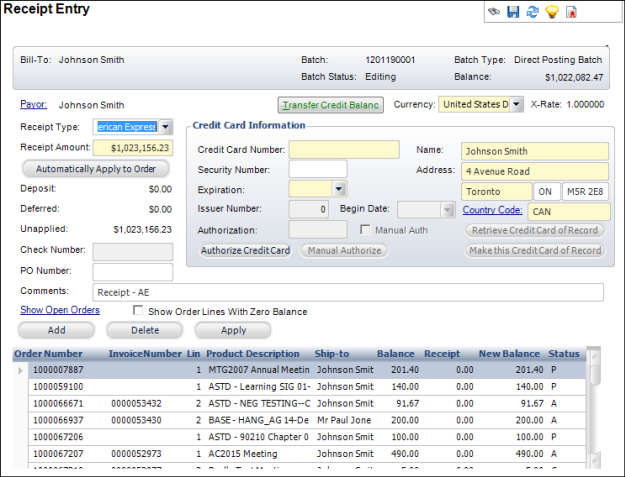
2. Search for the appropriate customer and click Create New Receipt.
3. Select the Receipt Type.
4. Enter the Receipt Amount.
5. If you selected a credit card from the Receipt Type drop-down, the Credit Card Information fields are enabled. Enter the information and click Authorize Credit Card.
6. If you selected check from the Receipt Type drop-down, enter the Check Number.
7. If necessary, enter the PO Number.
8. Enter any Comments related to the receipt.
9. If necessary, click Transfer Credit Balance to view any unapplied receipts or credit balances for the bill-to customer (only posted receipts will display).
10. If necessary, select the Show Order Lines With Zero Balance checkbox to display order lines with a balance on zero.
11. To apply payment to the selected order, click Automatically Apply to Order.
12. To apply payment to multiple orders, click Add to add an order balance to the receipt and then click Apply to verify the payment details.
13. Click Save.