Step 8: Configuring the Duplicate Matching Dataflow
Using Spectrum’s Enterprise Designer, you can modify the Duplicate Matching
dataflow settings to control what fields are considered and the threshold
of these fields when determining possible matches in customer records.
TMA Resources does not recommend, however, changing the original duplicate
matching dataflow provided with the Advanced Matching module. If you do
decide to alter the dataflow settings, make sure to create a copy of the
original dataflow and alter the copy, rather than changing the original.
 This
section only offers a high-level process of configuring a dataflow. For
more information on using the Enterprise Designer and working with dataflows,
please refer to the Spectrum 7.0 Users
Guide and Spectrum 7.0 Templates
Guide available at ftp://ftp.tmaresources.com/group1/documentation.
This
section only offers a high-level process of configuring a dataflow. For
more information on using the Enterprise Designer and working with dataflows,
please refer to the Spectrum 7.0 Users
Guide and Spectrum 7.0 Templates
Guide available at ftp://ftp.tmaresources.com/group1/documentation.
To configure the Duplicate Matching Dataflow:
1. In
your Windows start menu, navigate to Program
> Pitney Bowes > Spectrum Technology Platform > Client Tools and
select Management Console.
2. From
the left-side menu, double-click DuplicateMatching
(Service).
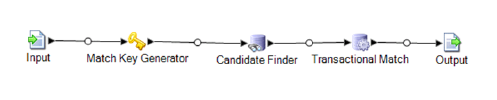
The DuplicateMatching (Service) displays in the main panel, as shown below.
3. In
your Windows start menu, navigate to Program
> Pitney Bowes > Spectrum Technology Platform > Client Tools and
select Enterprise Designer.
The DuplicateMatching (Service) should display on the screen.
4. From
the menu bar, select File > Export
File.
5. Save
the DuplicateMatching file to your server under a new name.
For example, DuplicateMatching_CUSTOM.
6. Back
in Enterprise Designer, open your DuplicateMatching_CUSTOM
file.
The dataflow should appear the same as the DuplicateMatching (Service)
above.
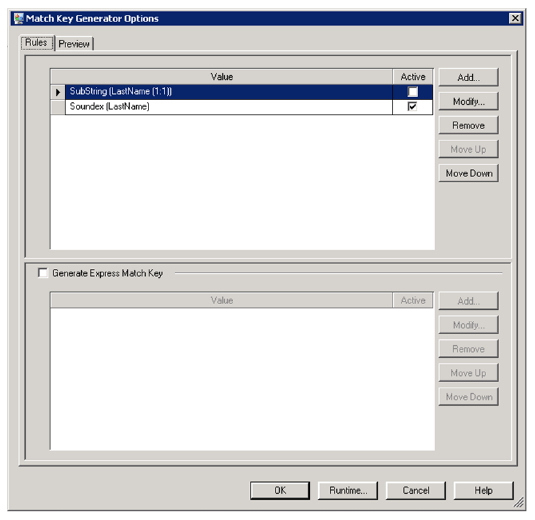
7. Double-click
Match Key Generator to customize the rules used to facilitate the matching
process, as demonstrated in the following image.
8. Double-click
Candidate Finder to customize
the field map for the dataflow.
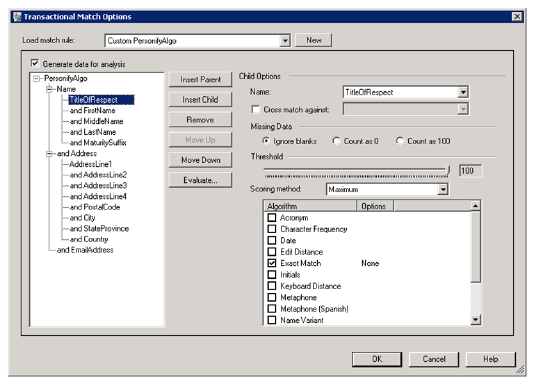
9. Double-click
Transactional Match to customer
the scoring methods of the fields and determine parent fields over child
fields, as shown below.
10. Save
the dataflow.
11. To
import the new dataflow for use instead of the original dataflow, from
the menu bar, select File > Import
> Dataflow.
12. Select
your customized dataflow and click OK.