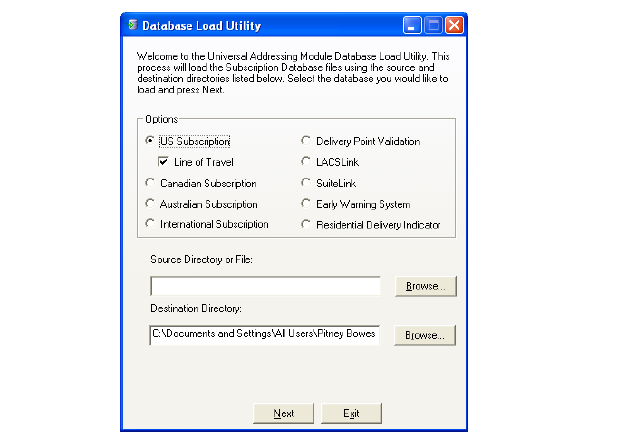
The Database Load Utility dialog box displays, as shown below.
1. From
your desktop, click Start > All
Programs > Pitney Bowes > Spectrum Technology Platform > Modules
> Universal Addressing > Database Load Utility.
The Database Load Utility dialog box displays, as shown below.
2. Ensure that the US Subscription radio button is selected.
3. Click
Browse for the Source
Directory or File.
If the Insert disk window displays, click Cancel to
display the Open window.
4. Navigate to the location on your server where you unzipped the US Database file, select TAPBLK01.CD.
 If
you downloaded a compressed file, you must un-compress it first.
If
you downloaded a compressed file, you must un-compress it first.
5. Enter the appropriate Destination Directory and click Next.
For
the Destination Directory, each month’s updates should be put in a different
folder.
For example, C:\ProgramData\Pitney Bowes\Spectrum\US-09-2010 for the US
databases in September of 2010.
The Loading Database window displays.
Once the database is loaded, the Loading Database window clears from your
screen.
6. Select the Delivery Point Validation radio button.
7. Click
Browse for the Source
Directory or File.
If the Insert disk window displays, click Cancel to
display the Open window.
8. Navigate
to the location on your server where you copied the DPV database folder,
select dpvs.db.
If you downloaded a compressed file, you must un-compress it first.
For
the Destination Directory, each month's updates should be put in a different
folder. For example C:\ProgramData\Pitney Bowes\Spectrum\US-09-2010 for
the US databases for September of 2010.
9. Select the LACSLink radio button.
10. Click
Browse for the Source
Directory or File.
If the Insert disk window displays, click Cancel to
display the Open window.
11. Navigate
to the location on your server where you copied the DPV database folder,
select LACS.DB.
If you downloaded a compressed file, you must un-compress it first.
For
the Destination Directory, each month's updates should be put in a different
folder. For example C:\ProgramData\Pitney Bowes\Spectrum\US-09-2010 for
the US databases for September of 2010.
12. If
you have obtained the RDI database from the USPS, select the Residential
Deliver Indicator radio button.
If you did not obtain the RDI database from the USPS,
13. For the Nine digit RDI Table, click Browse.
14. Navigate to the CD obtained from the USPS, select rts.hs9.
15. For the Eleven digit RDI Table, click Browse.
16. Navigate to the CD obtained from the USPS, select rts.hs11.
17. Click
Next to load the RDI databases.
The Loading Database window displays.
Once the database is loaded, the Loading Database window clears from your
screen.
18. Follow the prompts to complete the installation process.
19. Click Exit to close the Database Load Utility window.
If
you have purchased the Canadian and International Products, you can load
those databases in a similar manner.
20. Launch the Management Console from your desktop by selecting Start > All Programs > Pitney Bowes > Spectrum Technology Platform > Client Tools > Management Console.
21. In
the left hand navigation, under Modules, Universal Addressing, Tools,
select USA Database Resources, as shown below.
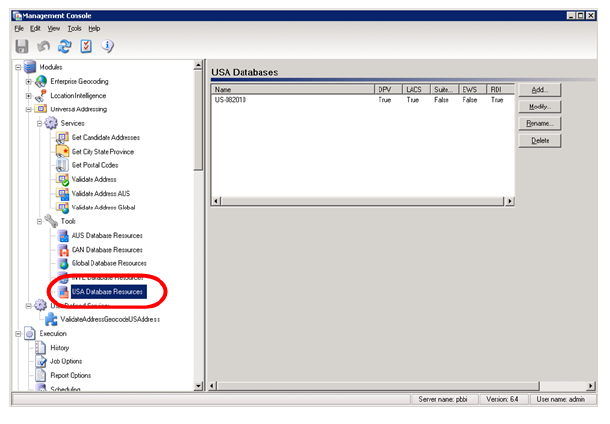
22. Click
Add to add a database; the following
form will appear.
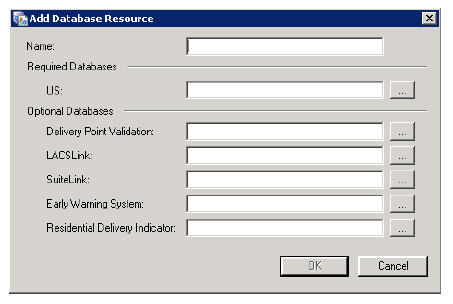
23. Enter the name and browse to the US and other databases you have installed in the previous steps.
24. Click OK.
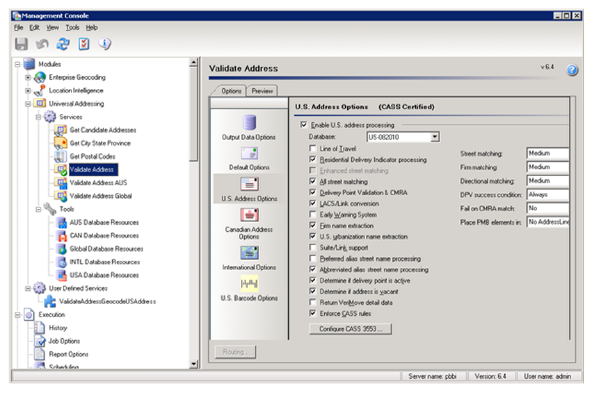
25. In the left hand navigation, under Modules >Universal Addressing >Services, select Validate Address.
26. Under
U.S. Addressing Options, at the top, choose the name of the Database Resources
created in the previous step.
Here you can also configure other options related to validating US addresses.
27. On the Preview Tab, you can enter an address and preview what will be returned by Spectrum when it is validated.
28. If
you have other countries installed (i.e. CAN and/or INTL), you need to
execute similar steps.