Installing Lyris ListManager
Contact your Lyris vendor for Lyris ListManager 10.2 installation instructions.
Additional Lyris information is located at www.Lyris.com/products/listmanager/index.html.
After completing the Lyris ListManager installation, the following database
settings must be configured on the Lyris and Personify database servers
to establish the Personify and Lyris database communication.
 The
steps listed below are only required if the Lyris database is installed
on a different server than the Personify database server.
The
steps listed below are only required if the Lyris database is installed
on a different server than the Personify database server.
Contact your Database Administrator to have the steps performed on both
the Personify database server and the Lyris database server. These steps
need only be completed during the initial installation of Lyris ListManager.
To set up your Lyris and Personify database servers:
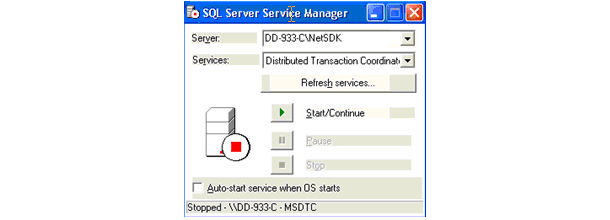
1. Select
the SQL Server Microsoft Distributed Transaction Coordinator from its
location on your computer.
2. If
the SQL Server Microsoft Distributed Transaction Coordinator is already
running, exit the SQL Server Service manager.
Otherwise, do the following:
a. Specify
the Server and Services
fields.
b. Click
Start/Continue, displayed in the
following image.
3. Follow
the steps below to enable network DTC access:
a. Click
Start.
b. Click
Control Panel.
c. Click
Add or Remove Programs.
d. Click
Add/Remove Windows Components.
e. Select
the Application Server check box.
f. Click
Details.
g. Select
Enable Network DTC Access.
h. Click
OK.
i. Click
Next.
The system will now install the updates.
j. Click
Finish.
4. Enable
the security configuration by doing the following:
a. Click
Start.
b. Click
Control Panel.
c. Select
Computer Services.
d. Click
Administrative Tools.
e. Click
Computers.
f. Click
My Computer.
g. Right-click
Properties.
h. Click
the MSDTC tab.
i. Click
Security Configuration located
in the Transaction Configuration area.
The following box displays.
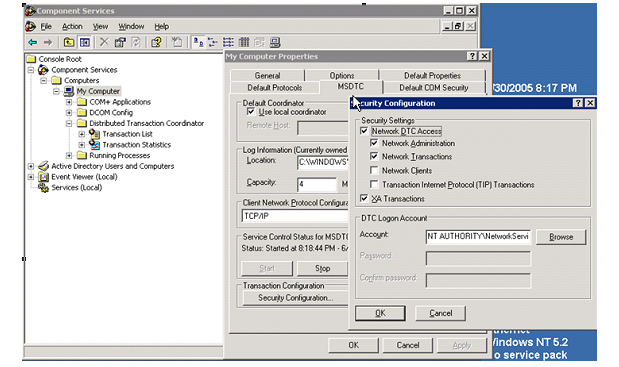
j. Click
the Network DTC Access option.
k. Click
OK.
If
the Network DTC Access option has already been configured do the following:
- Deselect the Network DTC Access
option.
- Click OK.
- Click Security Configuration located
on the MSDTC tab.
- Click Network DTC Access.
- Click OK.
l. Right-click
My Computer in the Component Services window.
m. Select
Properties.
n. Click
the MSDTC tab.
o. Click
Reset log.
p. Reboot
the server.