
To set up an Umbrella Product:
1. Navigate
to Product > Product Central in Personify.
2. The Product Maintenance screen will appear; click Create New Product.
3. Click
Umbrella Products as shown in the image below.
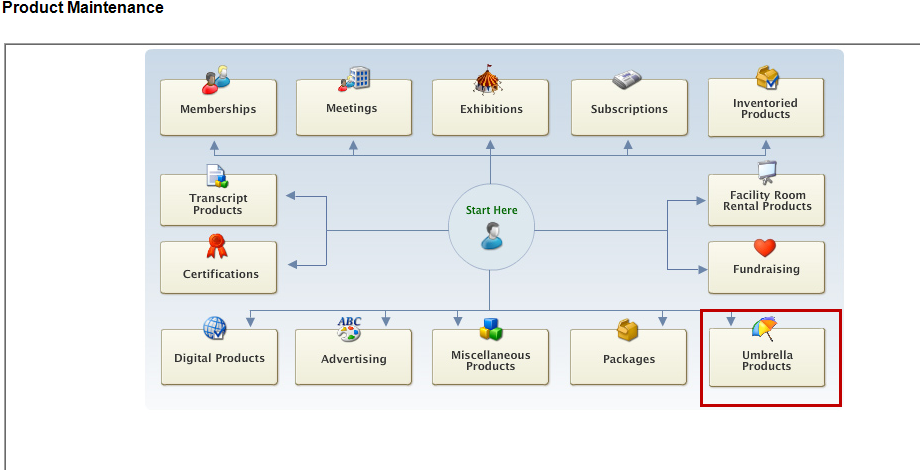
This will open the Product Maintenance General Setup page where you can
begin to set up your Umbrella Product.
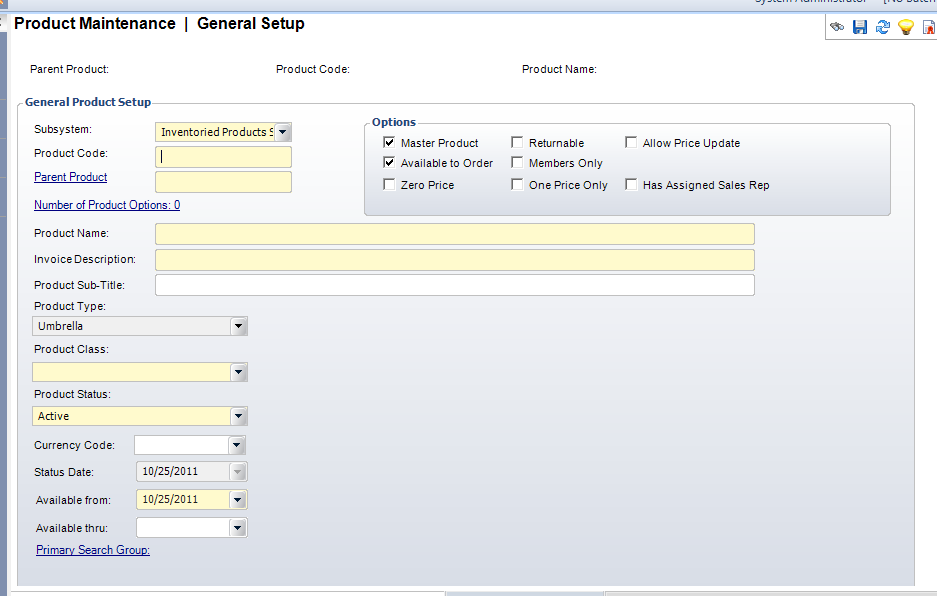
4. Select a Subsystem for your product from the drop-down menu
![]() Only INV, SUB,
and ECD are available as subsystems.
Only INV, SUB,
and ECD are available as subsystems.
5. Type
the Product Code to label
the product; for instance, TSHIRT.
The Parent Product field will automatically populate with the same name
you have typed for the Product Code. If this is not the Parent Product,
select a Parent Product by clicking on Parent Product and choosing from
the options filtered after you search.
6. Define
the Product Name.
This should be a descriptive name as it is the name that will display to
your customers.
7. Define
the Invoice Description.
If you have already defined your product name, the Invoice Description
will pre-populate when you click in the content box with the Product Name.
If you would like the Invoice Description to be different, change it as
you see fit. This will display in e-business.
8. Define the Product Sub-Title, if necessary. Product Type will be automatically set as "Umbrella." This field is not editable.
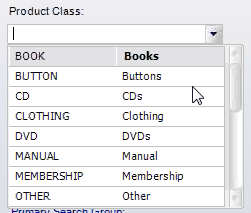
9. Select
the Product Class from the
drop-down menu as shown below; this will be the type of product you are
creating.
10. Select a Product Status from the drop-down menu.
a. Active if the product is ready and available for purchase. When creating a new product, the Product status will automatically default to Active.
b. Select Cancelled if the product has been cancelled and is no longer available for purchase.
c. Select Discontinued if the product has been discontinued and is no longer available for purchase.
11. Select
a Currency Code from the
drop-down menu, if necessary.
The Status Date will default to today's date; this field is not editable.
12. Select
an Available From date; this
is the date that the product will begin availability.
This date will be the day the product is available, but it will not display
on the web until the e-business begin date is met.
 The
Available From date cannot be changed if orders have already been created
for it.
The
Available From date cannot be changed if orders have already been created
for it.
13. Select an Available Thru date; this is the last date that the product will be available through, if desired.
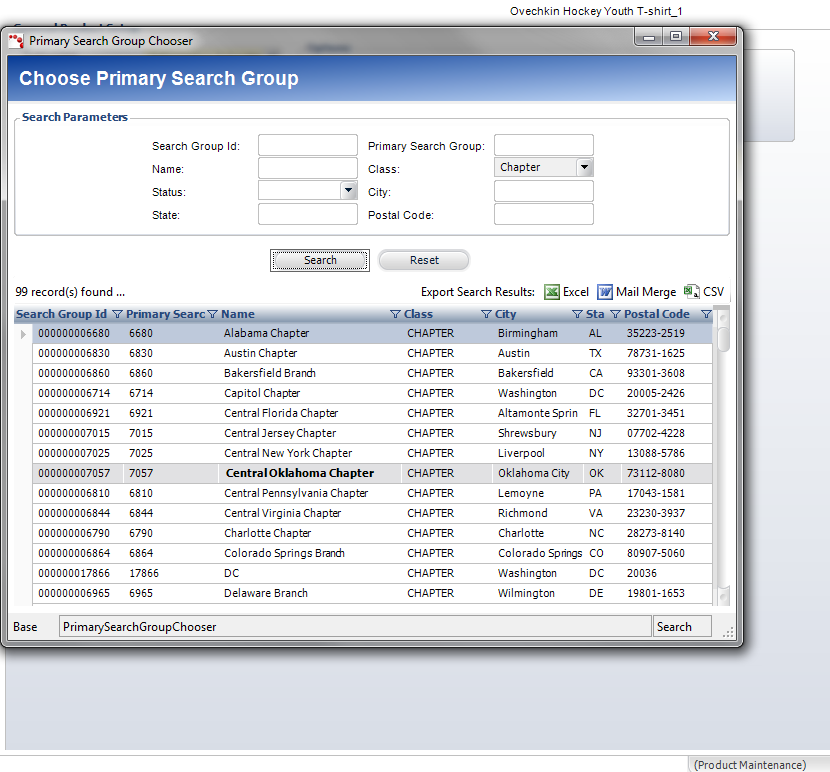
14. Click
Primary Search Group if you
would like to select a specific group or chapter to target.
15. Under Options, you will see multiple checkboxes that are available
a. Master Product
b. Available to Order
c. Zero Price-not recommended
d. Returnable-not recommended
e. Members Only-not recommended
![]() Associated products
should not be set up if they have a different members-only standing than
the umbrella product.
Associated products
should not be set up if they have a different members-only standing than
the umbrella product.
f. One Price Only-not recommended
g. Allow Price Update-not recommended
h. Has Assigned Sales Rep-not recommended
16. Click Save changes
17. Click Validate Setup under the Product Definition task menu
![]() You should receive
a message stating that the validation was successful. If you instead receive
an error message, note the missing items and correct them, then attempt
to validate again once you have made the changes and saved.
You should receive
a message stating that the validation was successful. If you instead receive
an error message, note the missing items and correct them, then attempt
to validate again once you have made the changes and saved.