 If
a contact does not have an email address in Personify, a contact tracking
record cannot be created in Personify through the Outlook Plug-In. The
plug-in searches both primary and non-primary email addresses.
If
a contact does not have an email address in Personify, a contact tracking
record cannot be created in Personify through the Outlook Plug-In. The
plug-in searches both primary and non-primary email addresses.
Using the Personify Outlook 2010 Plug-In, you can email specific Personify contacts without necessarily saving them as Outlook contacts. You can use the Search Personify option to find Personify contacts to add to the email, or, if you know the contact’s email address, you can simply type it in the To field. If you chose to type the contact’s email address into the To field, if you select to save the email to Personify, the plug-in will check for a customer record in the Personify database to create a contact tracking record for.
If
a contact does not have an email address in Personify, a contact tracking
record cannot be created in Personify through the Outlook Plug-In. The
plug-in searches both primary and non-primary email addresses.
When saving an email to Personify, the plug-in assumes that you want to create a contact tracking record for the Personify contact receiving the email AND for the staff sending the email (yourself). In order for a contact tracking record to be created for the staff sending the email, the staff MUST have a customer record in Personify.
The
plug-in does not change the maximum number of recipients on an Outlook
distribution list. Check with your email administrator regarding the limits
of your email system.
To email contacts:
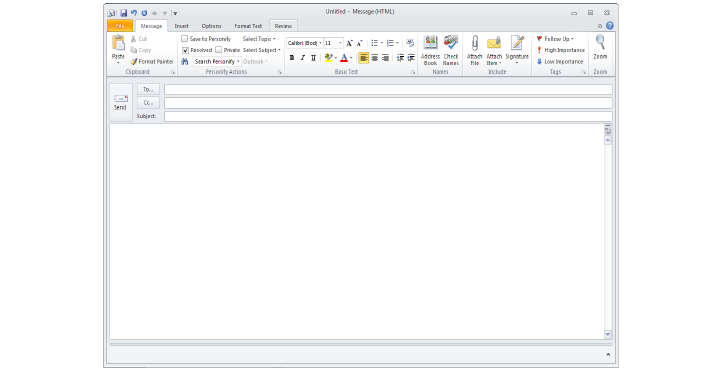
1. On
the Home tab of the Mail screen, click New
E-mail.
A new, blank email window displays, as shown below.
2. From
the Personify Actions section of the ribbon bar, begin typing your search
into the Search Personify field.
Search terms must be three or more characters in length.
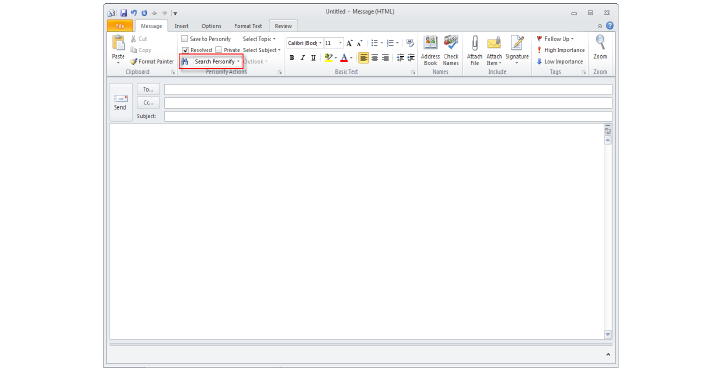
Alternatively,
select the Search Personify drop-down to display a list of previous searches.
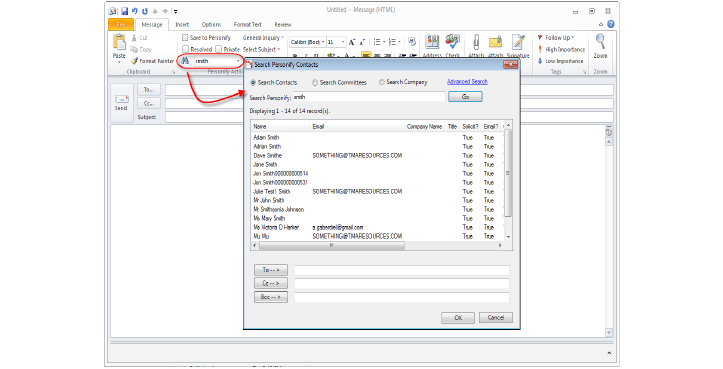
3. After
typing your search, hit Enter
or click the binoculars icon to the left.
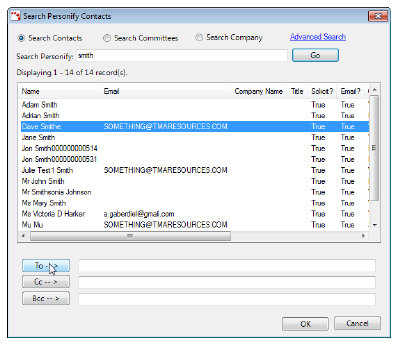
The Search Personify Customers window displays, as shown on the next page.
The search results display the following fields:
Name
Email (primary only)
Company Name
Title
Solicit?
Email?
City
State
Zip
Contact Id
Phone
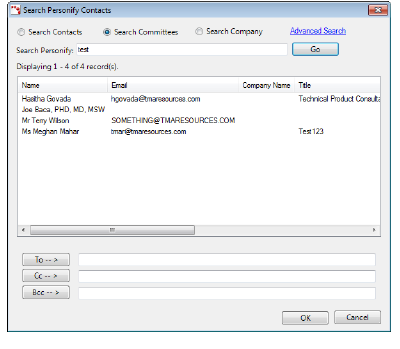
4. By
default, the Search Contacts radio button is selected.
If necessary, select the Search Committees or
Search Company radio button.
The search results display the same fields as when searching by contacts,
with the addition of the Committee field with searching for committees.
When
searching committees, if an individual serves on more than one committee
that is search on, that individual will be displayed more than once in
the search results.
5. If necessary, enter a different name into the Search Personify field and click Go.
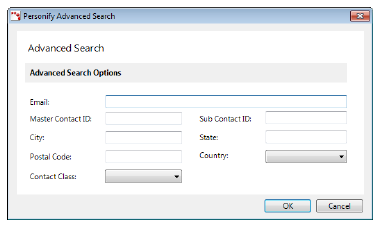
Click
the Advanced Search link to display
the Personify Advanced Search screen and narrow the search results further.
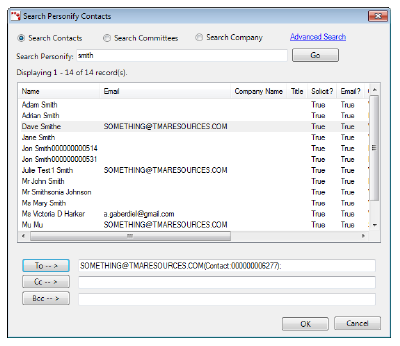
6. From
the search results grid, select the appropriate contact(s) and click the
To button.
If
you want to send an email to customers on a specific committee, click
the Committee column header to sort the customer by committee. You can
select multiple customers to add to the email by using the Ctrl key on
your keyboard.
The email address is
added to the field to the right.
If
one or more of the selected contacts do not have an email address in Personify,
only the contact(s) with an email address display in the field to the
right of the To button. Emails cannot be sent to Personify contacts who
do not have an email address in Personify.
7. To add a carbon-copy (Cc) or blind carbon-copy (Bcc) to an email, select the appropriate contact from the search results grid and click the appropriate button.
8. To add additional contacts to the email, repeat the above steps.
9. Click
OK.
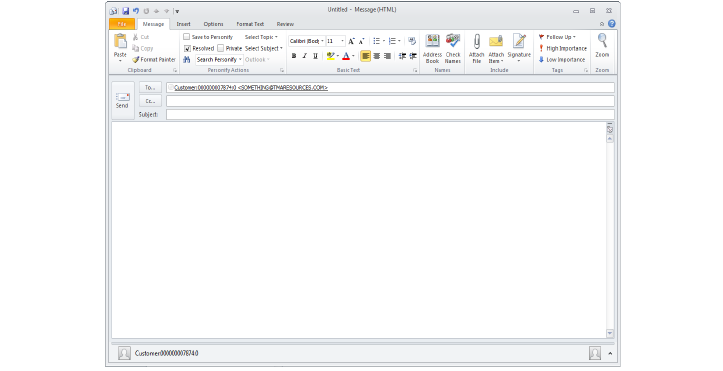
The Search Personify Customers screen closes and the Untitled new email
displays with the selected contact(s) email address(es) in the To, Cc,
or Bcc field. You can proceed to write and send your email from this point.
10. Depending on the defaults defined on the Personify Account Settings screen, the rest of the fields in the Personify Actions section can be updated as necessary:
For
more information on these defaults, please see Configuring
the Personify Outlook Plug-In.
a. To save this email to Personify, which creates a contact tracking record for the contact, select the Save to Personify checkbox.
Only
emails to contact’s with email address stored in Personify can be saved
to Personify as contact tracking records.
b. If the email does NOT require any attention after it has been sent, select the Resolved checkbox.
c. If
the email is private, select the Private
checkbox.
Selecting this checkbox will mark the email as “Private” in the Personify
Actions section. If the email is saved to Personify, selecting this checkbox
will mark the contact tracking record as “Private” in Personify and only
you and system administrators can see the contact tracking record in the
back office.
d. If necessary, select the Topic of the email from the drop-down.
e. If you selected a Topic, if necessary, select the Subject of the email from the drop-down.
f. The Staff Assigned defaults to the user entered during the configuration the account settings.
11. Click
Send.
If you selected the Save to Personify checkbox, the Contact Tracking screen
displays, as shown below. Perform the following additional steps:
![]()
a. Select
the Communication Method.
If you select to save the email to Personify as a contact tracking record,
this default value will be saved as the “Contact Type” in the Personify
contact tracking record created.
b. If
necessary, select the Save Communication
Method As a Default checkbox.
If you select this checkbox, the option you chose from the Communication
Method drop-down will be saved as the Outbound Communication Method default
on the Contact Tracking tab of the Personify Account Settings screen.
c. Click
OK.
A confirmation message displays, as shown below.
d. Click OK.
12. If
multiple contacts share the same e-mail address, the Select Contacts screen
displays, as shown below. Perform the following additional steps:

a. Select the contact(s) to create the contact tracking record for.
b. If necessary, select the Always create contact tracking items for individuals sharing the same email address checkbox.
If
you select this checkbox and you do not select any contacts from the grid
above, the plug-in will create a contact tracking record for ALL of the
contacts.
See Also: Identifying Emails to Personify Contacts in the Outlook 2010 Plug-In