The Currency Exchange Rate Maintenance screen displays, as shown below.
Before you can accept any foreign currency from members, you must create the currency codes for each currency your organization plans to accept and enter it in Personify. This allows you to create exchange rates for each to your base currency and map receipt types to the different currencies. Personify can not associate any receipt type or merchant ID with a currency unless the currency has a currency code associated with it in the application.
To create currency codes:
1. From
the Personify menu bar, select System
Admin > System Setup > Currency Setup.
The Currency Exchange Rate Maintenance screen displays.
2. Click
Create New.
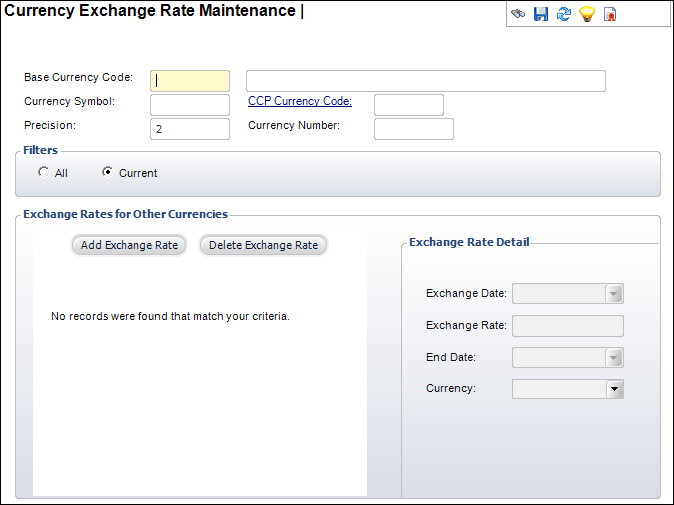
The Currency Exchange Rate Maintenance screen displays, as shown below.
3. In the Base Currency Code field, enter a currency code in the left field and a description of that currency in the right field.
 This
does not have to be your base currency; however, you do need to make sure
you create a currency code for your base currency. You also need to create
a currency code for every currency you want to accept from your organization’s
members.
This
does not have to be your base currency; however, you do need to make sure
you create a currency code for your base currency. You also need to create
a currency code for every currency you want to accept from your organization’s
members.
4. Using key codes, enter the Currency Symbol.
5. If
it exists, enter the currency’s Precision.
For example, you can break down a US dollar to the hundreth (.01) so the
currency precision is 2. Since you can not break down a Japanese Yen any
smaller than one yen, the currency precision is 0.
6. In the CCP Currency Code field, enter a currency code.
7. In the Currency Number field, enter the currency number.
8. Click Save.
9. Repeat steps 2-6 for each currency you want to accept from members making sure to include your base currency.
Only
your base currency shows other currencies and their exchange rates for
the base currency in the Exchange Rate for Other Currencies table.
10. To add a new exchange rate, complete the following steps:
a. Click
Add Exchange Rate under the Exchange
Rate for Other Currencies table.
A new row appears in the table.
b. From the available drop-down calendar, select the Exchange Date.
c. Enter the exchange rate in the Exchange Rate field.
d. Optionally, you can enter an End Date for the exchange rate.
e. Select the correct currency from the Currency drop-down.
f. Click Save.
11. To update an exchange rate for a currency code, add a new instance of the same currency code with a later Exchange Rate Date and new Exchange Rate and click Save.
Updating
an exchange rate by adding a new rate for the same currency code automatically
removes the previous exchange rate from the Current list once you reach
the new Exchange Rate Date. The new Exchange Rate Date enters in as the
End Date for the previous exchange rate.
If a user backdates a batch to a date associated with a previous exchange
rate, the system uses the exchange rate active on that date.
To
view only the current Exchange Rates for your association, select the
Current radio button in the Filters
section.
To view every exchange rate ever entered in the application, select the
All radio button in the Filters
section.
If
you update existing exchange rates while viewing only current rates, the
old exchange rates remain in the list until you click the All radio
button and click Current.