 The
server you install the Personify Web Service on must be outside the firewall.
The
server you install the Personify Web Service on must be outside the firewall.
The Personify Mobile Application Web Service is a Representational State Transfer (REST) service made using the Windows Communication Foundation (WCF). The Personify application introduced REST Services with version 7.3.1. The installation of the Personify Mobile REST Web Service is very similar to the Application, Customer, and Order Subsystem REST Services you or your organization may have already installed.
The
server you install the Personify Web Service on must be outside the firewall.
Before beginning the installation process, navigate to the following
file path and copy the appropriate version package folder to your server:
...\Personify\Releases\AddOn\Mobile
The Package folder contains a ReadMe file (PersonifyWcfServiceHost.deploy-readme). Open this file in a text editor and review it before proceeding.
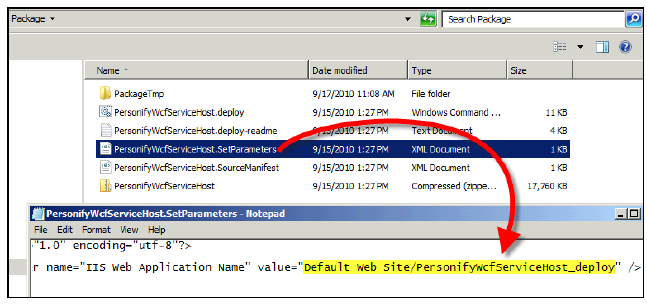
The Web Services Package installs your web services application under the name “PersonifyWcfServiceHost_deploy”.
If you would like to change the name of your application, open the PersonifyWcfServiceHost.SetParameters file in the ...\Personify\Releases\AddOn\Mobile folder, search for “IIS Web Application Name,” and modify the Default Web Site value attribute.
To install the Mobile Web Service:
1. Ensure
you have copied the following folder from the Personify release package
onto your server:
...\Personify\Mobile\WebService\Package.
2. Open the Command Prompt.
3. Make sure you have Administration privileges to the ...\Personify\Mobile\WebService\Package folder.
4. Access the Package folder located on your server.
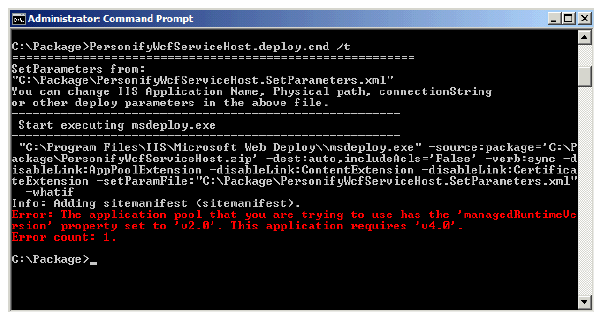
5. Type
the following command into the prompt and click Enter.
PersonifyWcfServiceHost.deploy.cmd
/t
Doing so will simulate the installation, but not actually deploy it. If
your application pool is not currently configured for .Net 4.0, you will
receive the following error message.
6. If you did not receive this error message, please proceed to step 7. If you did receive the error message above, follow these steps to reconfigure your application pool for .Net 4.0.
a. Open the IIS Manager.
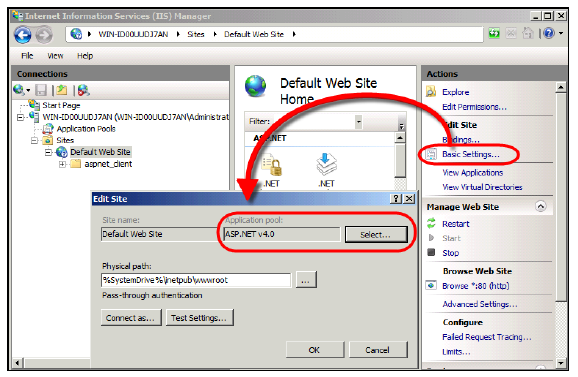
b. From
the IIS Manager, under Actions > Edit
Site, click Basic Settings.
The Edit Site screen displays.
c. Click
Select and select "ASP.NET
v4.0" from the list, as shown below.
d. Click OK to complete the configuration change.
e. Back
in the Command Prompt, re-simulate the installation by typing the same
code in as in Step 4:
PersonifyWcfServiceHost.deploy.cmd
/t
If no errors occur, you can proceed to the next step.
If errors do occur, determine the error code and contact your Customer
Service Representative.
7. Reset your IIS.
8. Open the Command Prompt again and navigate back to the ...\Personify\Mobile\WebService\Package folder on your server.
9. Type
the following command into the prompt and click Enter.
This command performs the REST Web Services installation.
PersonifyWcfServiceHost.deploy.cmd
/y
10. Refresh
your IIS Websites list.
The PersonifyWcfServiceHost_deploy connection, or the name you gave your
website, appears on the Connections list.