 As
of 7.4.0SP1, if your order contains multiple line items and one or more
of the line items is a cash FND product, the Receipt Entry screen will
display when you click Create New Receipt,
as shown below.
As
of 7.4.0SP1, if your order contains multiple line items and one or more
of the line items is a cash FND product, the Receipt Entry screen will
display when you click Create New Receipt,
as shown below.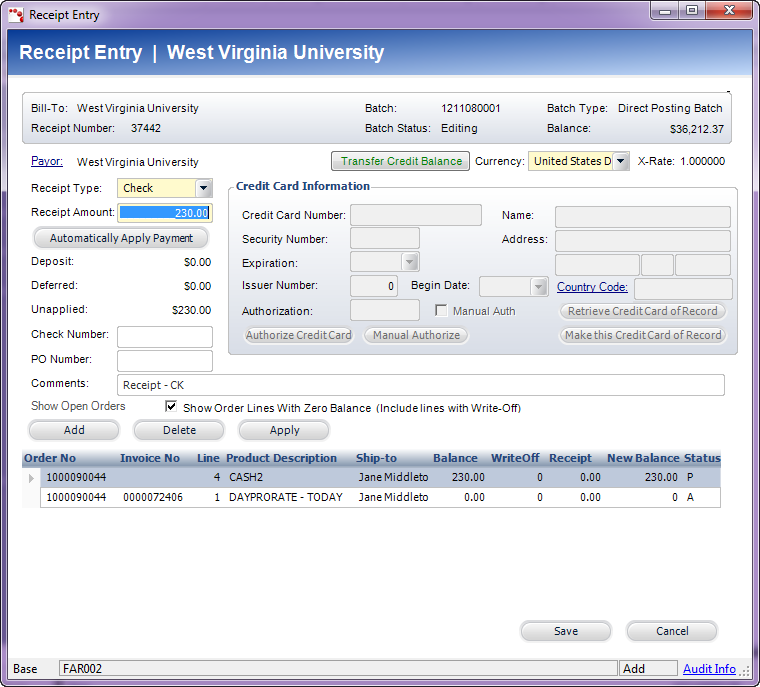
Once a membership product(s) has been added to the order and shipping information has been defined where necessary, a receipt for the order should be created in order to activate the order. A partial or full payment can be made towards the order or, if necessary, a payment schedule can be setup to automatically charge a credit card or debit an electronic fund on a set schedule.
To create a receipt for a membership order:
1. Access the Step 3: Payment Information tab.
If a batch is not currently open, you are prompted to open a batch for
processing. Click “Yes” and select the batch from the list.
2. Click Create New Receipt.
As
of 7.4.0SP1, if your order contains multiple line items and one or more
of the line items is a cash FND product, the Receipt Entry screen will
display when you click Create New Receipt,
as shown below.
If
applicable, to view any unapplied receipts or credit balances for the
bill-to customer and apply the amount(s) available to the order, click
Transfer Credit Balance. Only posted receipts will display.
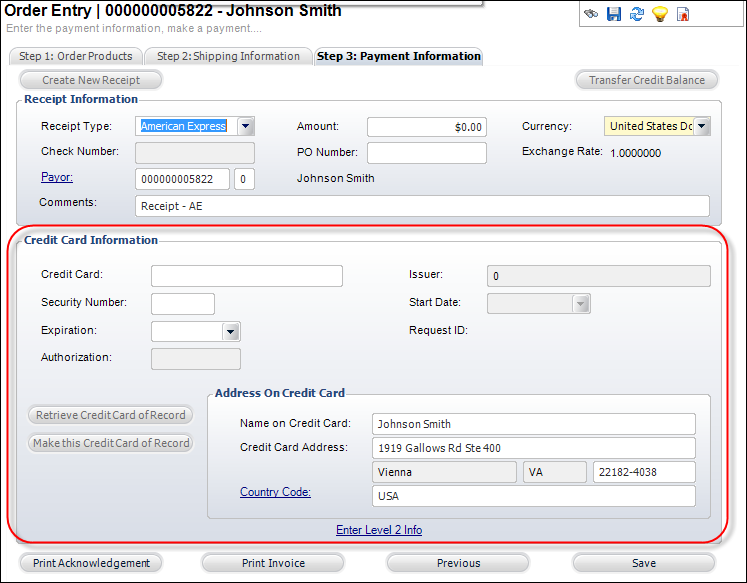
3. From the Receipt
Information section (highlighted below), enter the appropriate information:

a. Select the Receipt
Type from the drop-down.
Available receipt type options are defined for the org unit of the logged
in user. For more information, please see Defining
Organization Unit Receipt Types and Cash Accounts.
b. The Amount defaults to the Order Balance. Change this, if necessary.
c. Change the Currency,
if necessary.
Please note that changing the Currency may result in a change to the Amount.
d. If you selected “Check”, enter the Check Number.
e. If you selected “Check” or “Cash”, enter the PO Number.
f. If the Payor
is different from the bill-to customer, click the link and search for
a payor.
The payor is the individual, customer, company, or committee who pays for
the order, who may not necessarily be the customer.
If
the bill-to customer is changed on the Step 2: Shipping Information tab,
the Payor is changed automatically.
g. Enter any Comments as necessary.
4. If a credit card
was selected as the Receipt Type, enter payment information in the Credit
Card Information section (highlighted below):
a. Verify that the appropriate credit card is selected as the Receipt Type in the Receipt Information section above.
Alternatively,
if credit card information is on file for the customer, click Retrieve
Credit Card of Record to automatically populated the appropriate information.
b. Enter the Credit Card number.
c. Enter the Issuer.
d. Enter the Security Number. This number is typically three digits and is located on the back of the credit card.
e. Select the Start Date and Expiration date from the drop-downs.
f. Enter the Authorization number.
g. Verify the Address on Credit Card is correct. If not, then modify it.
If
you would like to save the credit card information on record for future
use, click the Make this Credit Card of Record.
5. Click Save.
A message is displayed that the payment has been applied to the order and
the order becomes Active.