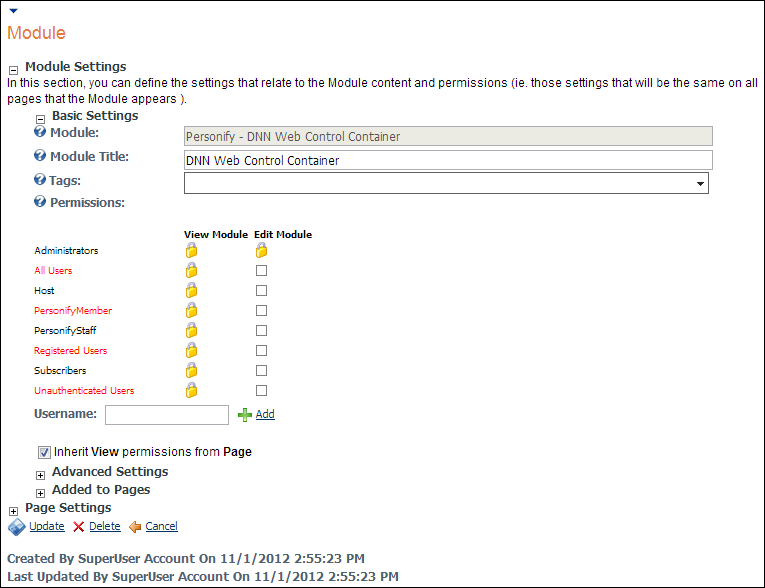
The Module Settings screen displays, as shown below. Use this page to edit the module's current settings.
After a module is added to a page (see Installing .NET Web Controls for more information), you have multiple options and settings you can configure.
· Edit Web Control Container: this option allows you to install a web control container or new DNN web control container on your site (see Installing .NET Web Controls for more information).
· Help: this link navigates you to the help page for this module if the help page is setup.
· View Source: this allows you to view and edit the source files for a module.
· Settings: this link take you to the Module Settings page. Use this page to edit the module's current settings. See Configuring the Module Settings for more information.
To configure the module settings:
1. Log into your site as host.
2. Navigate to the page on your website with the DNN web control container that you wish to edit.
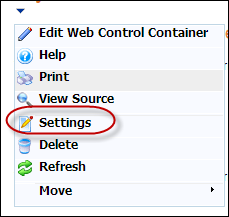
3. Select
the Settings option from the downward
arrow icon, as highlighted below.
The Module Settings screen displays, as shown below. Use this page to edit
the module's current settings.
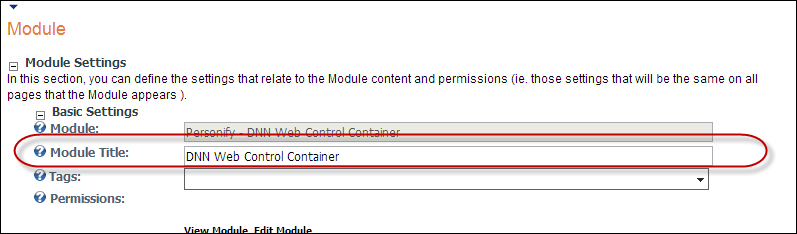
a. Rename
the DNN Web Control Container title
in the Module Title field, as
highlighted below.
b. Delete: this link allows you to delete the current module. A dialogue box appears asking you to confirm the operation before deleting the page.
c. Refresh: this link refreshes your module to reflect the most recent changes.
d. Move: this option allows you to move the web module on the page.
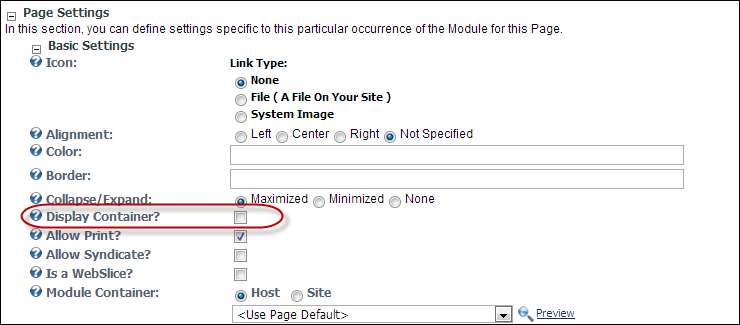
To hide the module container in order to remove unwanted space on your page:
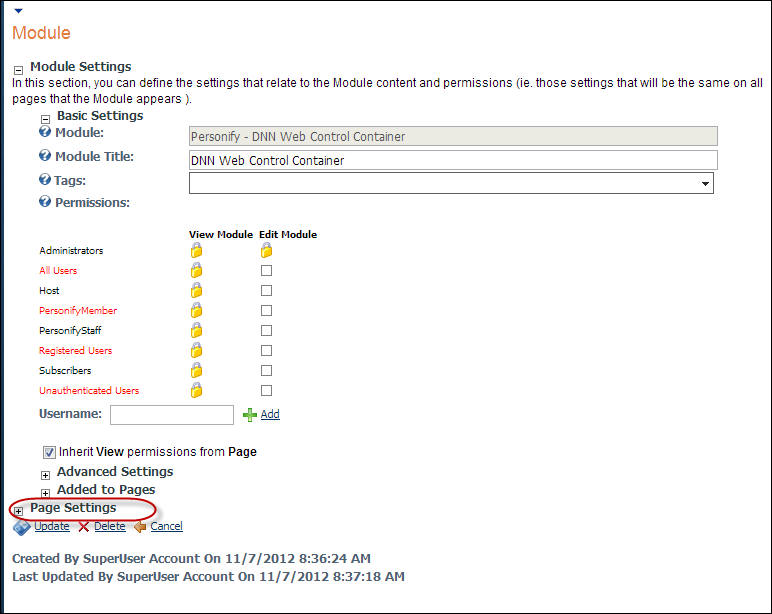
1. In the Module Settings section, expand the Page Settings options, as highlighted
below.
2. Uncheck
the Display Container? checkbox,
as highlighted below.
3. Click Update.