 For
CMS’s other than DotNetNuke, the client will have to customize the LoginRequestControl
module to log the user into the respective CMS.
The DNN Web Site can be configured to use the new Dot Net control for customer registration. This can be achieved by dropping the Personify.WebControls.Common.UI.Registration control on the Register Page of your web site. In addition to the Registration Control, the page should also have the LoginRequestControl. The Login Request Control is actually responsible for logging the user into the DNN Web Site.
 For
CMS’s other than DotNetNuke, the client will have to customize the LoginRequestControl
module to log the user into the respective CMS.
 Follow
the instructions in the order mentioned below.
This control needs to be dropped on a web page. It is up to each client to determine the appropriate location of this page. The section below details how to set up the control on your website. The instructions are intended for a user with web admin/host privileges.
To configure the New Customer Registration control:
1. Log into your e-Business site as host.
2. Create
a new page on your site to add the control.
See Adding and Managing Pages for
information on how to add a page to your website.
3. Add
the Personify- DNN Web Control Container
module to the page.
See Installing .NET Controls
for more information.
4. Select
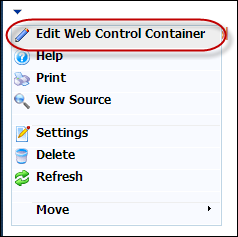
the Edit Web Control Container option from the downward arrow icon,
as highlighted below.
The Select A Web Control window displays.
5. From
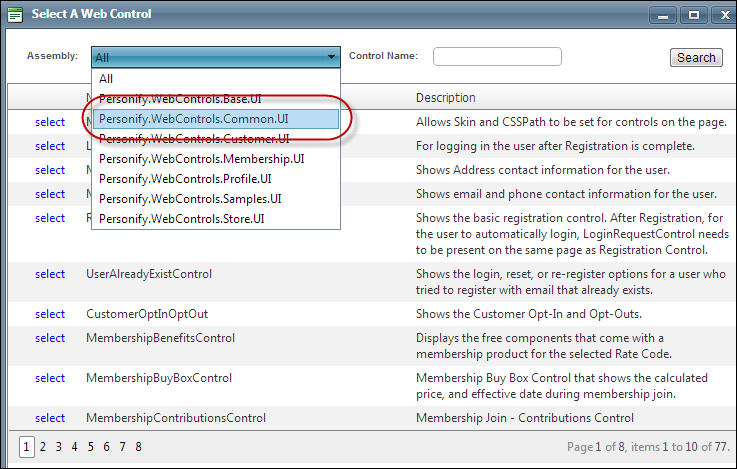
the Assembly drop-down, select "Personify.WebControls.Common.UI ",
as highlighted below.
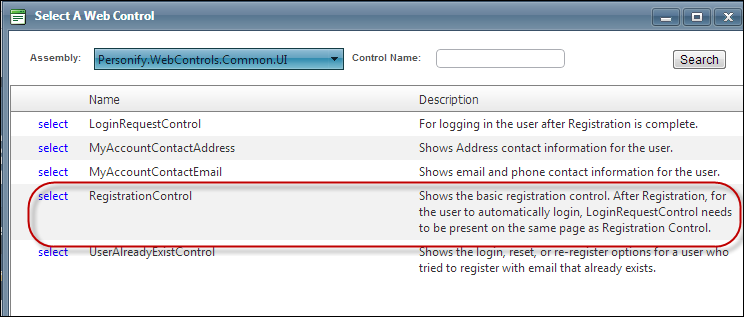
6. In the Control Name field, enter "RegistrationControl" and click Search.
7. Click Select next to the "RegistrationControl",
as highlighted below.
8. The
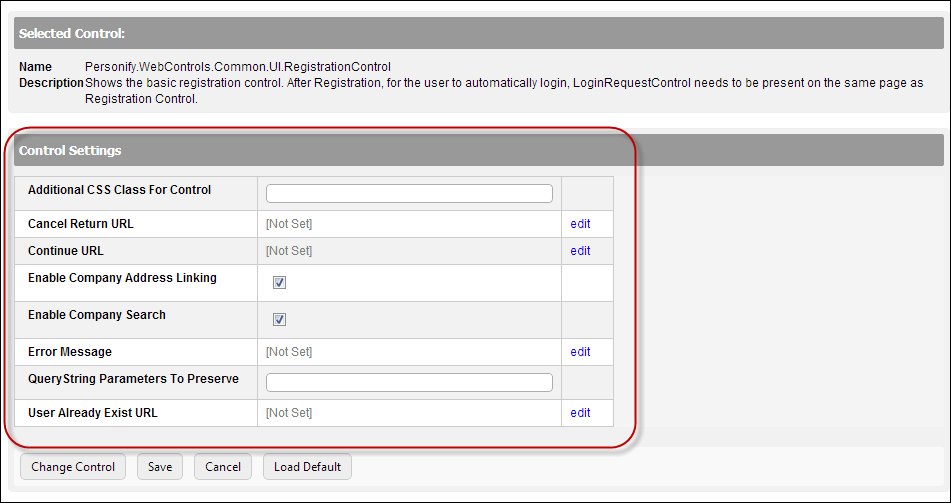
Control Settings for this control display, as highlighted below.
9. In
the Additional CSS Class for Control
field, enter the CSS class, if necessary.
This option allows you to add additional layout to the skin by developing
a new DOTNETNUKE style, which requires an advanced understanding of HTML
and CSS. See Using Skins for more information.
10. From
the Cancel Return URL line, click
edit.
The Select/Edit Personify Web Parameter screen displays.
a. Click
the select link next to the appropriate PWF parameter.
You should set the PWF parameter to a
value that will take the constituent to that URL in DNN when he/she selects
"Cancel".
b. If this PWF Parameter does not exist or you would like to create a new one, see Setting up PWF Parameters for more information.
11. From
the Continue URL line, click edit.
The Select/Edit Personify Web Parameter screen displays.
a. Click
the select link next to the appropriate PWF parameter.
You should set the PWF parameter to a value that will take the user to
the URL in DNN when his/her registration is complete.
b. If this PWF Parameter does not exist or you would like to create a new one, see Setting up PWF Parameters for more information.
12. Check
the Enable Company Address Linking
checkbox.
When checked, will allow users link his/her address to a company address
from the records you created in the back office.
13. Check
the Enable Company Search checkbox.
When checked, will allow users to search
for his/her work address from the records you created in the back office.
14. Optional: select or create a new Error Message.
a. If left blank and the "PersonifyErrorMessage" do not return a result, the default error message, "An error occurred while performing [Insert Action]. If the problem persists, please contact the site administrator", will display. [Insert Action] will be substituted with the action the control was performing at the time of the error.
b. If you wish to change the default error message, customize it with a PWF Parameter. See Setting up PWF Parameters for more information.
15. In
the QueryString Parameters to Preserve
field, enter "ProductID, RateCode".
This is the default name of the parameter to read the product’s ID, but
if the environment's redirection logic uses a different Query String name
set it here.
If this PWF Parameter does not exist or you would like to create a new
one, see Setting up PWF Parameters for
more information.
16. From
the User Already Exists URL line,
click edit.
The Select/Edit Personify Web Parameter
screen displays.
a. Click
the select link next to the appropriate PWF parameter.
You should set the PWF parameter to a
value that will take the user to the URL in DNN if his/her email address
entered in the first step of registration process is already in the system.
This page should hold the control – Personify.WebControls.Common.UI.UserAlreadyExistsControl.
b. If this PWF Parameter does not exist or you would like to create a new one, see Setting up PWF Parameters for more information.
17. Click Save.
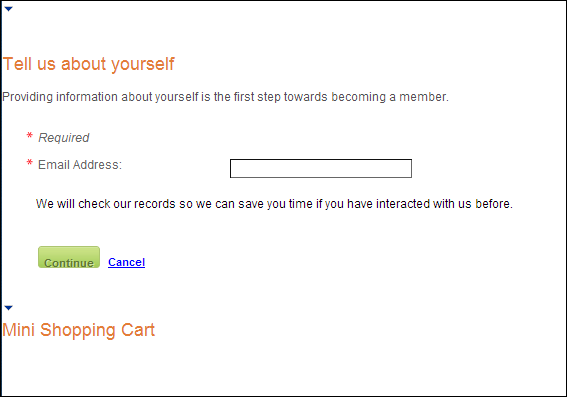
18. Navigate
to the same page that has the Registration control, as shown below.
19. Add
the Personify- DNN Web Control Container module to this page after the
Registration control.
See Installing .NET Web Controls
for more information.
20. Select
the Edit Web Control Container option from the downward arrow icon,
as highlighted below.

The Select A Web Control window displays.
21. From
the Assembly drop-down, select "Personify.WebControls.Common.UI ",
as highlighted below.

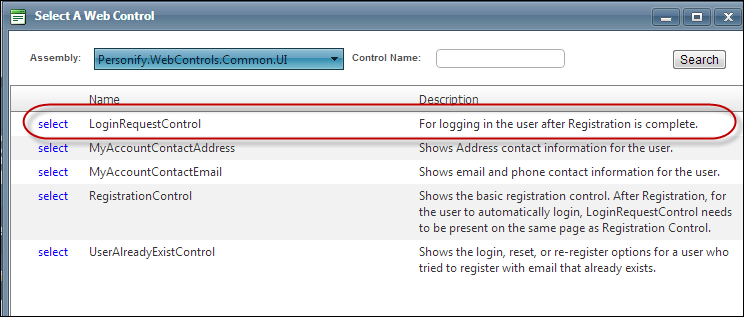
22. In the Control Name field, enter "LoginRequestControl" and click Search.
23. Click
Select next to the "LoginRequestControl",
as highlighted below.
24. The
Control Settings for this control display, as highlighted below.
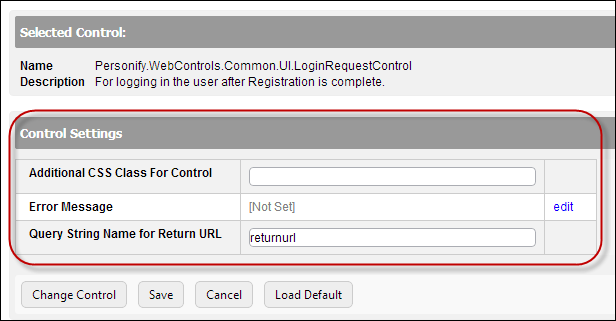
25. Optional:
in the Additional CSS Class for Control
field, enter the CSS class.
This option allows you to add additional layout to the skin by developing
a new DOTNETNUKE style, which requires an advanced understanding of HTML
and CSS. See Using Skins for more information.
26. Optional: select or create a new Error Message.
a. If left blank and the "PersonifyErrorMessage" do not return a result, the default error message, "An error occurred while performing [Insert Action]. If the problem persists, please contact the site administrator", will display. [Insert Action] will be substituted with the action the control was performing at the time of the error.
b. If you wish to change the default error message, customize it with a PWF Parameter. See Setting up PWF Parameters for more information.
27. In
the Query String Name for Return URL
field, enter "returnURL".
This is the default name of the parameter. However, if the environment's
redirection logic uses a different direct Query String name, enter it
here. See Setting up PWF
Parameters for more information.
28. Click Save.
29. Create
a new page on your website called Redirect Customer.
See Adding and Managing Pages for
information on how to add a page to your website.
30. Do NOT drop any modules on this page.
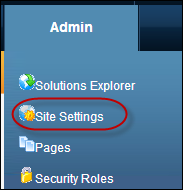
31. From
the menu bar, select Admin>Site Settings,
as highlighted below.
32. Alternatively,
from the menu bar, select Admin,
as highlighted below.

The Portal Administration page displays, as shown below.
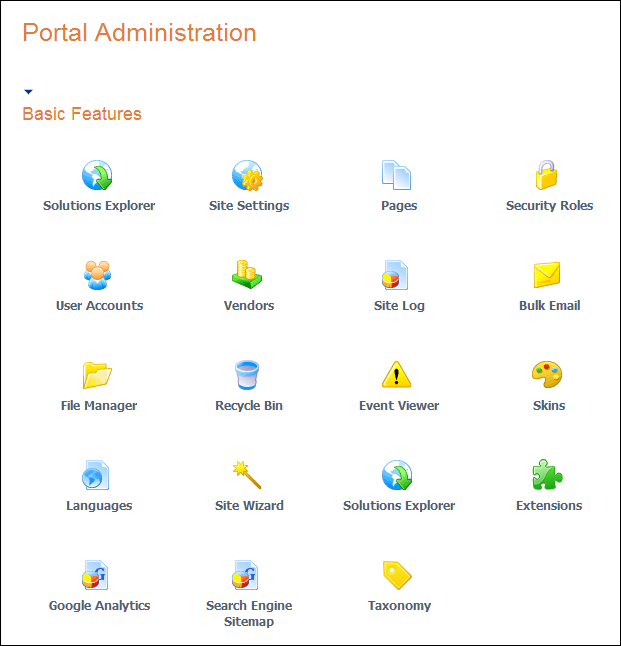
33. Click
on the Site Settings icon, as
displayed below.
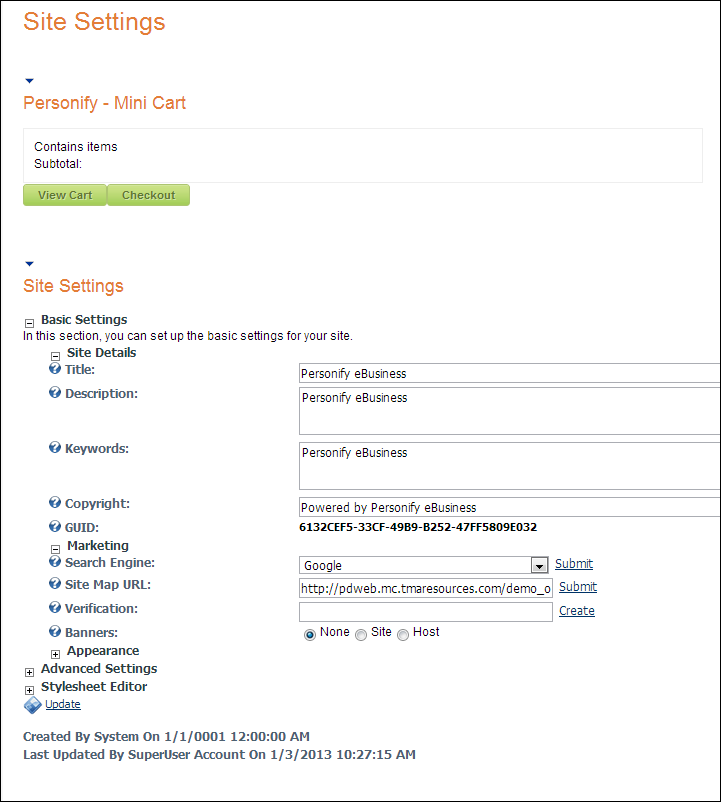
34. The
Site Settings window displays, as shown below.
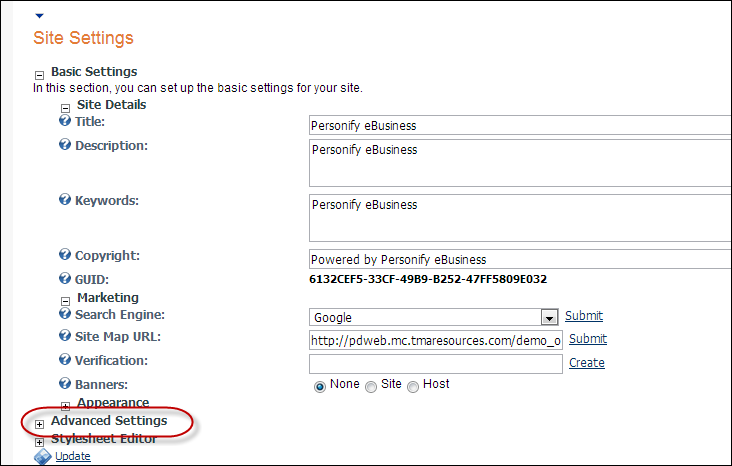
35. Expand
the Advanced Settings options,
as highlighted below.
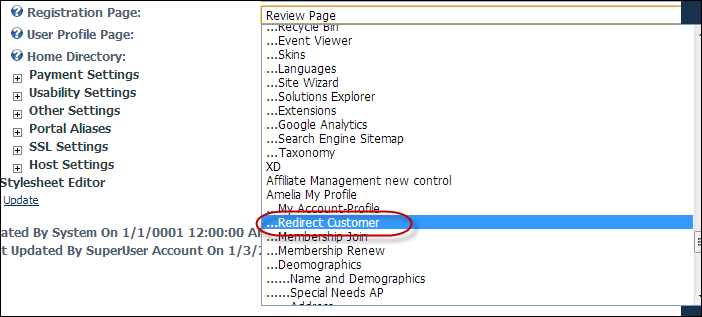
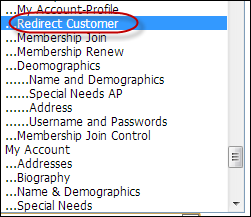
36. From
the Registration Page field, set
this field to the Redirect Customer page, as highlighted below.
37. Navigate to the page on your website where the Loging control is located and complete the following for each page on your website that has the Loging control on it:
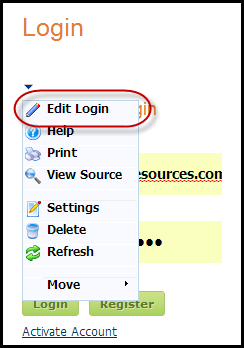
a. Select
the Edit Login option from the
downward arrow icon, as highlighted below.
The Login window displays, as shown below.
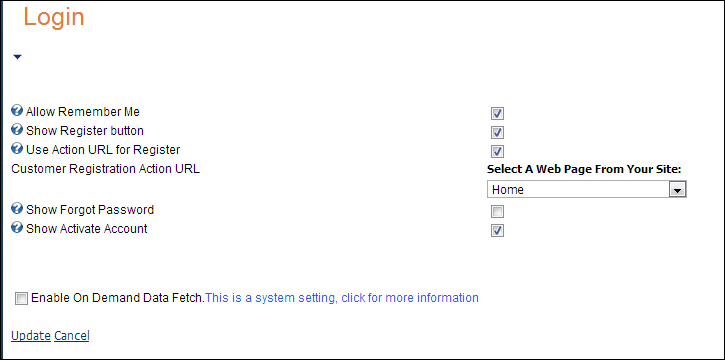
b. From
the Customer Registration Action URL
drop-down, select the Redirect Customer page, as highlighted below.
c. Click Update.
 Make
sure to repeat the above steps for every page that has the Login control
on it.
38. Navigate to the Redirect Customer page.
39. In
the Mode section, select the Edit
radio button, as highlighted below (see Using the Personify e-Business
Control Panel for more information about the functionality of the Mode
radio buttons).

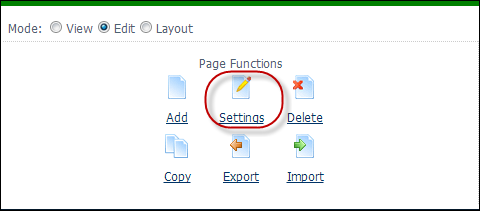
40. From
the In the Page Functions section, select Settings,
as highlighted below.
The Page Settings screen displays, as shown below.
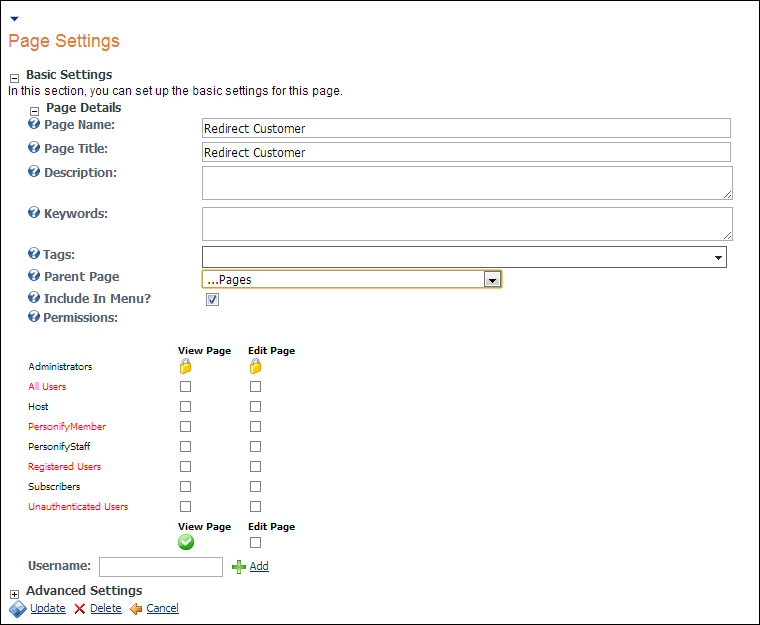
41. Expand the Advanced Settings option.
42. From
the Link URL field, select the Page (A
Page on Your Site) radio button, as highlighted below.

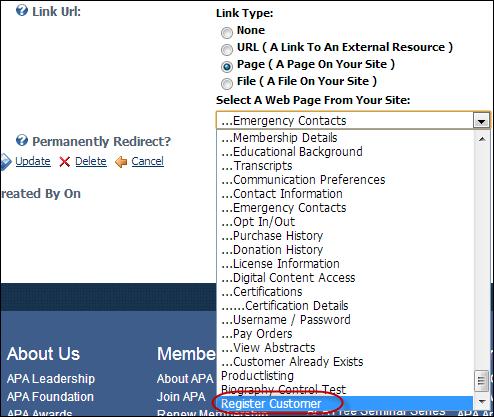
The Select A Web Page From Your Site drop-down displays.
43. From
the Select A Web Page From Your Site
drop-down, select the Register Customer page, as highlighted below.
44. Click Update.
 This
implementation works fine in Chrome and Firefox. In Internet Explorer,
the Registration Module throws a javascript error. The issue is in the
way DNN calls the registration page when the user clicks on the Register
Link on the web site. See Technical
Details of DotNetNuke Error for more information.
 The
interim Redirect page is a work around to avoid this error and this page
will redirect the user to the Registration Page.
When a user clicks on the Register link the on Default.aspx, the download of associated javascript files are failing. This appears to be the primary cause of the issue.
Content type of the highlighted request should ideally be "text/javascript"
instead of "text/html", as highlighted below.

The following describes why a browser generate the errors displayed
in the image below:

· Root
cause of this behavior lies in the request URL :
http://localhost/DEMO_OLS/MyAccount/RegisterCustomer/tabid/356/HttpCombiner.axd?s=Personify.WebControls.Base-*-c*-_Personify.WebControls.Base.JS.*-_crequireJQuery.js_-_cjquery.gritter.min.js_-_cjson2.js_-_cjquery.ba-bbq.min.js_-_cmanager.js&t=text/javascript&v=634927963344970000
· Highlighted
segments fools DNN into serving HTML markup for Registration control,
instead of javascript content. There are several areas within the web
application where a request does not contain these segments (e.g., click
"Store’" tab menu).
http://localhost/DEMO_OLS/HttpCombiner.axd?s=Personify.WebControls.Base-*-k*-_Personify.WebControls.Base.JS.*-_krequireJQuery.js_-_kjquery.gritter.min.js_-_kjson2.js_-_kjquery.ba-bbq.min.js_-_kmanager.js-*-Personify.WebControls.Store-*-k*-_Personify.WebControls.Store.JS.*-_ksearchcontrol.js_-_kpersonifyPager.js_-_kproductlistcontrol.js_-_knavigationbar.js_-_kbreadcrumb.js&t=text/javascript&v=634921268991627563
· The URL is auto-generated by DNN. cmdRegister_Click event handler invokes DotNetNuke.Common.Globals.NavigateURL() to generate redirect URL. We have to configure DNN to use localhost/DEMO_OLS/MyAccount/RegisterCustomer.aspx instead of localhost/DEMO_OLS/MyAccount/RegisterCustomer/tabid/356/Default.aspx.