A taskbar displays, as shown below.
Data Analyzer lets you schedule reports in the My Reports portal. This feature lets you schedule a date and time for a report to be refreshed and then sent.
The following procedure assumes that you have logged into Data Analyzer from the Personify application and have an open My Reports portal window.
To schedule a report:
1. Open the list of Webi documents from the left-side navigation window.
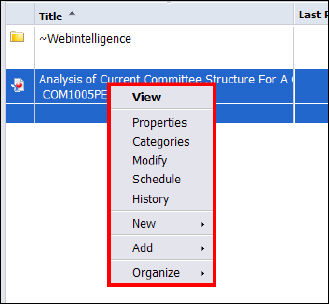
2. Right-click
the report.
A taskbar displays, as shown below.
3. Select
Schedule.
The Schedule page displays, as shown below.
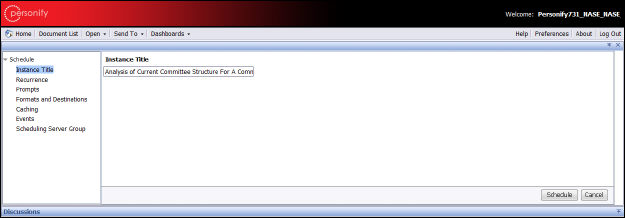
4. From the Schedule task pane, click Recurrence.
5. From
the Run object drop-down, select the desired frequency you want the report
to run.

 There are
nine options in the Run object menu; once you select your frequency,
scheduler information appears below. The content changes depending on
your frequency. For example, if you select Daily, you can set how many
days the report is run and the range of dates.
There are
nine options in the Run object menu; once you select your frequency,
scheduler information appears below. The content changes depending on
your frequency. For example, if you select Daily, you can set how many
days the report is run and the range of dates.
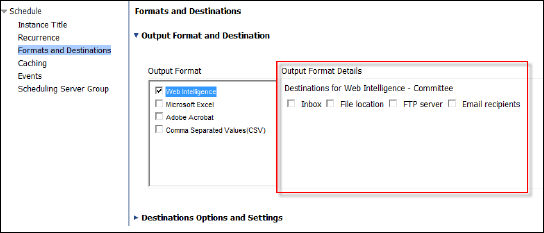
6. From the Schedule task pane, click Formats and Destinations.
7. Select
the Output Format.
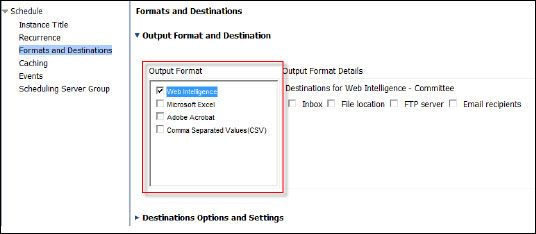
8. Select
the Output Format Details.
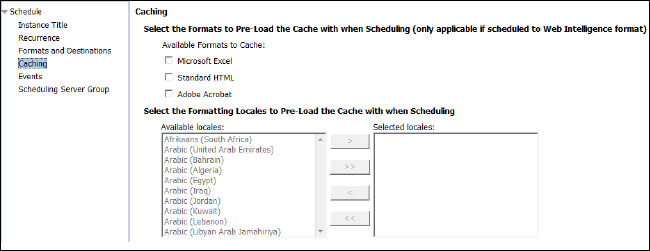
9. From the Schedule task pane, click Caching.
10. Select
the caching format as well as the formatting locales to use during Scheduling.
This lets you determine which file formats (Excel spreadsheet, word document,
etc.) and language to be available during scheduling. If selected, these
are pre-loaded for use during scheduling.
11. From the Schedule task pane, click Events.
12. Select
any available events or schedule events to wait for or trigger upon completion.
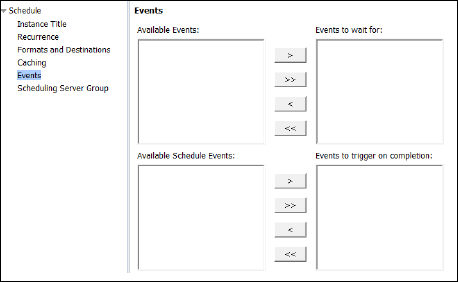
This tells
the My Reports portal whether to wait for events to become available or
for them to be forced upon completion.
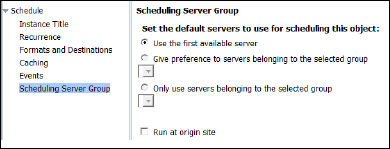
13. From the Schedule task pane, click Scheduling Server Group.
14. Select
default servers for scheduling your report.
15. Click
Schedule at the bottom right of the window.

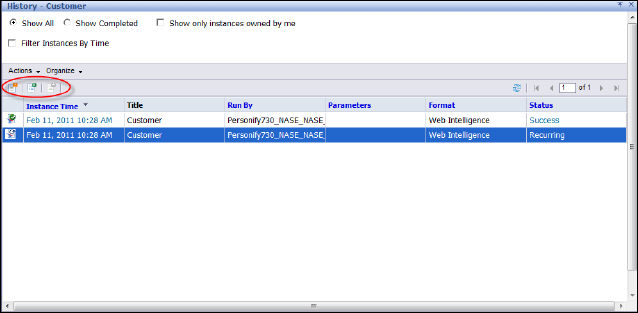
Once you have scheduled a report, it appears in the History window (which
you can later access from the Webi documents folder, next to the Schedule
link). The History window displays information such as the scheduled report,
any parameters, its format, and current status. By selecting the desired
report, you can pause/resume or delete the scheduled report.
Using delete
only cancels the scheduled generation of the report and not the report
itself.