The Quick Pay screen displays, as shown below.
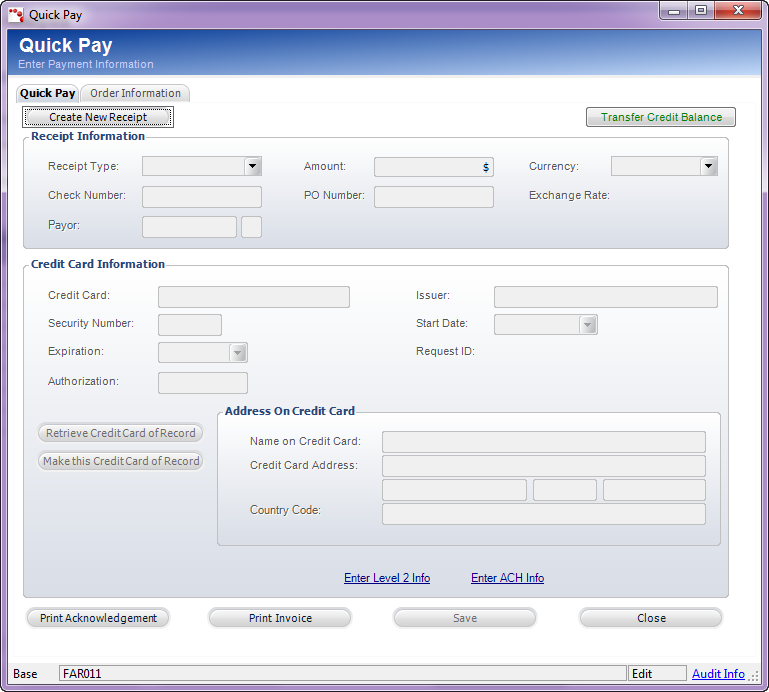
The Quick Pay screen can be accessed across multiple subsystems, using multiple screens. This is simply a quick way to enter payment information for an order. For example, from the Customer Financial Analysis screen, you can click Pay Selected Order and enter payment information for the selected order.
You can enter payment information quickly on the Quick Pay tab and view order information on the Order Information tab.
To pay the selected order:
1. From the Customer Financial Analysis
screen, select the appropriate line item from the Order and Transaction
Analysis tab and click Pay Selected Order.
The Quick Pay screen displays, as shown below.
2. On
the Quick Pay screen, click Create New Receipt.
The fields are now active.
3. Select the Receipt Type from the drop-down. There are three main options for receipt type:
· Check – enter the Check Number or PO Number.
· Cash – enter the PO Number, if necessary.
· Credit Card – see step 5 below.
4. Enter the Amount is correct.
5. Enter the Payor or click the link and search for a payor. The payor is the individual, customer, company, or committee who pays for the order, who may not necessarily be the customer.
6. To enter a payment with a credit card, perform the following:
a. Enter the Credit Card number.
b. Enter the Issuer.
c. Enter the Security Number. This number is typically three digits and is located on the back of the credit card.
d. Select the Start Date and Expiration date from the drop-downs.
e. Enter the Authorization number.
f. Verify the address on the credit card is correct. If not, then modify it.
7. If necessary, click Transfer Credit Balance to view any unapplied receipts or credit balances for the bill-to customer (only posted receipts will display).