 The
Workflow Designer does not currently allow you to create workflows that
deal with the buttons associated with a Search page or the tasks on the
left-side toolbox of Personify screens.
The
Workflow Designer does not currently allow you to create workflows that
deal with the buttons associated with a Search page or the tasks on the
left-side toolbox of Personify screens.
· Entire Application Form or Web Form
· Single
Page within a Form
(as part of a PageGroup or TabControl)
· Single Control on a Form
· Button
· CaptionLabel***
· CheckBox
· ComboBox
· DatePicker
· GroupBox***
· LinkLabel
· Label***
· Panel***
· Text Box
· UpDown
· Web Browser
The
Workflow Designer does not currently allow you to create workflows that
deal with the buttons associated with a Search page or the tasks on the
left-side toolbox of Personify screens.
To enable elements for workflows:
1. Open the form you plan to create a workflow for via its appropriate tool (Application Designer/Web Forms Designer).
2. Select
an element related to the workflow you will create.
When selected, the properties of that page/form/control display on the
right including the Workflow properties.
The Workflow properties display last in the Properties list.
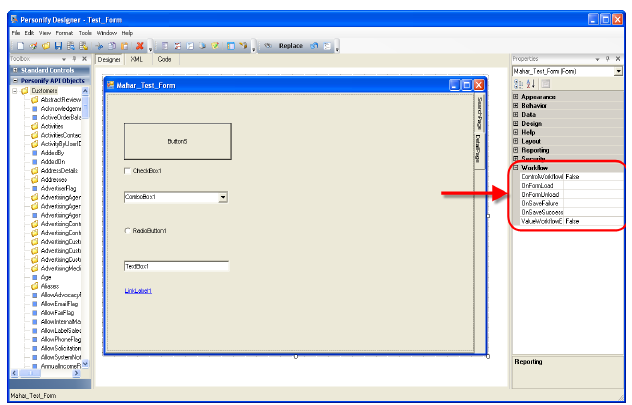
3. For
all elements you would like to author a Decision rule against when creating
a workflow in the Designer, set ValueWorkflowEnable to “True.”
For example, if as part of your workflow you want to set a Decision rule
to say “If CustomerType=Student,” then on your form you would give the
CustomerType drop-down’s ValueWorkflowEnable a value of “True.”
4. For
all elements you want an action to occur against as part of the workflow
created, set ControlWorkflowEnable to “True.”
This property determines whether or not the control name shows up in the
drop-down list of controls available to take an action on within the Workflow
Designer. For example, if you would like the School Info page to display
only when a user selects “Student” from the Customer Type drop-down, then
on your form you would give the School Info page’s ControlWorkflowEnable
a value of “True.”
5. Check to ensure you enabled all elements necessary.
6. Save the form.