 Access
points can also be defined using the Security Group Maintenance screen.
See Defining Security Groups
for more information.
Access
points can also be defined using the Security Group Maintenance screen.
See Defining Security Groups
for more information.
Access points are used to restrict the ability of users to view and/or edit specific fields within a screen. When you define an access point and associate it with one or more fields within a screen, only security groups that are granted access to that access point will be able to view and/or edit those fields.
Certain batch and credit card access point permissions are initially delivered, but you can modify these permissions. The permissions initially delivered with Personify are described in Access Point Permissions.
The access point must first be set up in the Access Point Maintenance screen. Then, using the Application Designer, the fields (or other controls) must be linked to the access point.
Access
points can also be defined using the Security Group Maintenance screen.
See Defining Security Groups
for more information.
To define access points:
1. From the Security Central screen, click Maintain Access Points.
2. Click
Create New Access Point.
The Access Point Maintenance screen displays, as shown below.
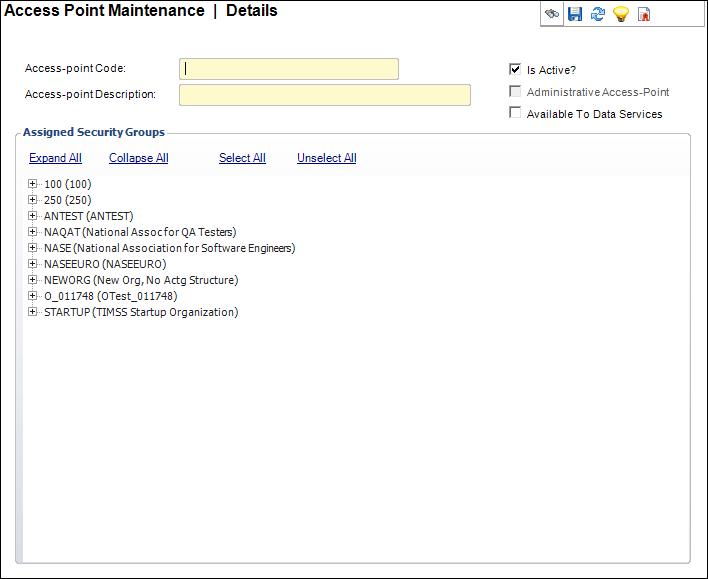
3. Enter the Access-point Code.
4. Enter the Access-point Description.
5. If necessary, check the Is Active? checkbox.
6. In
the Assigned Security Groups section, a list of security groups displays.
Click the + next to the appropriate
security group to expand it. Double-click the security group you want
to have access to the access point.
The red X changes to a green checkmark.
7. Click Save.
8. After you have created an access point, you can link that access point to a screen.
Screen Element |
Description |
|---|---|
Access Point Code |
Text box. A unique access point code. The code should be intuitive, such as VIEWSSN for an access point for viewing a social security number. |
Access Point Description |
Text box. A description of the access point code. |
Is Active? |
Checkbox. When checked, indicates the access point is active. |
Administrative Access-Point? |
Read-only checkbox. When checked, indicates the user performs administrator tasks and should have administrator rights. The properties of an administrator include being a super user, has access to Application Designer and Database Designer, can publish screens, can use debug tools, and has permission to admin screens and access points. |
Available To Data Services |
Checkbox. Indicates weather this Access-point will be available to use with Personify Data Services. When an access-point is assigned to an element using the Personify Web Services Designer, that element can be consumed via Data Services by the users only who has permission to that Access-point. |