 If
the report file does not upload, verify the server configuration report
upload path is set properly in the Personify installation database.
If
the report file does not upload, verify the server configuration report
upload path is set properly in the Personify installation database.
Using this screen, you can upload a report file to the Business Objects server. The system stores the report file in a certain folder (Online Report, TRS Report, Custom Report, Base Report) based on the report and type options selected here, so be careful when selecting these options so the report file is stored in the correct location. Also, this report will overwrite an existing report if the files have the same name, so verify the file name is different before uploading.
If
the report file does not upload, verify the server configuration report
upload path is set properly in the Personify installation database.
To upload the report file:
1. On
the Reports Maintenance screen, click Upload
Report File from the TRS Application Setup task category.
The Report and Other Setups screen displays, as shown below.
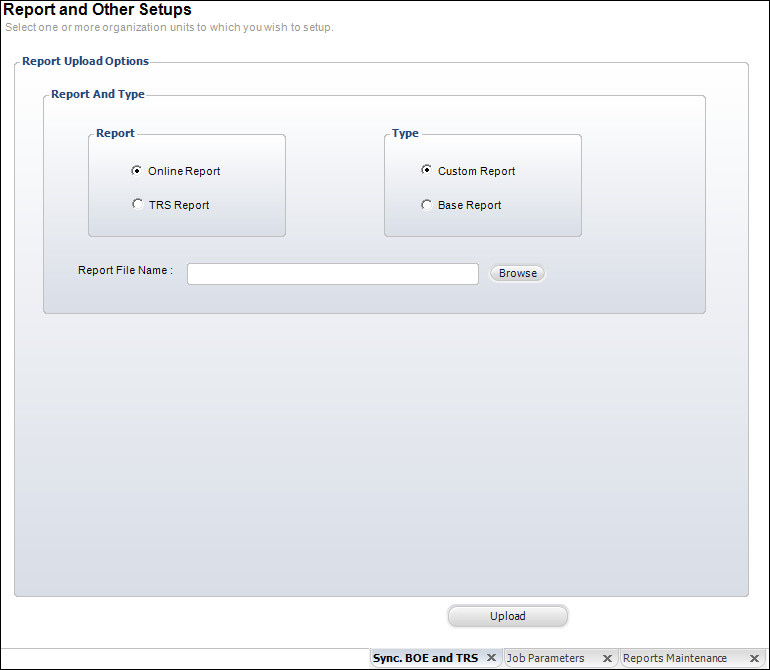
2. Select whether the report to be uploaded is an Online Report or a TRS Report.
3. Select whether the report type is a Custom Report or a Base Report.
4. Click Browse and search for the report to be uploaded.
5. Click
Upload to upload the report
into the Business Objects server.
This activity may take less than a minute and a pop-up window displays
informing you of the report upload status.
Screen Element |
Description |
|---|---|
Online Report |
Radio button. Select if the report you want to upload is an online report. |
TRS Report |
Radio button. Select if the report you want to upload is a TRS batch report. |
Custom Report |
Radio button. Select if the report you want to upload is a custom report. |
Base Report |
Radio button. Select if the report you want to upload is a base report. |
Report File Name |
Text box. Click Browse to search for the report you want to upload. |
Upload |
Button. When clicked, the report is uploaded to the Business Objects server. This activity may take less than a minute and a pop-up window displays informing you of the report upload status. |