Scheduling a Report job
The Job Scheduling screen lets you set up jobs to be
run automatically. For example, the credit card processing settlement
process must be run at the end of the day.
 If
you want to schedule a report job to run with the previous month's data,
use the Advanced filter on the Job Submission screen to select transaction
dates for the previous month. The SQL statement written would have logic
to take the current date and get (month – 1, last day). The report parameter
for End Date would be a date into the future and would not need to be
changed.
If
you want to schedule a report job to run with the previous month's data,
use the Advanced filter on the Job Submission screen to select transaction
dates for the previous month. The SQL statement written would have logic
to take the current date and get (month – 1, last day). The report parameter
for End Date would be a date into the future and would not need to be
changed.
To create a new reporting schedule setup:
1. From
the toolbar, select Reporting >
Job Scheduling.
2. Click Create New.
The TRS Report Chooser displays.
3. Search
for the appropriate Application and select it.
The Generic Chooser displays.
4. Select
the appropriate Setup Code for
the report.
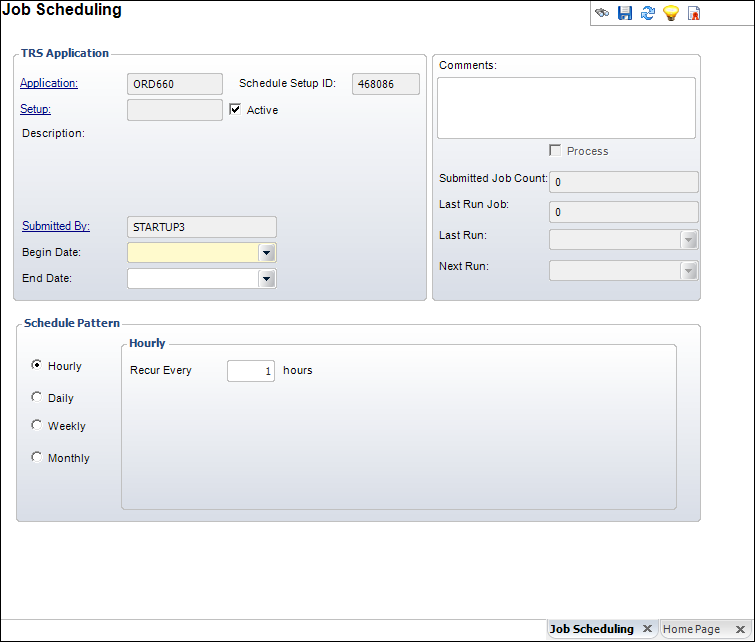
The Job Scheduling screen displays with the TRS Application information
populated, as shown below.
5. Select
the Begin Date from the drop-down.
The
Begin Date and End Date allow you to specify the exact date and time when
jobs are either processed or no longer processed. An End Date is not required
as you can specify the recurrence of the schedule pattern.
6. Select
the End Date from the drop-down.
7. If
necessary, check the Active checkbox.
If
the information you specify in this screen is not applicable for a period
of time but you want to retain the information for future purposes, you
can deselect the Active checkbox to indicate that the schedule is not
applicable.
8. Enter
any comments in the Comments section.
9. Select
the Schedule Pattern for how often
the job should be run.
The corresponding fields change depending on the radio button selected.
10. Click
Save.
Screen Element |
Description |
TRS Application |
Application |
Link.
The abbreviation and numerical representation of the name of the
report/process application. |
Setup |
Link.
The abbreviation and numerical definition for the user-defined
report/process setup. |
Description |
Read-only.
The description of the Setup Code selected. |
Schedule Setup ID |
Read-only.
The system-generated setup number for the schedule. |
Active |
Checkbox.
When selected, it signifies the setup is active. |
Submitted By |
Link.
The user who submitted the job schedule. The list of users is
populated from the PSM_USER table. |
Begin Date |
Drop-down.
The start date for the job’s scheduling. |
End Date |
Drop-down.
The end date for the job’s scheduling. |
Comments |
Text
box. A free-form field to enter any additional comments about
the job schedule. |
Process |
Read-only. |
Submitted Job Count |
Read-only.
The total count of how many times this job was submitted. |
Last Run Job |
Read-only.
The Job ID of the last job that ran for this application setup
schedule. |
Last Run |
Read-only.
The date of the last job that ran for this application setup schedule. |
Next Run |
Read-only.
The date of the next run for the job. |
Schedule Pattern |
Hourly |
Radio
button. Enter how many times you want the job to be run, in hours,
in the text box. |
Daily |
Radio
button. Select whether the job will recur every few days or every
weekday. If the Days radio button is selected, enter how many
times you want the job to be run, in days, in the text box. |
Weekly |
Radio
button. Enter how many times you want the job to be run, per week,
in the text box. Then select the checkboxes of the specific days
the job should be run. |
Monthly |
Radio
button. If the Day radio button is selected, enter the number
of times per month the job should be run. The second radio button
has not been implemented.
If you would like to schedule
a job to run at the end of each month, select the Monthly radio,
enter 1 of every 1 months, and set the time in the Begin Date
field to 12:01:00AM. |