
This screen is used to link a Online reports with one or more applications (screens).If “Available for Online Submission” or “Available for Both” is selected for the Submit Type on the Reports Maintenance screen, this task displays. The user will access these reports while in a particular Personify screen.
On the menu bar at the top of the screen select Reports option. From
the drop down, select Operational
Reports.
The Online Report Submission screen will display a list of all Online Reports linked to the screen.
To add linked screens to the report:
1. On
the Reports Maintenance screen, click Linked
Screens from the TRS Application Setup task category.
The Linked Screens section of the Reports Maintenance screen displays,
as shown below.
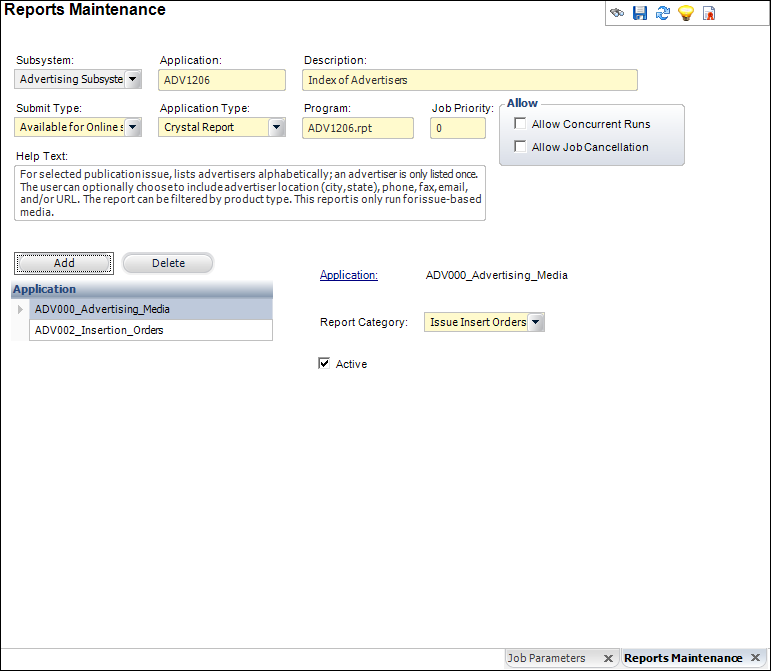
2. Click
Add.
The Generic Chooser displays.
3. Select
the appropriate application.
The application is added to the report as a linked screen.
4. Select the Report Category from the drop-down menu.
5. If necessary, check the Active checkbox.
6. Click
Save.
Repeat this for any other screens that you would like to link.
Screen Element |
Description |
|---|---|
Add |
Button. When clicked, the Generic Chooser displays. Search for and select the appropriate application to add as a linked screen. The application name automatically populates the Application field. |
Delete |
Button. When clicked, the highlighted application is deleted from the table and as a linked screen. |
Application |
Link. The name of the application (screen) to which this report is linked. This value pre-populates based on the application selected from the Generic Chooser when adding a linked screen. |
Report Category |
Drop-down. The category under which the report will be listed. For example, Advertisement, Customer Certification, Professional Internal Exports, Subscription Orders Reports, or Web Orders. |
Active |
Checkbox. When checked, indicates the link is active. |