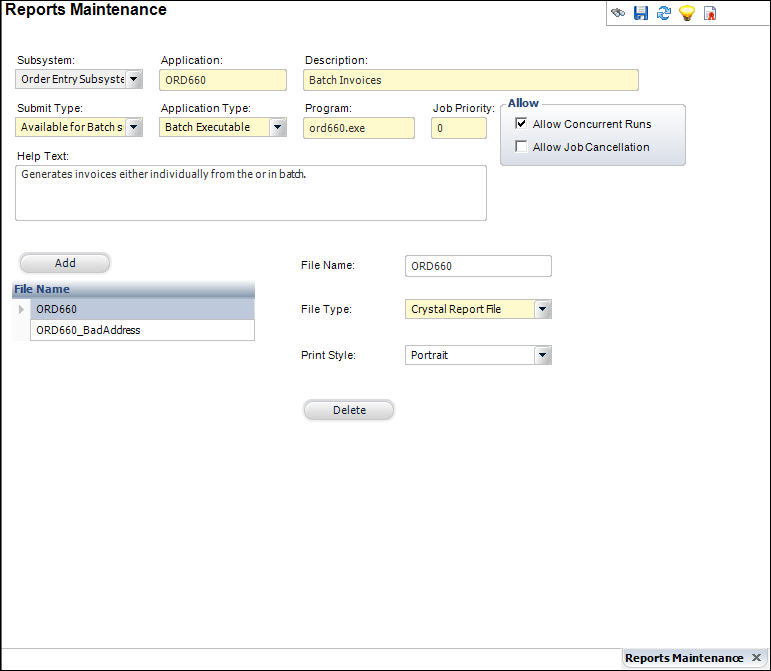
The Job Files section of the Reports Maintenance screen displays, as shown below.
If “Available for Batch Submission” or “Available for Both” is selected for the Submit Type on the Reports Maintenance screen, this task displays. This screen allows you to enter files associated with the report output files.
To add job files to the report:
1. On
the Reports Maintenance screen, click Job Files from the TRS Application
Setup task category.
The Job Files section of the Reports Maintenance screen displays, as shown
below.
2. Click Add.
3. Enter the File Name.
4. Select the File Type from the drop-down.
5. Select the Print Style from the drop-down.
6. Click Save.
Screen Element |
Description |
|---|---|
Add |
Button. When clicked, a row is added to the File Name table to add a file associated with the report. |
Delete |
Button. When clicked, the highlighted file is deleted from the table and the report. |
File Name |
Text box. The name of the file being associated with the report. |
File Type |
Drop-down. The type of file being associated with the report. For example, CSV File, HTML File, PDF, Crystal Report File, or Text File. |
Print Style |
Drop-down. The formatting style the file will print in. For example, Landscape, Portrait, or Text File. |