The Outlook Phone Mapping screen displays, as shown below.
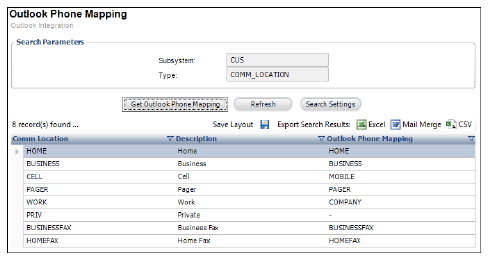
The Outlook Phone Mapping Interface screen in the Personify back-office allows you to choose how Personify assigns phone numbers, fax numbers, etc. for the contacts you add to your Personify Local Directory in Outlook.
For example, Personify refers to a cellular phone as “cell” and Outlook refers to a cellular phone as “mobile”. Therefore, when you create a new record in Outlook from the Personify data, you can set the Outlook Phone Mapping to change the user’s “cell” record in the “mobile” field for Outlook.
To setup Outlook Phone Mapping in Personify:
1. From the Personify menu bar, click System Admin > Configure and Verify Interfaces.
2. In
the Outlook section of the Configure and Verify Interfaces screen, click
Outlook Phone Mapping.
The Outlook Phone Mapping screen displays, as shown below.
3. Double-click
the Personify Communication Location (Comm Location) that you would like
to map to in Outlook.
The Outlook Phone Mapping Details screen displays, as shown below.
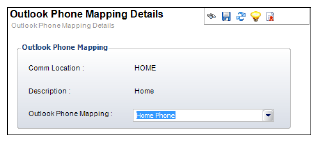
4. From
the drop-down, select where you would like the Personify Communication
Location to be mapped to in Outlook.
For example, mapping the Communication Location “CELL” in Personify, to
“MOBILE” for Outlook.