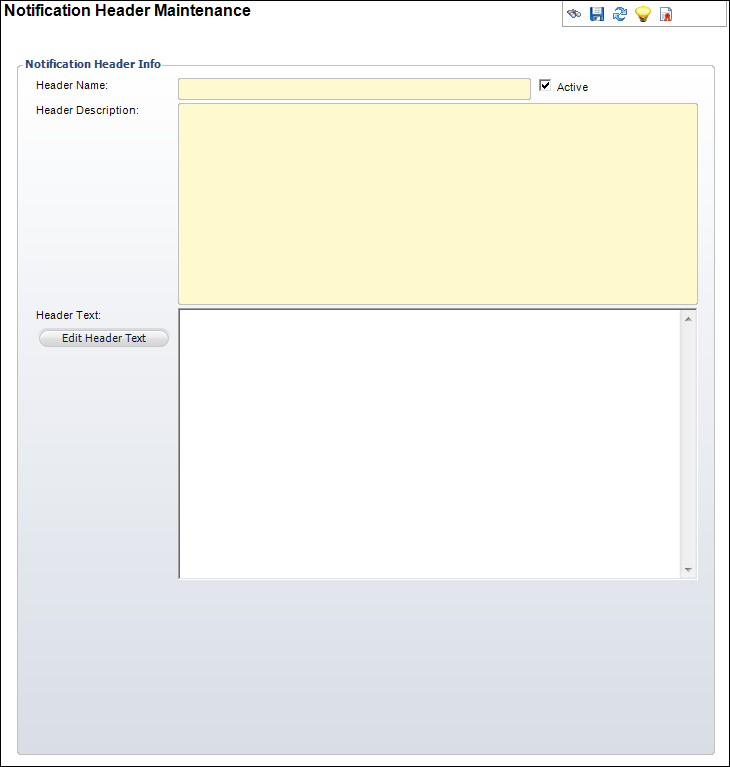
The Notification Header Maintenance detail screen displays, as shown below.
You can define an HTML header to include in your outgoing notification emails. When the system runs the email notification service it will combine the header, body, and footer together as a single HTML document.
To define the notification header:
1. From
the toolbar, select System Admin > Notification
Services > Notification Header Maintenance.
The Notification Header Maintenance screen displays.
2. Click
Create New Header.
The Notification Header Maintenance detail screen displays, as shown below.
3. Enter the Header Name.
4. Enter the Header Description.
5. Click
Edit Header Text.
The HTML Editor Dialog window displays.
6. Enter the header information (text, graphics, etc.) as you want it to display on your outgoing notification emails.
 Optionally,
if you are comfortable with HTML code you can click the Code Window radio
button. This opens a text field where you can enter an HTML code string.
Optionally,
if you are comfortable with HTML code you can click the Code Window radio
button. This opens a text field where you can enter an HTML code string.
7. Click
OK.
The header displays in the Header Text section.
8. If necessary, uncheck the Active Flag checkbox.
9. Click Save.
Screen Element |
Description |
|---|---|
| Header Name | Text box. The name of the header that you are creating. |
| Header Description | Text box. The description of the header that you are creating. |
| Header Text | Read-only text box. After creating your header using the HTML Editor Dialog window, your header displays in this text box. |
| Edit Header Text | Button. Opens the HTML Editor Dialog window where you can create your header using HTML code. |
| Active Flag | Checkbox. Displays whether or not this header is active. |