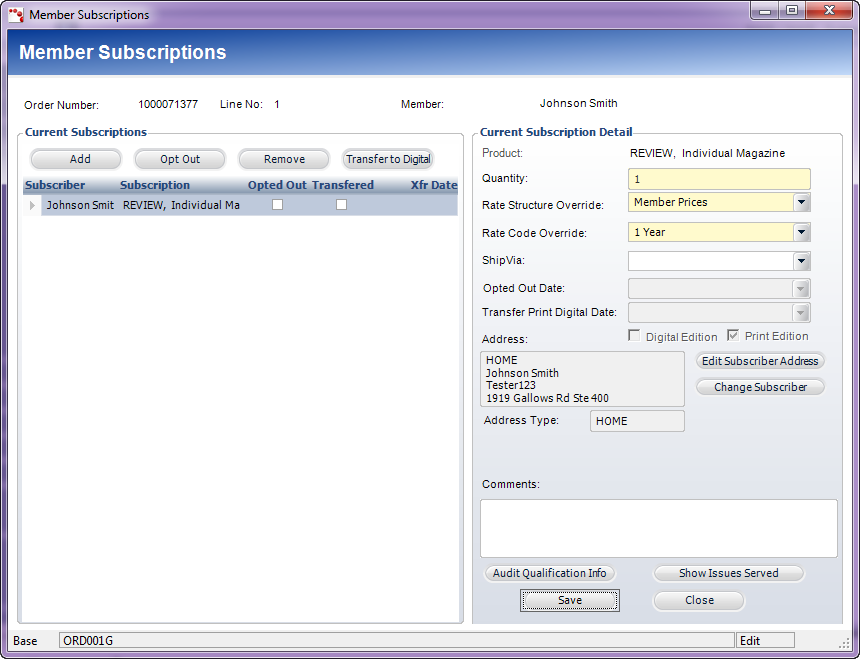
The Member Subscriptions screen is displayed, as shown below.
Subscription benefit products are free with the membership, regardless of price, and are automatically included with the order, if previously defined on the Rate Code Extension screen during product setup. Subscriptions benefit products can also be manually added to an order via the Member Subscriptions screen, as described below. When manually adding a subscription benefit to a membership order, if the “Back Issues” checkbox is selected on the Rate Code Extensions screen for the subscription product, the customer will receive back issues for the length of their membership. If this checkbox is NOT selected, the subscription benefit will start in the current month of the membership.
Alternatively, a subscription product can be added as a separate line item to the order. Doing so would allow you to control the Start and End date specifically and whether or not the customer would receive back issues. The subscription product would require a “complimentary” rate code, which would make the product zero priced.
To add a member subscription benefit:
1. From the Order
Entry screen, click Edit Membership Subscriptions from the Work
with Line Items task category.
The Member Subscriptions screen is displayed, as shown below.
2. Click Add.
3. From the Current Subscription Details section, click the Product link and search for a subscription product to add to the order.
4. The Quantity of the subscription product to be added to the order defaults to "1". Change this if necessary.
5. If different from
the default, select the Rate Structure Override from the drop-down.
This overrides the rate structure defined for the product. Certain customers,
such as members vs. nonmembers, receive special rates, and the rate structure
specifies this.
6. If different from
the default, select the Rate Code Override from the drop-down.
This overrides the rate code defined for the product. The rate code determines
the pricing for the rate structure.
7. If necessary, select the Ship-Via method from the drop-down.
8. If necessary,
click Edit Subscriber Address
to select a different address of the subscriber to which the subscription
should be sent.
The Address and Address Type fields updated accordingly based on the selected
address.
9. If necessary, click Change Subscriber to select a different customer to receive the subscription benefit.
10. If necessary, enter any Comments.
11. Click Audit
Qualification Info to open the Audit Qualification Maintenance
screen to add audit information.
For more information, please see Adding
Audit Information to a Membership Subscription Benefit Order.
12. Click Show
Issues Served to open the Issues Fulfillment screen to view issues
served.
For more information, please see Showing
Issues Served on a Membership Subscription Benefit Order.
13. Click Save.