The Import Universe window displays, as shown below.
Home > Data Analyzer > Working with Universes > Customizing Universes > Linking Universes
If you would like to customize a universe, TMA Resources recommends that you follow the steps below for linking universes, instead of cloning/copying the universe. The reason is because if TMA Resources delivers a fix that affects the base universe, when your copied universes will not receive the fixes.
To link a universe:
1. Open and log into the BusinessObjects Universe Designer.
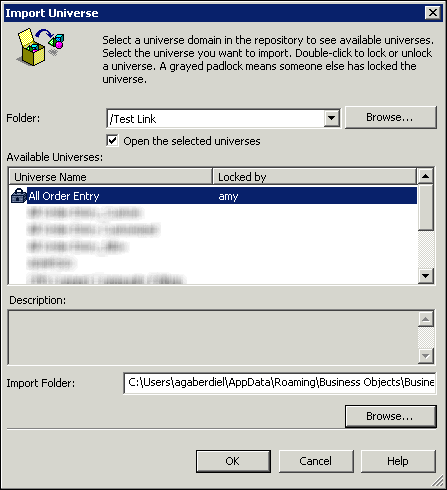
2. From
the File menu, click Import.
The Import Universe window displays, as shown below.
3. Search for and select the base universe you want to customize.
4. Click
OK.
A confirmation message will display when the universe successfully imports.
5. Click OK.
6. From
the File menu, click Parameters.
The Universe Parameters window displays, as shown below.
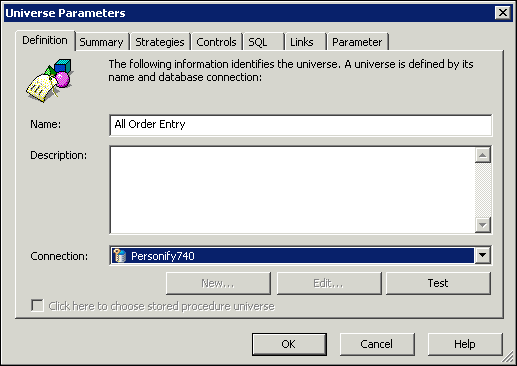
7. From
the Name field, rename the universe.
TMA Resources recommends including your association acronym in the name
of the customized universe in order to easily distinguish it from base
universes.
8. Click OK.
9. Click the Save button.
10. From
the File menu, click Export.
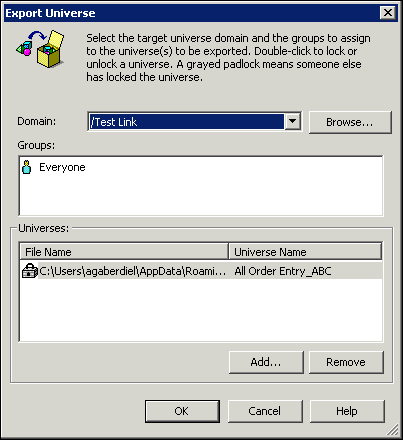
The Export Universe window displays, as shown below.

11. By default, the same folder you imported the base universe from displays in the Domain drop-down. Do not change this.
12. Click
OK.
The following Warning message will display.
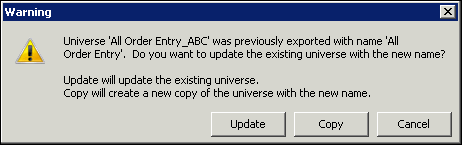
13. Click
Copy.
A confirmation message will display when the universe successfully exports.
14. Click OK.
15. From the File menu, click Close.
16. From
the File menu, click Import.
The Import Universe window displays, as shown below. Notice that the universe
we just renamed now displays in the list of Available Universes.
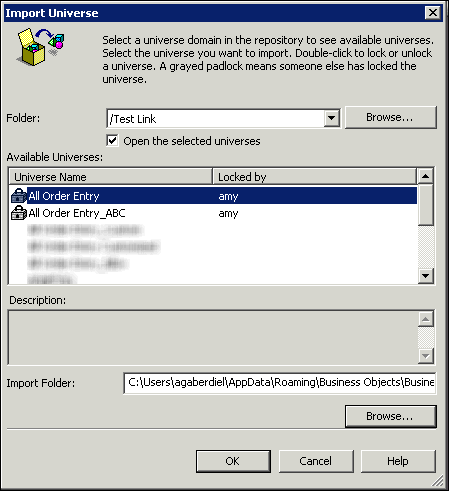
17. Select
the renamed universe and click OK.
A confirmation message will display when the universe successfully imports.
18. Click OK.
19. From
the navigation pane on the left, select all the base classes, as shown
below.
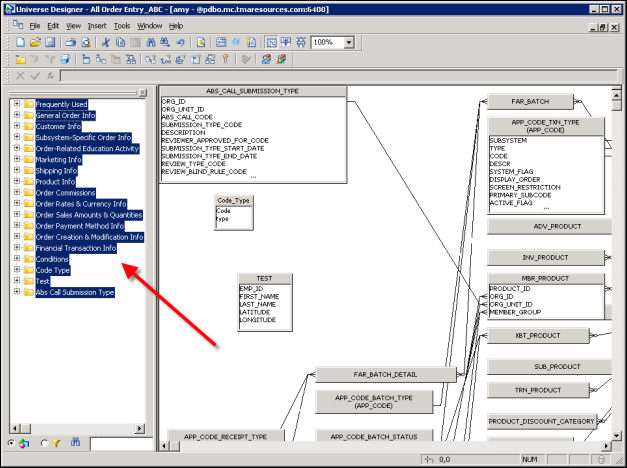
20. Click
the Delete button on your keyboard.
A confirmation message displays.
21. Click Yes.
22. From
the File menu, click Parameters
and access the Links tab, as shown
below.
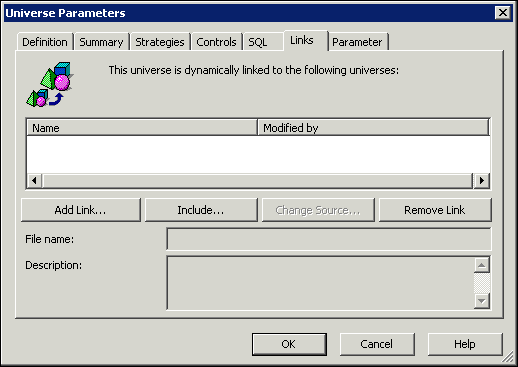
23. Click Add Link.
24. Search for and select the base universe you opened in step 3.
25. Click
OK.
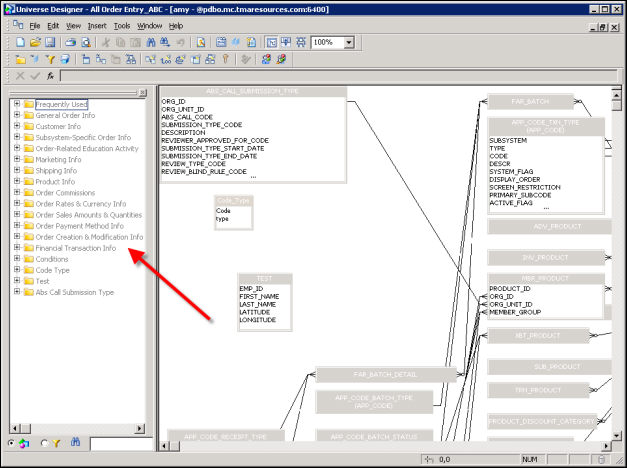
Notice that the base classes return to the left navigation pane in a grey
color, as shown below.
26. Proceed to make your customizations to the universe.
27. Click Save.
28. From
the File menu, click Export.
29. Click OK.