This procedure is used to assign security for all the available Web Intelligence reports the process involved is very much similar to universe security.
In Webi Security, privileges can be both viewed and modified at the folder and document level.
To set Webi security:
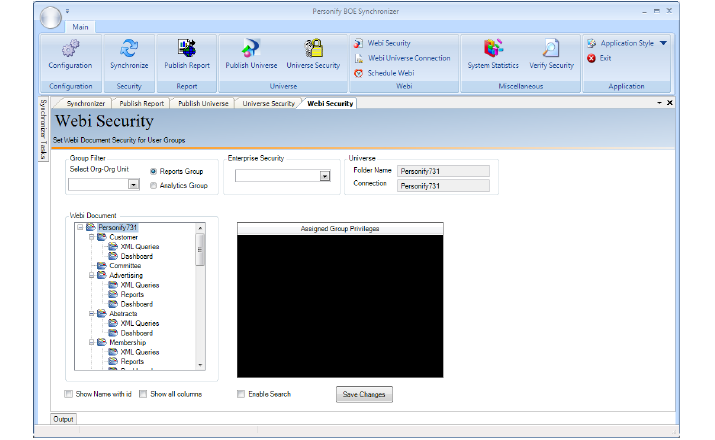
1. On the main menu at the top of the screen, click Webi Security.
2. On the left you will see all the available Webi documents, and in the middle you will see the assigned groups with their respective privileges.
3. To give privileges to a group, select the Org-OrgUnit and the Enterprise Security type from the corresponding drop-downs.
4. Select the desired group and assign the appropriate privilege by clicking the Role cell for the group and selecting the role from the drop-down that appears.
 The drop-down appears only when you hover the mouse over the field.
5. Unless explicitly mentioned, the added group will have a Run privilege. To change it, click on the role for the added group and change accordingly.
6. Click Save Changes when you finish assign privileges.
Like in Universe Security, you can select multiple group names and right-click the selection to apply group-wide settings.
7. On the main menu at the top of the screen, click Webi Universe Connection.
8. Under Webi Universe Assignment, check one or multiple Webi reports and click Validate Webi to check the respective universes assigned as shown below.
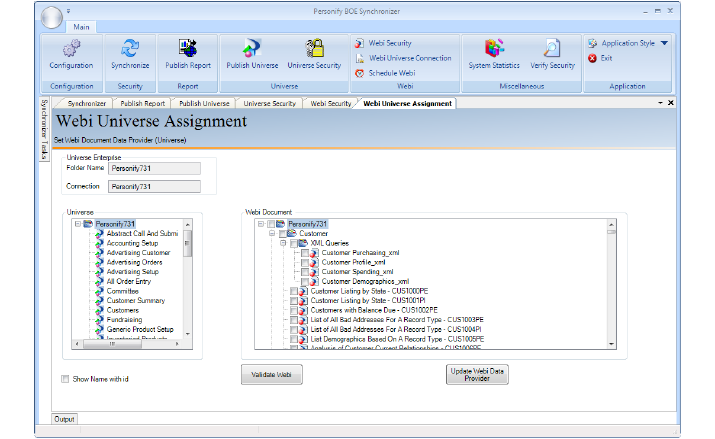
You can also update the report universes by clicking on Update Report Data Providers.
9. Any errors or warning appear in a dialog box; click OK if it appears.
The existing Personify environment, with the changes in the reports and universes, uses the Synchronizer and points to the following folders:
For Reports:
..\Business Objects\Upgrade\Reports\Online
..\Business Objects\Upgrade\Reports\TRS
For Universes:
..\Business Objects\Upgrade\Universe